Creating your own Scrappy Fabric Star Ornament – Pattern is a rewarding and creative way to use up leftover fabric scraps while adding a charming, handmade touch to your holiday décor. Whether you’re an experienced quilter or just dipping your toes into fabric crafts, this pattern is accessible, fun, and deeply satisfying. With a few basic materials and a bit of time, you can craft beautiful stars that brighten your tree, home, or even serve as heartfelt gifts.
The Scrappy Fabric Star Ornament – Pattern allows for endless customization. Each ornament can have its own personality depending on the colors, textures, and patterns of the scraps you choose. Not only is this an eco-friendly craft, but it’s also a great way to preserve memories through meaningful fabrics—like baby clothes, heirloom linens, or old favorite shirts.
In this guide, we’ll explore a detailed walkthrough of the process, tips for selecting your fabrics, stitching techniques, and fun ways to use your finished ornaments. Whether you’re creating for the holidays, a birthday, or simply for fun, this pattern is sure to bring joy and warmth.
1. Understanding the Scrappy Fabric Star Ornament – Pattern
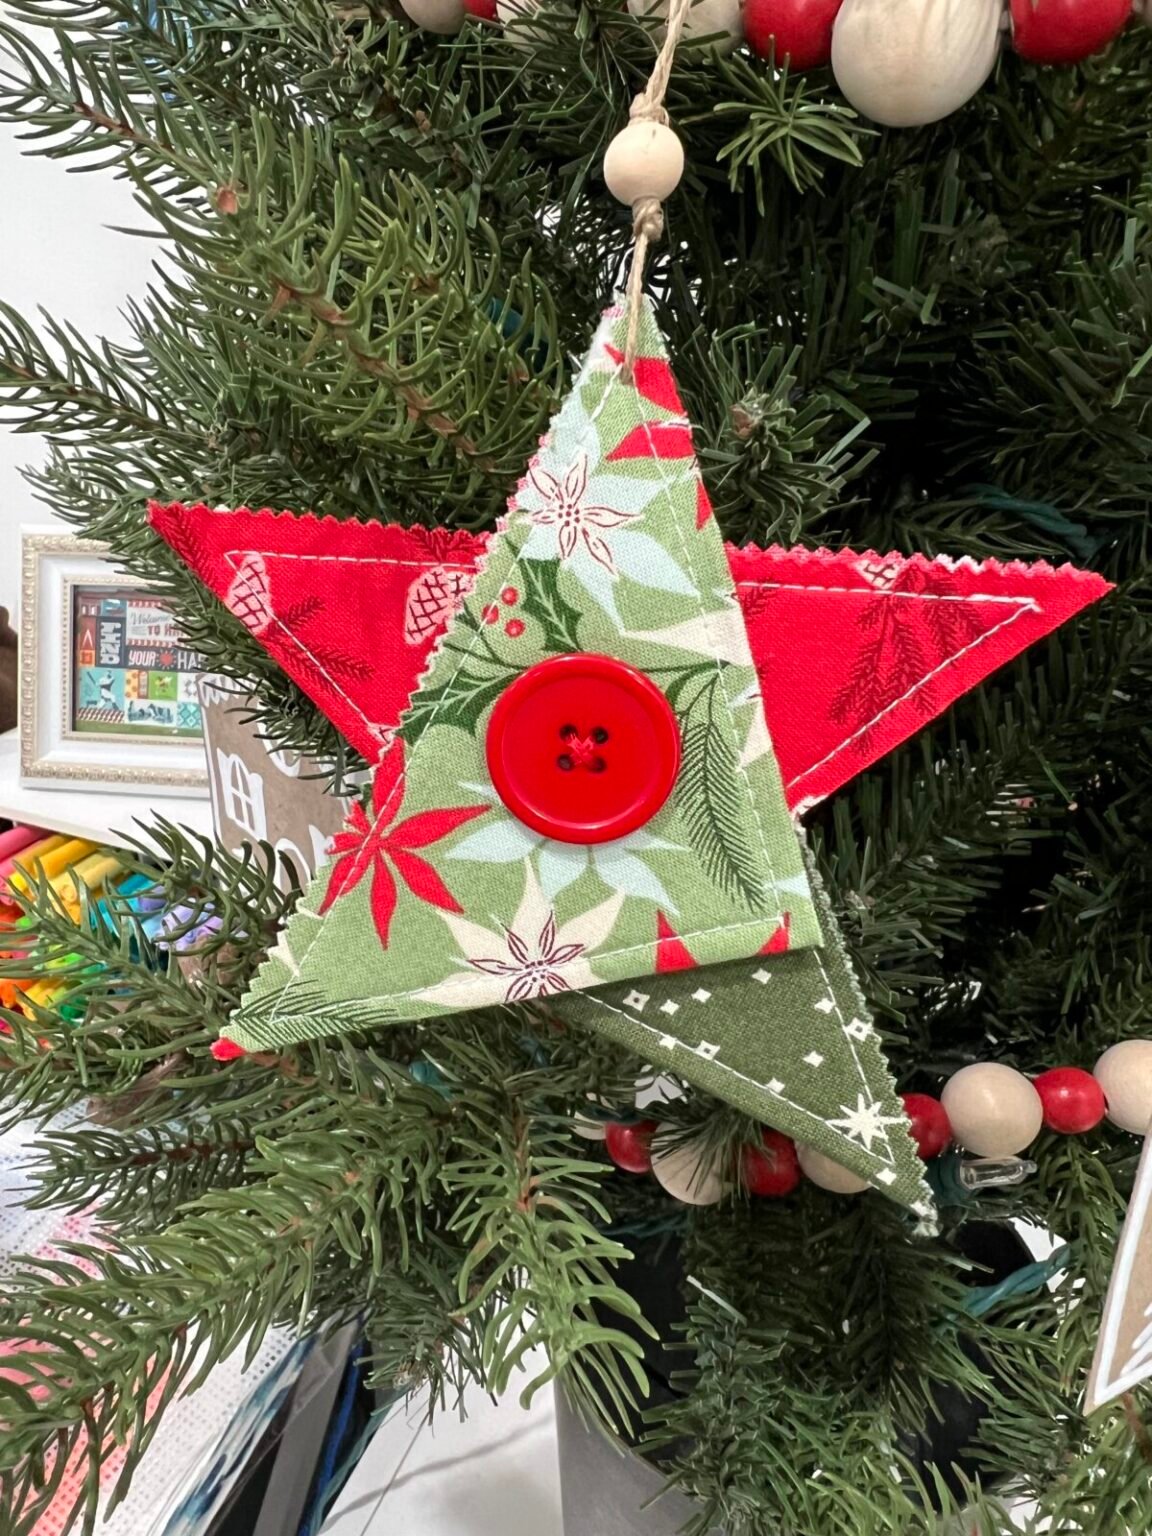
The Scrappy Fabric Star Ornament – Pattern is essentially a patchwork-based star made using small, irregular fabric pieces stitched together into a five- or six-pointed star shape. It’s an excellent beginner-friendly project that teaches basic quilting techniques in a manageable format.
The pattern typically begins with a star template. You’ll trace and cut your base shape on fabric or paper as a guide. Most patterns recommend using paper piecing or English paper piecing (EPP) methods because they provide stability and precision.
What makes this project so appealing is its flexibility. You’re not limited to specific fabrics or colors—scraps from old projects or even worn-out clothing can breathe new life as artful decorations.
Choose a color theme or go completely random—both styles offer beautiful results. Many crafters love using vintage or repurposed fabrics to give the ornament a nostalgic or rustic charm.
Another advantage of this pattern is its portability. You can prep all the pieces in advance and take them with you, turning downtime into productive crafting time—perfect for those who like to sew on the go.
Best of all, once you get the hang of it, you can complete an ornament in under an hour. This makes it ideal for batch crafting, especially if you’re making gifts or decorations for a large group.
2. How to Select Fabrics for the Star Ornament
Choosing the right scraps for your Scrappy Fabric Star Ornament – Pattern is one of the most enjoyable and artistic parts of the process. This is where your creativity really shines.
Start by collecting your leftover scraps from past sewing projects. Look for cotton or quilting-weight fabrics as they are easiest to sew and shape. Avoid stretchy or slippery materials unless you’re experienced in handling them.
Color coordination is key if you want a more cohesive look. For instance, a red and white theme gives a classic Christmas vibe, while soft pastels are perfect for baby showers or spring decor.
Texture can add visual interest. Mixing linen, cotton, and light canvas gives your stars a tactile dimension. Just ensure the fabrics are of similar weight to avoid sewing difficulties.
Make sure all pieces are pre-washed and ironed. This avoids shrinkage later and makes your fabric easier to work with, giving a neater and more professional look to your finished star.
Don’t worry if some pieces have irregular shapes—this is what makes the scrappy style so charming. Just ensure each piece is large enough to cover its portion of the template with a little extra for seam allowance.
Finally, consider adding metallic or glittery fabrics to a few points of the star for a festive sparkle. These little touches can elevate your ornament from simple to stunning with minimal effort.
3. Assembling the Scrappy Fabric Star Ornament
Now that you have your fabrics chosen, it’s time to begin assembling your Scrappy Fabric Star Ornament – Pattern. Here’s how to get started and ensure your star turns out beautifully.
First, prepare your star template. You can download a free star outline online or create your own on cardstock. Cut out the star pieces separately if you’re doing EPP, or use a single star template for paper piecing.
Using your scraps, cut fabric pieces that are slightly larger than each star section. This allows room to fold the fabric over and secure it without gaps. Pin or glue the fabric temporarily to keep it in place.
Begin stitching the pieces together by hand or machine. If you’re hand-stitching, use a whipstitch or ladder stitch for invisible joins. Take your time to align each edge properly.
Once all sections are joined, press the seams flat with an iron. This step is crucial for a polished finish and helps the ornament lie flat.
For added dimension, you can stuff the center of your star lightly with batting or cotton. This gives it a plush, 3D feel, which looks especially great on a tree.
Finally, add a loop of ribbon or twine to the top for hanging. You can also embellish your ornament with buttons, beads, or embroidery to give it a personalized touch.
4. Creative Ways to Use Your Fabric Star Ornaments
Your finished Scrappy Fabric Star Ornament – Pattern isn’t just for Christmas trees—there are countless ways to use and display these little works of art all year round.
Hang them in a window as a sun catcher or fabric mobile. The light filtering through the patterns creates a beautiful stained-glass effect with the right fabric choices.
Use them as festive gift toppers. They add a personal, handmade touch to wrapped presents and double as an extra gift.
Make a garland by stringing multiple stars together. This is a charming way to decorate a mantel, entryway, or even a child’s room with a whimsical feel.
Create a baby mobile using soft fabric stars in pastel or bright colors. Sew in a bell or crinkle material for sensory stimulation and extra fun.
Sew a sachet inside each star filled with lavender or dried herbs. These can be used as drawer fresheners or calming ornaments to hang in the bedroom.
Finally, turn them into keychains, backpack charms, or bookmarks for a thoughtful and functional handmade gift that goes beyond seasonal decoration.
FAQ: Scrappy Fabric Star Ornament – Pattern
Q1: Do I need a sewing machine to make these ornaments?
Not at all! While a sewing machine can speed up the process, you can complete the entire ornament by hand using simple stitches like whipstitch or running stitch.
Q2: Can I use fabric glue instead of stitching?
Fabric glue can work for adhering fabric to the template, but stitching is recommended for durability, especially if the ornament will be handled frequently.
Q3: What size should the finished star be?
This depends on your template. Most crafters aim for stars between 3–6 inches in diameter, but you can scale it up or down depending on the intended use.
Q4: Can I wash the fabric star ornaments?
If they are stitched well and made with washable materials, yes. However, spot cleaning is generally preferred to maintain the shape and prevent fraying.
Q5: Where can I find free patterns for the star shape?
Many quilting and crafting websites offer free printable star templates in various styles and sizes. A quick online search will provide plenty of options.
Q6: How can I make the ornament more child-friendly?
Use soft, hypoallergenic fabrics and avoid buttons or small decorations that could be a choking hazard. You can even involve older kids in the crafting process!
Conclusion
Crafting a Scrappy Fabric Star Ornament – Pattern is a delightful way to repurpose your leftover materials into something meaningful and beautiful. With just a bit of fabric, a needle, and some creativity, you can make ornaments that add warmth and personality to any space or occasion. From selecting your fabric to stitching and embellishing, this project invites both creativity and mindfulness.
We hope this guide has inspired you to start making your own ornaments. If you tried this project, we’d love to hear your thoughts! Leave a sincere opinion in the comments and feel free to share any suggestions or variations you’ve tried. Happy crafting!