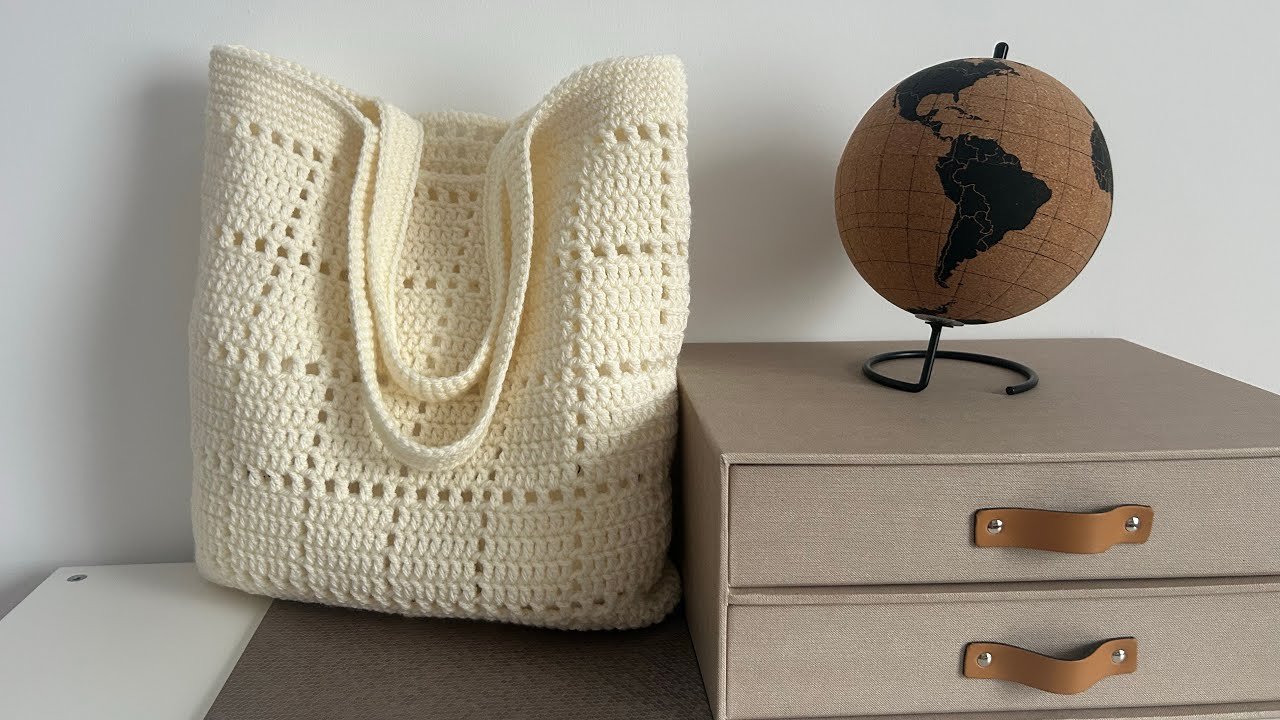
If you’ve been searching for the perfect project to start your crochet journey, the Easy Perforated Bag for Beginners – Crochet Pattern might be exactly what you need. This stylish yet simple bag is a fantastic way to practice your stitches while creating something both beautiful and practical. Whether you’re new to crochet or looking for a relaxing project, this pattern offers the perfect balance of creativity and ease.
The Easy Perforated Bag for Beginners – Crochet Pattern is ideal for crafting enthusiasts who want to create functional accessories without getting overwhelmed by complexity. With a breathable, airy design and modern aesthetic, this bag works well for shopping, beach days, or casual everyday use. The openwork style gives it a light texture, perfect for warmer seasons or layering with other items.
In this article, you’ll learn everything you need to know to get started with your own Easy Perforated Bag for Beginners – Crochet Pattern. From materials and techniques to customization options and where to find the best patterns, this guide is here to walk you through each step. Let’s begin by taking a look at the essentials you’ll need before crocheting your first bag.
1. Materials You Need to Start the Easy Perforated Bag for Beginners – Crochet Pattern
Before diving into the Easy Perforated Bag for Beginners – Crochet Pattern, it’s important to gather the right supplies. Having all the necessary tools and yarn ready will help you stay focused and enjoy the process without interruptions.
First and foremost, choose a lightweight cotton yarn, which is ideal for perforated designs. Cotton yarn is sturdy, breathable, and maintains its shape well, making it a great match for tote-style or mesh bags.
You’ll need a crochet hook that suits your yarn size—typically between 3.5mm and 5mm for beginner-friendly cotton yarns. A slightly larger hook helps create the open, lacy look that defines a perforated bag.
Include basic tools like scissors, a yarn needle for weaving in ends, and stitch markers to help you keep track of your rows or rounds. These small items can make a big difference in your workflow.
Since this pattern is designed for beginners, you won’t need complicated tools or advanced notions. However, having a measuring tape can be helpful if you plan to alter the size or make sure your bag fits specific dimensions.
Consider using a lining fabric and a simple sewing needle if you want to add a lining to your finished bag for extra strength and security—especially useful if you’ll carry smaller or heavier items.
Lastly, pick your color wisely. Solid colors or natural tones often work best for showcasing the openwork texture. But don’t be afraid to play with variegated yarns for a more vibrant, eye-catching look.
2. Basic Techniques for Crocheting a Perforated Bag
The beauty of the Easy Perforated Bag for Beginners – Crochet Pattern is that it’s built using simple stitches arranged in a way that creates a breathable, mesh-like structure. This section will walk you through the techniques used in most of these beginner-friendly patterns.
Most patterns begin with a chain foundation, which acts as the base for your bag. You’ll chain a certain number of stitches based on the desired width of your finished piece.
After the foundation row, you’ll often use double crochet (dc) or chain spaces to form the perforated pattern. A common technique is alternating double crochets with chains, creating a mesh grid.
Working in rows or rounds, depending on your chosen pattern, is also common. Rounds work great for seamless bags, while rows can offer more shape control, especially for rectangular or square bags.
Pay close attention to the pattern’s stitch count. Maintaining even spacing is crucial for creating the neat, uniform perforated effect. Using stitch markers can help ensure that your pattern stays consistent.
The bag typically includes a flat base followed by a body that gradually grows taller. You’ll stop when the bag reaches the desired height, which is usually around 10 to 14 inches for tote-style designs.
Lastly, you’ll add handles, which can be crocheted as part of the bag or sewn on separately. Many beginners prefer simple chain straps, while more experienced crafters might try thicker, reinforced handles for durability.
3. Customizing Your Easy Perforated Bag for Beginners – Crochet Pattern
Once you’re confident with the base pattern, it’s time to make the Easy Perforated Bag for Beginners – Crochet Pattern your own. Customization is one of the most rewarding aspects of crochet—especially when creating bags that reflect your personal style.
Start with size adjustments. Want a larger beach tote or a small handbag? Just increase or decrease the initial chain count and number of rows. Keep the stitch pattern consistent to maintain the perforated look.
Experiment with color changes or striping. You could add stripes every few rows or create a color block design for a bold, modern look. Just be sure to carry your yarn neatly or weave in ends carefully.
Add a lining or pocket to the inside of the bag. This gives your crochet piece extra functionality, making it more secure for carrying small items like phones or keys. Choose a matching or contrasting fabric for fun.
Include decorative elements like tassels, fringe, or beads to personalize the look even further. These additions are easy to attach and make a huge impact on the final aesthetic of your bag.
Want a closure? Consider adding a button loop, drawstring, or zipper. These small features can upgrade your bag from basic to highly practical, especially for everyday use or gifting.
Finally, think about strap style and length. A short handle works great for handbags, while a longer strap can turn your bag into a crossbody. You can even braid or twist the yarn for added visual appeal.
4. Where to Find the Best Easy Perforated Bag Patterns Online
Thanks to the popularity of handmade accessories, there are plenty of places online where you can find the Easy Perforated Bag for Beginners – Crochet Pattern. Whether you want written instructions, visual aids, or downloadable guides, the internet is full of helpful resources.
Etsy is a go-to platform for finding high-quality PDF crochet patterns. Many designers offer easy-to-follow instructions with images and tips, and you can often message the seller directly with questions.
Ravelry is a favorite among crochet communities. It has both free and paid versions of perforated bag patterns, and you can browse by difficulty level, yarn type, or specific bag styles.
YouTube is perfect if you prefer video tutorials. Search for “easy perforated crochet bag tutorial” and you’ll find step-by-step guides, often with slow motion and close-up views that are great for beginners.
Pinterest is another visual platform where you can discover patterns, modifications, and finished bag ideas. Often, these images link back to detailed blog posts or video content.
Several crochet blogs offer free beginner patterns and even teach readers how to modify them. Blogs like “Repeat Crafter Me”, “All About Ami”, and “The Spruce Crafts” frequently share easy, trendy patterns.
If you’re active on social media, follow crochet hashtags like #crochetbagpattern or #perforatedbag on Instagram or TikTok. You’ll find not just patterns, but also inspiration from crocheters around the world.
FAQ: Easy Perforated Bag for Beginners – Crochet Pattern
Q1: Is the Easy Perforated Bag for Beginners – Crochet Pattern suitable for absolute beginners?
Yes, most patterns labeled “easy” or “beginner” use basic stitches like chains and double crochets, making them perfect for first-timers.
Q2: How long does it take to crochet a perforated bag?
It typically takes 4 to 8 hours, depending on your speed and the size of the bag. Beginners may take a bit longer but will enjoy the learning process.
Q3: What’s the best yarn for this project?
100% cotton yarn is highly recommended. It’s durable, easy to work with, and gives the bag a nice structure while staying lightweight.
Q4: Can I sell bags made using this pattern?
Yes, you can sell finished products, especially if you used a free or commercial-use pattern. Always check the pattern’s licensing to be sure.
Q5: Do I need to line my bag?
Lining is optional. For carrying small items or for a polished look, adding a fabric lining is a great idea. Otherwise, the bag works well on its own.
Q6: Can I make the bag larger or smaller?
Absolutely. Adjusting the starting chain and the number of rows or rounds will let you change the size. Just maintain the stitch pattern consistently.
Conclusion
The Easy Perforated Bag for Beginners – Crochet Pattern is a fantastic starting point for anyone wanting to blend creativity with functionality. With just a few materials and simple techniques, you can create a stylish, eco-friendly, and useful accessory. Whether you’re crafting for yourself, a friend, or even a small business, this pattern offers flexibility and endless customization options.
We hope this guide gave you all the information you need to start your project with confidence. If you’ve made your own version or have tips for other beginners, we’d love to hear from you. Leave a sincere comment below with your thoughts, experiences, or suggestions—and happy crocheting!