Creating a Folded fabric star ornament – Pattern is one of the most rewarding holiday crafts you can take on. Whether you’re a beginner or an experienced sewer, this charming project uses simple folding techniques and scrap fabric to create beautiful, reusable decorations for Christmas, holidays, or even year-round home decor. The best part? You don’t need a sewing machine—just a bit of fabric, patience, and a love for handmade items.
In this article, you’ll learn how to make your own Folded fabric star ornament – Pattern, from selecting the right materials to assembling and finishing your ornament. This craft is not only cost-effective, but also an environmentally friendly way to use leftover fabric scraps from previous projects. These folded stars are excellent for gift tags, tree decorations, or even garlands. They’re lightweight, customizable, and incredibly fun to make.
Using proper SEO techniques and optimizing this article for visibility on search engines, we’ll ensure the term Folded fabric star ornament – Pattern is included naturally throughout the content. By maintaining a balance between helpful instructions and key search terms, we help readers find exactly what they need while staying fully within Google AdSense guidelines. Let’s dive into this creative process and bring these stars to life.
1. Choosing Materials for Your Folded Fabric Star Ornament
Before you start following your Folded fabric star ornament – Pattern, it’s important to choose the right materials. Fabric choice plays a big role in how your ornament will look and feel. Light to medium-weight cotton works best. Avoid thick fabrics like denim or fleece, as they can be hard to fold and manipulate.
You’ll need squares of fabric—usually 4″ x 4″ or 5″ x 5″ work well. Pick two or three coordinating fabrics to give your star a layered, dimensional effect. Try festive holiday prints, metallics, or even classic plaids. Solids also work great if you want a minimalist look.
In addition to fabric, you’ll need basic tools: a hot glue gun or fabric glue, scissors or rotary cutter, ruler, pencil or fabric marker, and an iron for crisp folds. Some crafters also use interfacing to make the fabric more rigid, especially if the star needs to hold its shape on a tree.
One thing to consider while gathering materials for your Folded fabric star ornament – Pattern is how you’ll finish the piece. Will you add a button, a bead, or a ribbon loop for hanging? These small embellishments give your ornament a professional look and make it stand out.
For beginners, using pre-cut fabric squares (charm packs) can simplify the process. These squares are already sized and coordinated, saving you time and effort. They’re widely available in fabric stores and online craft retailers.
Don’t forget safety. If children are crafting with you, consider using fabric glue instead of hot glue to avoid burns. This project can be a great family-friendly activity, especially around the holidays.
2. Folding and Preparing the Fabric Squares
The foundation of the Folded fabric star ornament – Pattern lies in how the fabric is folded. Each square will be folded in a way that creates points of the star. It’s a simple process that gets easier with repetition and practice.
Start by folding your fabric square in half diagonally to form a triangle. Press the fold with a warm iron to make a sharp crease. Then, fold the left and right corners of the triangle up to meet the top point, forming a diamond shape.
Flip the piece over, and repeat this folding technique on all remaining squares. Usually, you’ll need about eight folded units to form a full star. You can use all one color or alternate between two fabrics for a layered effect.
After folding, press all your units well with an iron. This step is important—it helps the folds stay crisp and makes the assembly process easier. You can also apply a little bit of fabric starch to help stiffen the pieces.
At this stage in the Folded fabric star ornament – Pattern, you can begin to plan your layout. Arrange the units in a circular pattern to see how they will fit together. Some people like to sketch or photograph their layout before gluing.
This is also a good time to decide whether you want your star to be one-sided (for wall or gift use) or double-sided (for hanging freely). If double-sided, you’ll need twice as many folded pieces and will assemble two stars back-to-back.
3. Assembling the Folded Fabric Star
Once all your units are folded and pressed, it’s time to assemble your Folded fabric star ornament – Pattern. Choose a sturdy base for gluing—many crafters use felt circles or even thin cardboard as the backing. Cut the base slightly smaller than your finished star.
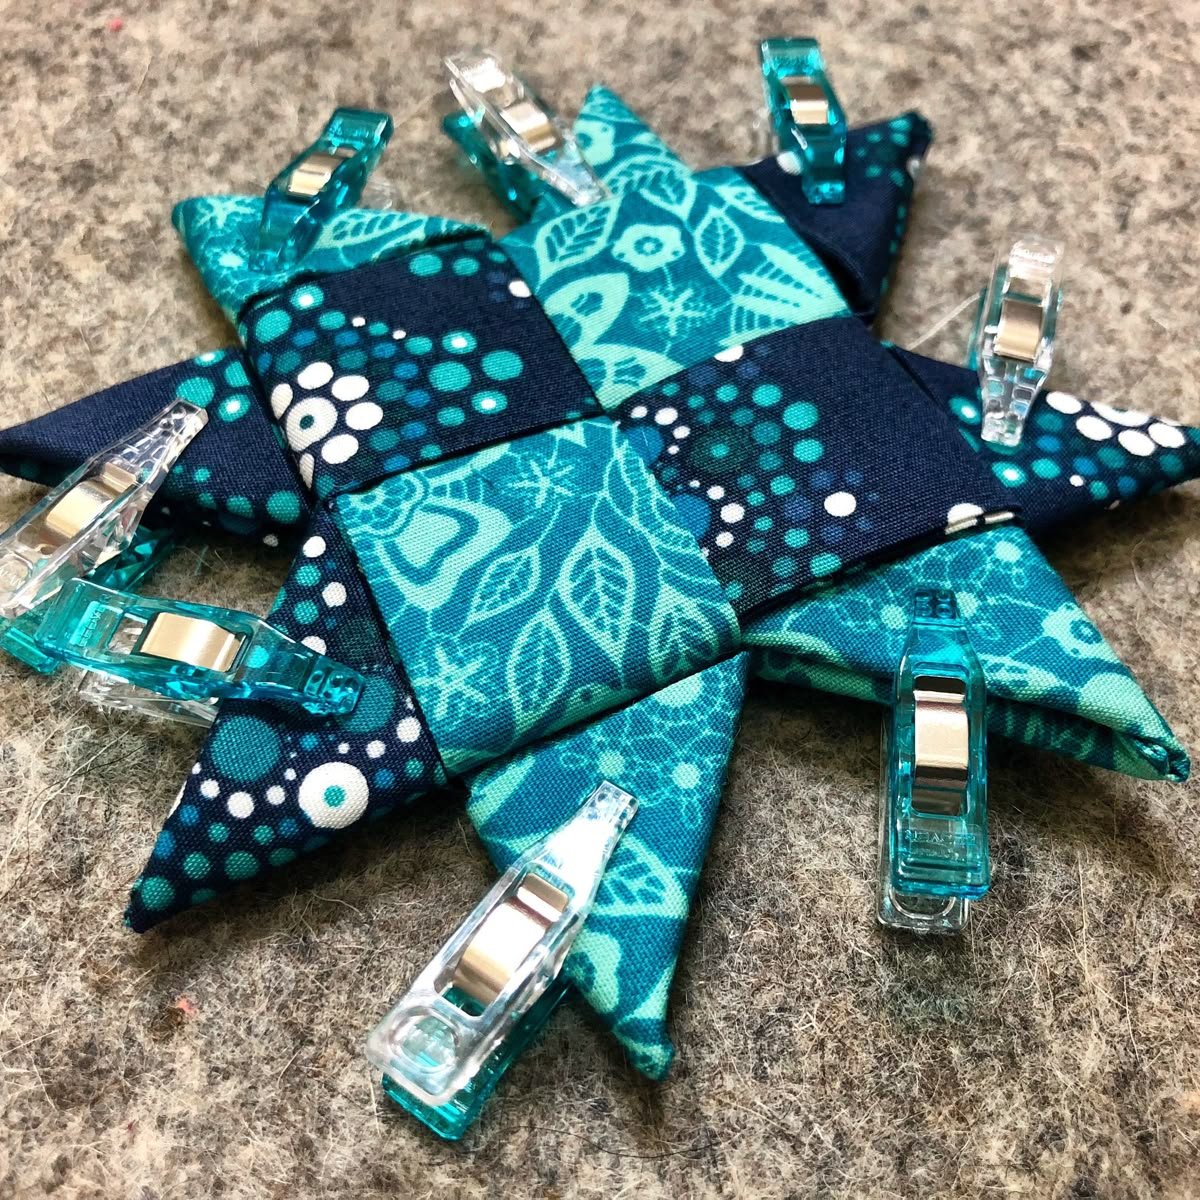
Begin gluing the folded units onto the backing. Work one piece at a time, layering them evenly in a circular fashion. Slightly overlap each piece to create a smooth, continuous shape. Take your time to ensure symmetry.
Use small dabs of hot glue or fabric glue to secure each piece. Hold in place for a few seconds until the glue sets. As you continue, you’ll see the star shape forming. Don’t worry if it’s not perfect—handmade charm is part of the appeal.
After all pieces are attached, press down gently around the entire star to ensure everything is secure. Let it dry completely before moving on to embellishments or hanging details.
If you’re making a double-sided ornament, repeat the process and then glue the two finished stars together back-to-back. Add a small loop of ribbon or string between the layers so you can hang the ornament.
To finish your Folded fabric star ornament – Pattern, add decorative touches. A button in the center, a pearl bead, or even a mini bell can add dimension. Use your creativity to make each ornament truly unique.
4. Displaying, Gifting, and Storing Your Ornament
Now that your Folded fabric star ornament – Pattern is complete, it’s time to think about display and storage. These ornaments are light, making them perfect for hanging on Christmas trees, garlands, or wreaths.
For gifting, consider placing the star in a clear gift bag with a ribbon tie or a handmade tag. They also make beautiful gift toppers that the recipient can reuse on their own tree. Thoughtful, handmade gifts always leave a lasting impression.
You can create themed sets using different fabric collections. A set of blue and white stars evokes a wintery feel, while red and green prints are perfect for traditional Christmas. Personalize them with monogrammed fabric or initials.
For craft fairs or Etsy shops, these ornaments are ideal products. They’re inexpensive to make, quick to assemble, and highly customizable. Plus, their lightweight nature makes them easy to ship.
When storing your ornaments after the season, keep them in a small box with tissue paper to protect their shape. Avoid crushing them under heavy decorations. If needed, press lightly with a warm iron before using again next year.
The Folded fabric star ornament – Pattern is not just a craft—it’s a tradition in the making. Once you master the technique, you’ll find yourself creating new versions every year, and maybe even passing the skill down to younger generations.
FAQ
What size fabric should I use for the folded fabric star ornament?
Most patterns recommend 4″ x 4″ or 5″ x 5″ fabric squares. These are easy to fold and create a star that’s about 4 to 5 inches wide when finished.
Do I need a sewing machine to make this ornament?
No, this pattern does not require a sewing machine. It’s a no-sew craft that relies on fabric folding and glue, making it accessible for all skill levels.
Can I use glue instead of sewing the pieces together?
Yes, hot glue or fabric glue works perfectly for this pattern. Just ensure you press the pieces firmly together and let them dry completely before handling.
What types of fabric work best?
Lightweight cotton is ideal. It folds easily and holds its shape well. Avoid thick or stretchy fabrics, which can make the folding process difficult.
Can I make the ornament double-sided?
Absolutely! Just create two identical stars and glue them back-to-back, adding a ribbon or string between them for hanging. This makes the ornament look polished from all angles.
How can I personalize the ornament?
Add buttons, beads, initials, or themed fabric prints. You can even use family heirloom fabric to make it more sentimental and meaningful.
Conclusion
You’ve now learned how to create your very own Folded fabric star ornament – Pattern using simple materials and easy-to-follow steps. From selecting fabrics and folding squares, to assembling and embellishing your star, each stage of this project offers a chance to be creative, resourceful, and festive.
Whether you’re making these as holiday gifts, decorations for your home, or just a relaxing seasonal project, the folded fabric star brings beauty and heart to any space. Plus, it’s a great way to repurpose scraps and reduce fabric waste.
If you found this tutorial helpful, please leave a sincere opinion or suggestion below. Your feedback helps improve future patterns and inspires others to start crafting too. What fabric did you use? Did you add a special twist? We’d love to hear about your experience with the Folded fabric star ornament – Pattern.