If you’ve ever found yourself staring at a growing pile of leftover fabric and wondering what to do with it, you’re not alone. The good news is, you can turn scraps into a quilting masterpiece – pattern by using those beautiful bits of cotton, linen, and prints to create something truly unique. Whether you’re a beginner or a seasoned quilter, working with scraps is not only economical but also incredibly rewarding. It allows you to explore your creativity without the pressure of using new materials.
What makes scrap quilting so appealing is that no two projects ever look the same. Every piece tells a story — from the dress you once made to the holiday table runner you gifted last year. With the right pattern, planning, and a splash of imagination, you can transform what once seemed like “leftovers” into a cohesive, vibrant quilt that’s full of personality and charm. This is what we mean when we say, turn scraps into a quilting masterpiece – pattern — it’s about artfully combining what you already have to make something meaningful.
Not only does scrap quilting help reduce waste and save money, but it also challenges your eye for design. You’ll learn to work with color value, contrast, and placement in ways that improve your overall quilting skills. In this guide, we’ll walk through everything you need to know to make the most of your scraps — from choosing a pattern to assembling your quilt and beyond.
1. Choosing the Right Pattern for Scrap Quilting
The first step to turn scraps into a quilting masterpiece – pattern is selecting a quilt design that works well with a variety of fabrics. Not every pattern is suited for scrap quilting, but there are plenty that thrive on the randomness and color chaos of a good scrap stash.
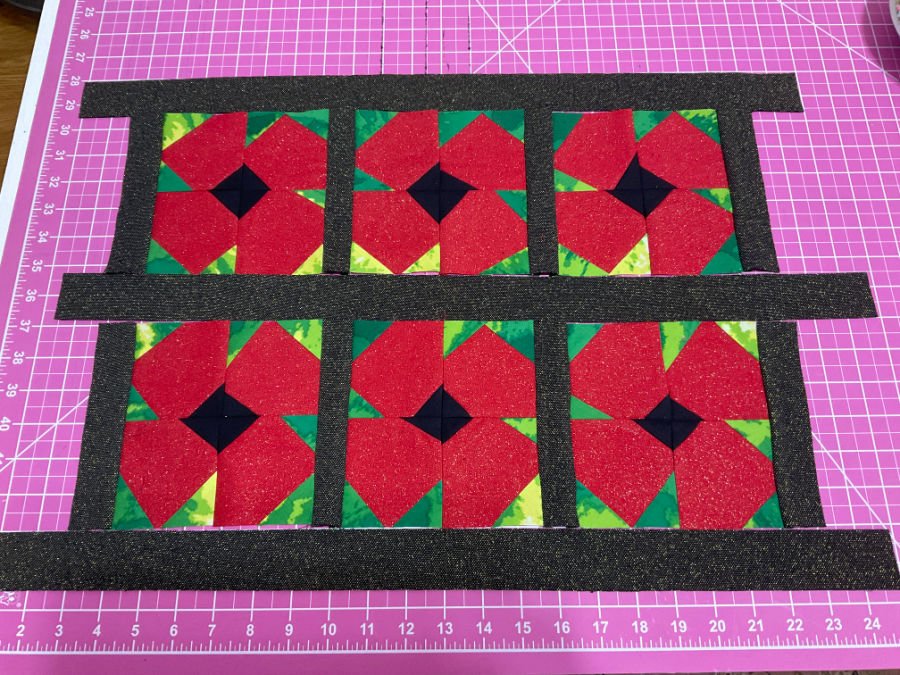
Start by looking for patterns that use small blocks or repetitive units. Designs like Log Cabin, Nine Patch, and Courthouse Steps are classics that lend themselves beautifully to scrap use. These blocks typically use small pieces of fabric, allowing you to make use of even the tiniest leftovers.
Another good option is a string quilt, where strips of various lengths and widths are sewn together diagonally across a base block. This style not only consumes a lot of scraps quickly but also creates a stunning, textured look with minimal planning. Plus, it’s beginner-friendly.
Color coordination is key. While scrap quilts are meant to be diverse, choosing a dominant color or a unifying background fabric can help bring order to the visual noise. A neutral sashing or border, for example, can make the individual blocks pop while keeping the quilt from feeling chaotic.
Scale also matters. If your scraps vary greatly in size, consider patterns that accommodate both small and large pieces. A “crumb quilt” is an excellent choice for using up tiny bits, while something like a “brick path” quilt uses longer rectangular shapes.
Lastly, trust your instincts. Sometimes the best scrap quilts come from intuitive play rather than rigid pattern-following. Don’t be afraid to sketch your own layout or modify an existing pattern to fit your stash. This is your opportunity to turn leftovers into a personal expression of creativity.
2. Organizing and Sorting Your Fabric Scraps
Before you can turn scraps into a quilting masterpiece – pattern, it’s essential to organize your scrap collection. This makes the quilting process smoother and far more enjoyable. Many quilters avoid scrap projects simply because they’re overwhelmed by the mess.
Begin by sorting your scraps by color. This helps you easily identify combinations and plan blocks without hunting through piles of fabric. You can use zip-lock bags, plastic bins, or even drawers labeled by color category.
Next, sort by size. Some quilters prefer cutting scraps into standard sizes like 2.5-inch squares, 5-inch charms, or 1.5-inch strips. This method works great if you consistently sew patterns that require those cuts. It turns your scraps into a usable “pre-cut” collection.
If cutting everything down isn’t your style, just fold and store your scraps in rough size categories — small, medium, and large. This method gives you more flexibility when selecting pieces for more improvisational quilt blocks.
Don’t forget to press your scraps. Wrinkled fabric is harder to cut accurately, which can lead to mismatched seams and frustration during piecing. Taking time to iron everything before starting a project saves time in the long run.
Label your containers and storage bins. It’s a small step, but having a labeled, organized system makes it easier to find exactly what you need when inspiration strikes. You’re more likely to actually finish your quilt when the process feels manageable.
Lastly, set up a “scrap station” if space allows. This could be a basket near your cutting table or a tray by your sewing machine. Having scraps within reach encourages you to incorporate them into ongoing projects, turning what used to be clutter into a source of constant creativity.
3. Piecing Your Quilt with Purpose and Creativity
Once your materials are sorted, the next phase in the journey to turn scraps into a quilting masterpiece – pattern is piecing everything together. This is where your quilt begins to take shape, and where your artistic choices really shine.
Start with a design wall or floor layout. Seeing your blocks and scraps arranged visually helps you spot patterns and balance colors. You can easily swap pieces around to get the right mix before sewing everything together.
Use chain piecing to speed up the process. Sewing multiple pieces in one continuous line of stitching saves time and thread. It’s a common technique among quilters that also keeps your blocks in order without losing your layout.
Remember that “scrappy” doesn’t have to mean “random.” Even in quilts made from scraps, balance and repetition are important. Try repeating certain colors or fabrics across the quilt to give the design cohesion and rhythm.
Embrace improvisation. Scrap quilts are the perfect place to experiment. Don’t worry about every block being exactly the same. Variations in color, texture, and size can add movement and interest to your quilt.
If you’re new to quilting, consider sewing your blocks in manageable sections. Creating four-patch or nine-patch units and then assembling them into a larger top is less intimidating than tackling the whole layout at once.
Take your time with pressing and trimming as you go. Crisp seams and uniform block sizes lead to a professional-looking quilt. Small details like this elevate your work from homemade to handcrafted and showcase the effort behind your masterpiece.
4. Finishing Touches to Complete Your Scrap Quilt
Now that you’ve pieced your quilt top, it’s time to turn scraps into a quilting masterpiece – pattern by finishing your project with care. This final stage transforms your hard work into a polished, usable quilt.
First, choose your backing. You can continue the scrap theme by piecing the back from larger leftover fabrics, or use a single solid color to contrast the busy front. Either option can look beautiful depending on your vision.
Next comes basting — securing your quilt top, batting, and backing together. Use safety pins or basting spray to keep everything in place. A well-basted quilt prevents shifting and puckering during quilting.
Now decide on your quilting method. Straight-line quilting is classic and highlights your patchwork. Free-motion quilting allows for more creative expression but may require practice. Both are excellent choices for showcasing your fabric combinations.
When trimming the edges, be sure everything is square. Uneven quilts can be difficult to bind, and they won’t lie flat when displayed or used. A clean trim ensures a professional-looking finish.
Choose a binding that complements the quilt’s colors. You can even make a scrappy binding from leftover strips, which adds one more layer of detail and resourcefulness to your masterpiece.
Finally, label your quilt. Whether it’s handwritten, embroidered, or printed, include your name, date, and project name. A label turns your quilt into a documented piece of art and celebrates the journey from scraps to something truly special.
FAQ: Turn scraps into a quilting masterpiece – Pattern
Q1: What is the best pattern to use when quilting with scraps?
Patterns like Log Cabin, Nine Patch, and string quilts work well because they use small, varied pieces and allow for lots of color and texture variation.
Q2: How do I keep my scrap quilt from looking too messy?
Use a unifying element like a background fabric or dominant color to create cohesion. Planning your layout ahead of time also helps maintain visual balance.
Q3: Can I use all types of fabric scraps?
Ideally, use quilting cotton for consistency. Mixing fabric types can cause issues with stretch, shrinkage, or thickness when sewing or washing.
Q4: Is scrap quilting beginner-friendly?
Yes, it’s a great way to practice basic quilting techniques. Start with simple blocks and grow your skills while using materials you already have.
Q5: How can I store scraps efficiently?
Sort by color and/or size using clear bins, drawers, or bags. Keeping everything labeled and pressed will make your sewing process much smoother.
Q6: Can I sell quilts made from scraps?
Absolutely! Many people love the charm and uniqueness of scrap quilts. Just be sure your craftsmanship is high-quality and your fabrics are clean and durable.
Conclusion
Turning fabric leftovers into a quilt might seem like a challenge, but with the right mindset and tools, you can absolutely turn scraps into a quilting masterpiece – pattern. From choosing the perfect design to organizing your materials and finishing withprecision, every step is an opportunity to grow as a quilter and express your creativity.We hope this guide gave you the inspiration and knowledge you need to start your own scrap quilt journey.
If you’ve tried this or plan to, please leave your honest opinion and suggestions in the comments. We’d love to hear your stories, see your results, and learn how you bring your own style into every stitch.