A Scarecrow Mini Quilt – Pattern is the perfect project for capturing the charm of fall with a cozy, handmade touch. Whether you’re decorating for the season or just love whimsical, rustic designs, this mini quilt adds warmth and character to any space. It’s small enough for a quick weekend project but detailed enough to show off your creative flair.
The beauty of a Scarecrow Mini Quilt – Pattern lies in its versatility. You can hang it on the wall, use it as a centerpiece for your autumn table, or gift it to someone who appreciates handcrafted pieces. Mini quilts are a great way to experiment with new techniques, color palettes, or appliqué without committing to a full-sized quilt. Plus, the scarecrow theme brings a nostalgic, welcoming feel that never goes out of style.
In this article, we’ll guide you through everything you need to know about creating your own Scarecrow Mini Quilt – Pattern, from material selection and design tips to stitching methods and creative variations. Whether you’re a seasoned quilter or just beginning your journey, this pattern is approachable, rewarding, and full of seasonal charm.
1. Getting Started with Your Scarecrow Mini Quilt – Pattern
Before diving into stitching your scarecrow masterpiece, it’s important to start with proper planning. Understanding the basics of what goes into a Scarecrow Mini Quilt – Pattern will help ensure that your project is both enjoyable and successful.
Start by deciding on the overall size of your mini quilt. Common dimensions range from 12×12 inches to 18×18 inches, but you can customize this based on your display area. Smaller quilts are quicker to finish and easier to hang, while slightly larger ones allow for more design detail.
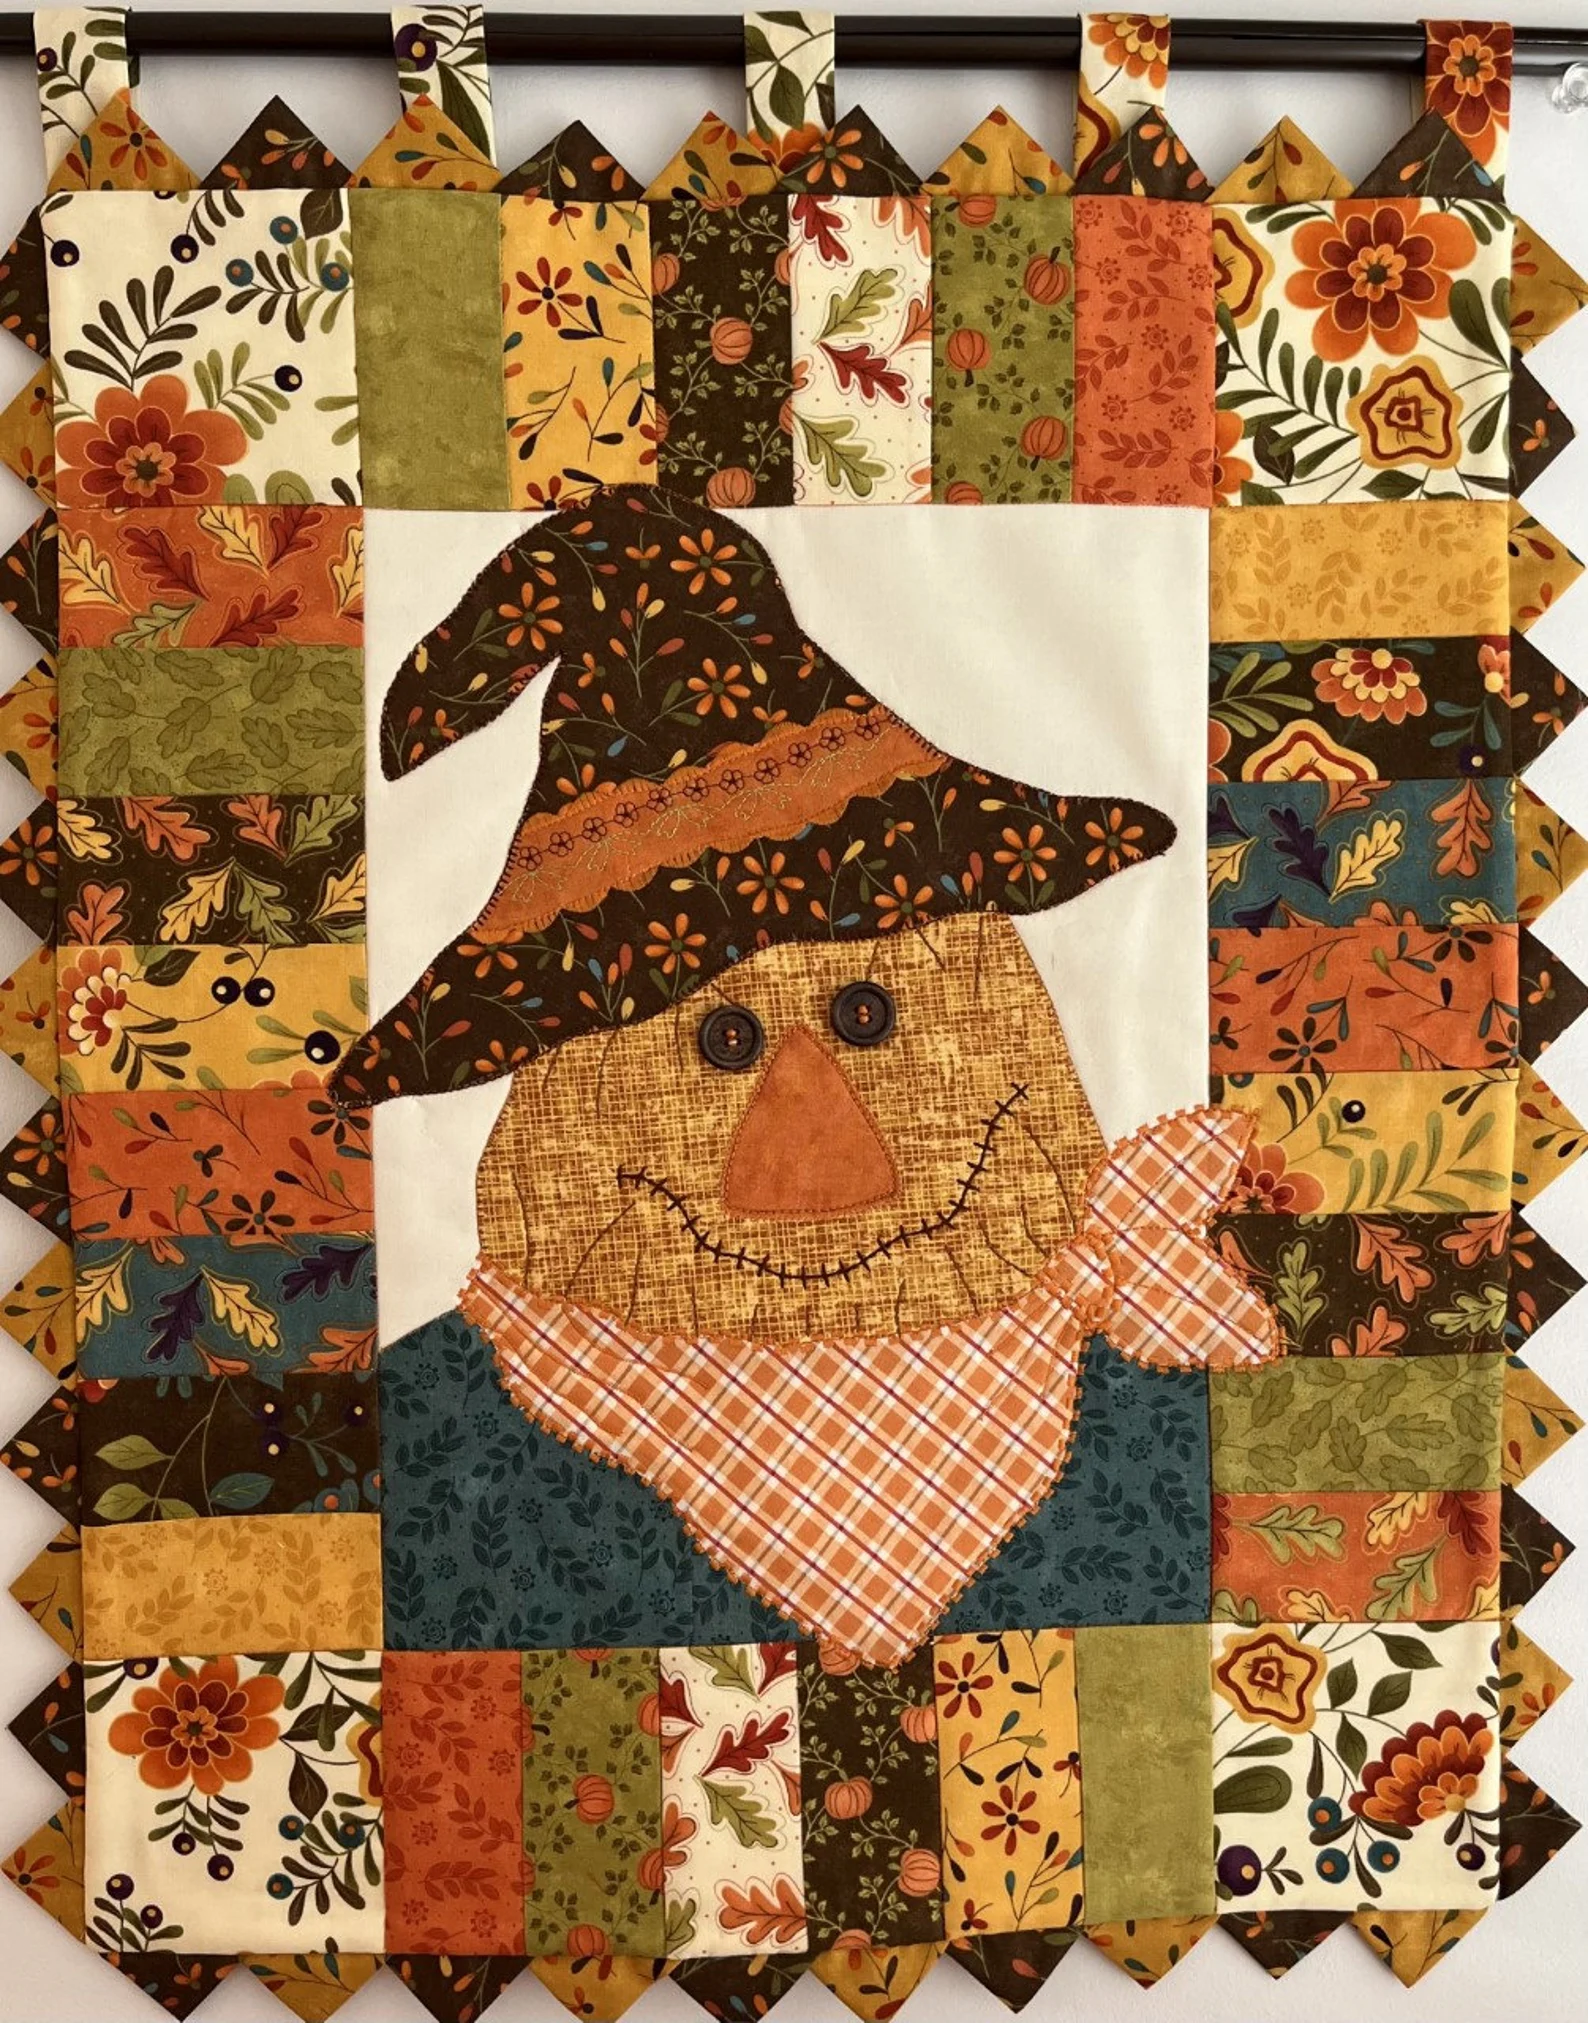
When choosing fabrics, lean into autumn-inspired colors. Think oranges, browns, golden yellows, muted greens, and even denim blues for the scarecrow’s outfit. Texture also plays a key role—using flannel, wool, or linen can give your quilt a cozy, rustic look that enhances the fall vibe.
Sketch or print your scarecrow design. This could be a full-body scarecrow, just a face, or even a silhouette. Add seasonal details like pumpkins, cornstalks, sunflowers, or a harvest moon. You can either draw your own layout or download a free or purchased Scarecrow Mini Quilt – Pattern online.
Decide which construction method you prefer: piecing, appliqué, or a combination of both. Appliqué is often the easiest way to create character details like a scarecrow’s hat, facial features, or patches. You can use raw-edge appliqué with fusible web for a quick finish or needle-turn appliqué for a more refined look.
Prepare your sewing tools and notions. You’ll need basic supplies like scissors, pins, thread, rotary cutter, and a cutting mat. If you’re using fusible appliqué, don’t forget your iron and pressing cloth. Embroidery floss is optional but adds beautiful finishing touches.
With your design, materials, and tools ready, you’re now set to begin your creative journey with the Scarecrow Mini Quilt – Pattern. Thoughtful preparation ensures a smoother process and helps bring your autumn vision to life.
2. Assembling the Scarecrow Design
Creating the actual scarecrow design is where the fun truly begins. Whether you follow a pre-made Scarecrow Mini Quilt – Pattern or draft your own, this step brings personality and warmth into your mini quilt.
Begin by constructing your quilt background. This might be a solid square or a patchwork layout. Neutral tones like beige, cream, or light brown work well to highlight the colorful scarecrow design. Sew your background pieces together and press them flat.
Next, trace and cut out your appliqué pieces. If you’re using fusible web, draw the reversed shape on the paper side, fuse it to the wrong side of the fabric, and then cut the shape. Pieces might include a hat, straw hair, eyes, shirt, overalls, and boots.
Arrange the pieces on your background fabric to build your scarecrow. Take your time placing each part until it looks balanced. Add playful touches like a patch on the pants, a stitched smile, or button eyes. Once everything looks right, fuse the pieces down.
Sew around each appliqué shape using your preferred method. A satin stitch gives a bold, polished look, while a raw-edge stitch looks more rustic and casual. If you’re using needle-turn appliqué, hand stitch carefully around each shape with matching thread.
Add embroidery or embellishments. This could be stitched facial features, decorative borders, or outlines around clothing. Using embroidery floss or perle cotton adds texture and dimension to your scarecrow’s expression and clothing.
Once your scarecrow is complete, double-check all your stitching and secure any loose threads. The heart of your Scarecrow Mini Quilt – Pattern is now finished, full of personality and autumn charm.
3. Quilting and Finishing Touches
Now that your scarecrow design is stitched down, it’s time to turn it into a finished quilt. Quilting and binding are essential steps that not only hold the layers together but also add visual interest and durability to your mini quilt.
Start by creating your quilt sandwich. Layer your quilt top, batting, and backing fabric. Use safety pins or basting spray to secure the layers together. Make sure everything is smooth and free of wrinkles before moving forward.
Choose a quilting method that complements your scarecrow. Simple echo quilting around the appliqué shapes helps make the design stand out. Alternatively, you can use free-motion quilting to create swirling wind patterns or cross-hatch lines for a rustic look.
If you’re quilting by hand, use a quilting hoop and small, even stitches for a traditional feel. Machine quilting is faster and adds a clean, contemporary look. Whichever method you choose, ensure that the layers are securely stitched.
Trim the edges of your quilt sandwich so they’re even. This makes it easier to attach the binding later. Use a rotary cutter and ruler to get clean, straight lines.
Prepare and sew your binding strips. Cut 2.5-inch-wide fabric strips, fold them in half lengthwise, and press. Attach the binding to the front of the quilt using a ¼-inch seam, then fold it to the back and stitch it down either by hand or machine.
Add a hanging sleeve or small loops to the back if you plan to hang your Scarecrow Mini Quilt – Pattern on a wall. You can also label your quilt with your name and the date to commemorate your handmade creation.
4. Creative Variations and Seasonal Inspiration
The best part about working with a Scarecrow Mini Quilt – Pattern is how customizable it is. You can make multiple versions with different themes, colors, or sizes to suit various spaces and seasons.
Try a Halloween twist by adding pumpkins, black cats, or spooky accents like bats and spiders. Use darker backgrounds and fun, novelty fabrics to give your scarecrow a festive, spooky vibe.
Make a patchwork scarecrow by using different fabrics for each piece of clothing. Use plaid for the shirt, denim for the pants, and corduroy for the hat. This gives a cozy, country feel and helps you use up scrap fabric.
Add a quote or seasonal saying to your quilt using embroidery or fabric paint. Phrases like “Harvest Blessings” or “Happy Fall Y’all” add a charming, personalized touch.
Create a family-themed scarecrow quilt by making mini scarecrows that represent each family member. Adjust clothing, hair color, or accessories to match each person. This is a fun way to involve kids and make the quilt meaningful.
Experiment with shapes and borders. Try scalloped edges, flying geese borders, or patchwork squares. These elements frame your scarecrow beautifully and elevate the overall design.
Finally, use your mini quilt as a foundation for other projects. Turn it into a pillow, table topper, or part of a larger quilt by adding more seasonal blocks. Your Scarecrow Mini Quilt – Pattern can evolve and grow with your creative ideas.
Frequently Asked Questions (FAQ)
What is a Scarecrow Mini Quilt – Pattern?
It is a small quilting project featuring a scarecrow design, often made using appliqué or patchwork techniques. It typically measures under 20 inches and is used for decoration.
Is this pattern suitable for beginners?
Yes, many Scarecrow Mini Quilt – Pattern designs are beginner-friendly, especially those using fusible appliqué. It’s a great starter project for learning basic quilting skills.
What kind of fabric is best for a scarecrow quilt?
Cotton, flannel, and wool work well. Use sturdy, easy-to-iron fabrics for the base, and consider textured or patterned fabrics for added detail in the scarecrow’s clothing.
How long does it take to complete a mini quilt?
Depending on your skill level and the complexity of the design, a Scarecrow Mini Quilt – Pattern can be completed in a few hours to a weekend.
Can I resize the scarecrow design?
Absolutely. You can scale the pattern to make a larger wall quilt or even incorporate it into a full-sized seasonal quilt.
Where can I find scarecrow quilt patterns?
You can find free and paid Scarecrow Mini Quilt – Pattern options on quilting blogs, Etsy,
Pinterest, and online quilting communities.
Conclusion
The Scarecrow Mini Quilt – Pattern is a delightful way to welcome fall into your home with creativity and warmth. From choosing cozy fabrics to adding charming details, this project invites you to embrace the season and explore your sewing skills. It’s a great way to practice new techniques, use up fabric scraps, and produce a finished product you’ll be proud to display.
Whether you follow a pattern or create your own design, this mini quilt will become a cherished part of your autumn decor. We hope this guide helped you understand the full process—from planning and assembly to finishing and personalizing your project.
If you try this project, we’d love to hear from you! Please leave your honest opinion and any suggestions you have to help others improve their mini quilt journey. Happy quilting!