If you’re looking for a charming and practical DIY project, learning how to sew a tree potholder – pattern might be just what you need. Combining creativity, function, and a bit of seasonal spirit, tree-shaped potholders are perfect for adding a handmade touch to your kitchen or gifting to loved ones during the holidays. Whether it’s Christmas, autumn, or spring, tree-themed designs can be adapted for every season with just a change in fabric.
The beauty of the sew a tree potholder – pattern lies in its simplicity. Even if you’re new to sewing, this project can be completed in under an hour with minimal materials. For more experienced crafters, it’s a fun way to use up scrap fabric and experiment with new quilting or applique techniques. Best of all, the finished product is not just decorative—it’s heat-resistant and functional in the kitchen.
In this article, we’ll guide you through everything you need to sew a tree potholder from start to finish. We’ll cover material selection, essential tools, sewing tips, and ways to personalize your potholder. Whether you’re sewing for yourself or making a set as thoughtful gifts, you’ll walk away with all the knowledge you need to confidently tackle this delightful project.
1. Why Choose a Tree-Shaped Potholder Design
The tree-shaped potholder isn’t just a cute idea—it’s a versatile, purposeful addition to your kitchen or gift basket. The unique shape adds visual interest and seasonal flair while being fully functional for everyday cooking needs.
Tree shapes, especially evergreens, are naturally associated with warmth and coziness, making them ideal for winter or holiday-themed kitchen décor. But depending on the fabric you choose, this design works well year-round. Think blooming trees for spring or fiery orange tones for autumn.
Functionally, the pointed branches of the tree shape offer natural gripping points, making it easier to hold onto hot pots, pans, or casserole dishes. The structure of the tree also allows for flexible design variations, such as adding texture with quilting or appliqué details.
Another advantage of the sew a tree potholder – pattern is its adaptability. You can enlarge or shrink the template depending on your needs. Smaller versions make great mug rugs or coasters, while larger ones can serve as trivets or statement table accents.
From a creative standpoint, the project invites you to experiment. Want to add buttons for ornaments? Or maybe a pocket on the back for slipping in your hand? The tree-shaped potholder offers a canvas for festive flair and personalization.
If you’re selling handmade goods at markets or online, tree potholders are also a customer favorite. They’re affordable to make, easy to batch produce, and their seasonal charm appeals to buyers looking for unique kitchen accessories or stocking stuffers.
2. Materials and Tools Required to Sew a Tree Potholder
Creating your own tree potholder doesn’t require an extensive toolkit. With just a few basic sewing supplies, you can get started and complete this project with ease. Most of these materials are probably already in your craft space!
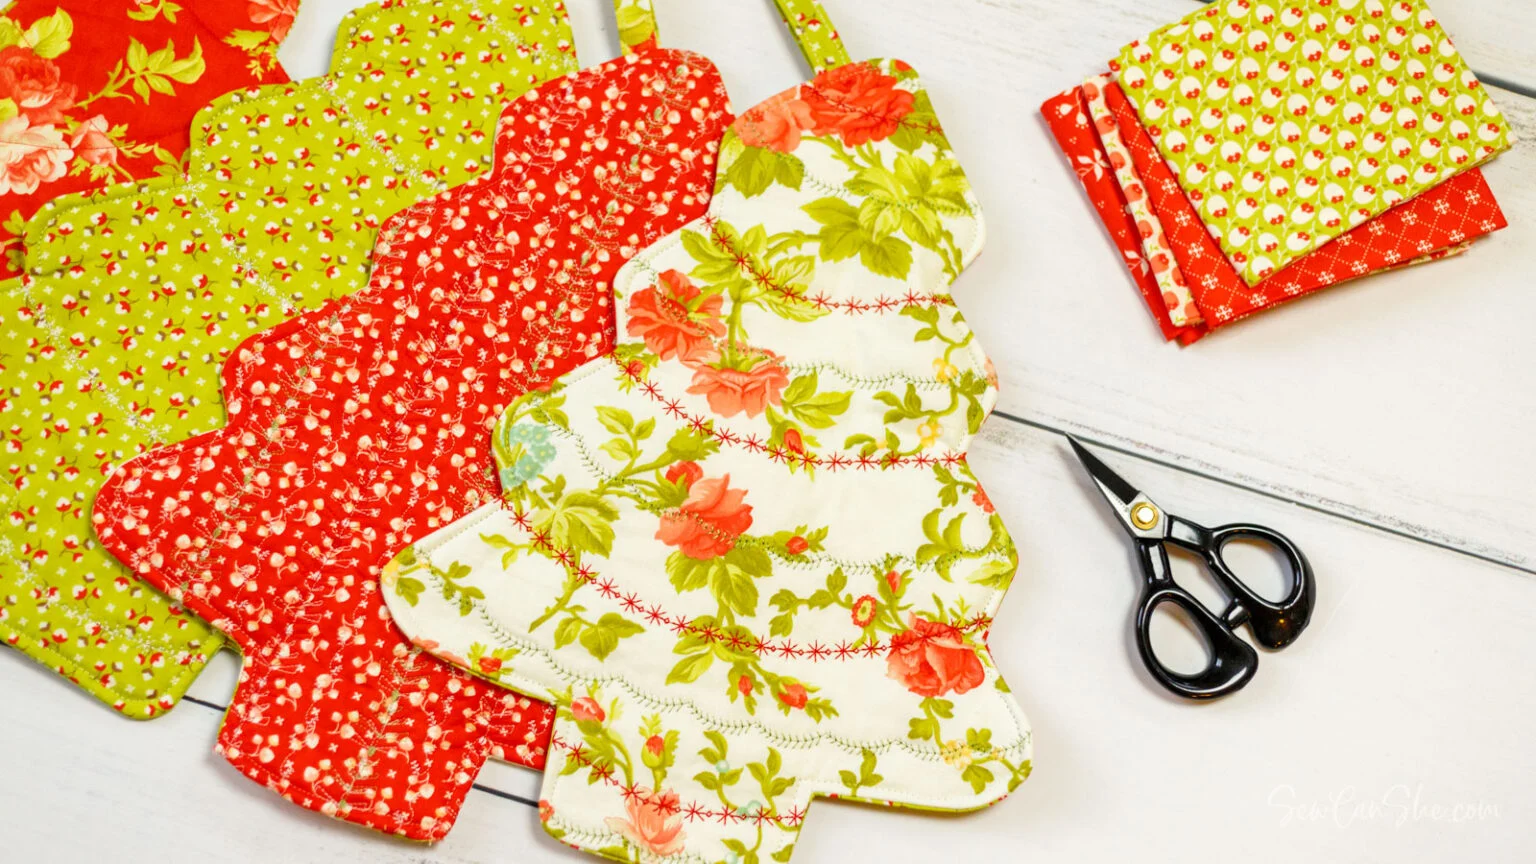
The most important component is 100% cotton fabric, both for safety and durability. Choose two coordinating pieces: one for the front and one for the back. For festive looks, use holiday prints or textured solids like green, red, gold, or white.
To make your potholder heat-resistant, you’ll need Insul-Bright (a heat-resistant batting layer). Combine it with cotton batting to increase the thickness and insulation. These layers ensure your hands stay protected while handling hot cookware.
You’ll also need basic sewing tools: fabric scissors or a rotary cutter, a ruler or measuring tape, pins or fabric clips, and a sewing machine. Hand sewing is possible for this project, but using a machine will give cleaner, more durable seams.
A tree-shaped template is essential for keeping your design symmetrical. You can draw one by hand or download printable versions from trusted crafting blogs or pattern marketplaces. Make sure your template is sized for your intended use (e.g., a standard 8–10” potholder).
Additional optional supplies include ribbon or bias tape for hanging loops, buttons or trims for decoration, and fabric markers or embroidery floss if you want to add hand-stitched details. Personal touches make each potholder unique and meaningful.
Finally, don’t forget to have a pressing iron nearby. Pressing your seams and layers not only improves the final look but also makes the sewing process smoother and more accurate. A well-pressed project always stands out!
3. Step-by-Step Instructions to Sew a Tree Potholder – Pattern
Now that you’ve gathered your supplies, let’s walk through how to sew a tree potholder – pattern from start to finish. This process is beginner-friendly and great for practicing sewing fundamentals like layering, stitching curves, and topstitching.
Start by cutting your fabric and batting using your tree template. You’ll need two fabric pieces (front and back), one layer of Insul-Bright, and one layer of cotton batting. Align all pieces neatly to ensure a clean stack when sewing.
Next, create a quilt sandwich: place the back fabric right side down, then layer the Insul-Bright, cotton batting, and finally the front fabric right side up. Pin or clip all layers together securely, especially around the edges and corners.
Using a sewing machine, quilt the layers together. You can sew straight lines, free-motion designs, or follow the outline of the tree shape. This step is optional but helps keep the layers stable and adds a nice decorative touch.
Now, prepare to sew the edge. Place the two fabric sides right sides together (if you haven’t quilted already), and sew around the tree shape, leaving a 2–3 inch gap for turning. Make sure to backstitch at the start and end of your seam.
Carefully clip the corners and curves to reduce bulk, then turn the potholder right side out through the gap. Use a turning tool or pencil to push out the edges and points. Give the entire potholder a good press with your iron.
Finish by topstitching around the edge, closing the turning gap and securing the layers. Attach a small loop of ribbon or fabric at the top of the tree if you’d like to hang your potholder. Congratulations—your tree potholder is complete!
4. Customization Ideas and Creative Uses
Once you’ve mastered the basics of the sew a tree potholder – pattern, the real fun begins—customization! This pattern is the perfect blank canvas for personal flair and creativity.
Add a touch of holiday magic by sewing on buttons to resemble ornaments or snowflakes. You can also applique stars, gifts, or other shapes using contrasting fabric scraps and zigzag stitching. These additions give your potholder character and festive charm.
Want to turn your potholder into a hand mitt? Add a pocket on the back. Simply cut an extra tree-shaped fabric piece, stitch the straight edge, and sew it onto the back before final assembly. Slide your hand inside for extra protection.
Experiment with fabric combinations to match different themes. Use pastels and florals for springtime, oranges and browns for fall, or icy blues and whites for a winter wonderland. The same pattern can be adapted for every occasion.
For a rustic look, try using linen, burlap, or plaid flannel. Finish the edges with bias tape instead of turning and topstitching, and tie it off with twine or wooden buttons. These make beautiful farmhouse-style gifts.
Make a set of matching potholders and trivets by using the same tree shape in different sizes. Group them together in a gift basket with kitchen towels, baked goods, or cookie cutters for a thoughtful holiday gift.
You can even use the tree potholder as a seasonal table decoration. Arrange a few down the center of the table, add candles or greenery, and you’ll have a unique and practical tablescape perfect for holiday gatherings.
FAQ – Sew a Tree Potholder – Pattern
Q1: Can I hand sew the tree potholder instead of using a machine?
Yes! While a sewing machine makes the process faster and cleaner, this project is simple enough for hand stitching using a strong backstitch and even seam allowance.
Q2: What type of batting is safest for heat protection?
Use Insul-Bright for heat resistance, combined with 100% cotton batting. Avoid polyester, as it can melt when exposed to high heat.
Q3: Is this a good beginner sewing project?
Absolutely. The sew a tree potholder – pattern is beginner-friendly, involving only basic shapes and techniques like straight stitching, layering, and topstitching.
Q4: How do I make the potholder thicker or more durable?
Add an extra layer of cotton batting or quilt the potholder before assembling. This will increase heat protection and stability.
Q5: Can I wash the potholder in the machine?
Yes, if you use cotton fabrics and batting. Machine wash on a gentle cycle and air dry or tumble dry low to maintain shape and durability.
Q6: Where can I find printable tree templates?
You can find free
or paid templates on craft blogs, Etsy, and sewing pattern websites. Or you can draw your own tree shape using graph paper or cardboard.
Conclusion
The sew a tree potholder – pattern is a delightful and practical project that blends creativity, warmth, and seasonal spirit. With minimal materials and easy-to-follow steps, anyone can make these beautiful, functional additions to their kitchen or holiday gift collection.
We hope this guide has inspired you to pick up your fabric and give it a try. Whether you’re making one or an entire set, this pattern offers room for endless customization and personal expression.
If you’ve made your own tree potholder using this guide, we’d love to hear about it! Please leave a sincere opinion or share your suggestions below. Happy sewing and enjoy every stitch!