If you’re looking for a charming and practical sewing project, the Padded Apple Coasters – Pattern is a delightful choice. These cute, apple-shaped coasters are not only functional but also bring a fresh, cozy aesthetic to any kitchen or dining table. Whether you’re sewing for yourself, crafting gifts, or adding items to your handmade shop, padded coasters shaped like apples are an adorable way to showcase your creativity.
The Padded Apple Coasters – Pattern is simple enough for beginners, yet enjoyable for experienced sewists who want to personalize their home décor. The basic design involves a soft, quilted apple shape with light padding to protect surfaces from hot or cold drinks. You can easily adapt the size, fabric choice, and embellishments to suit your own style or the season.
In this article, you’ll learn everything you need to get started with your own set of Padded Apple Coasters – Pattern. From the tools and materials you’ll need, to step-by-step construction, and even some creative ideas for customization, this guide covers it all in a warm, beginner-friendly tone. So grab your fabric and thread—let’s get sewing.
1. Materials and Tools You’ll Need
Before you begin sewing your Padded Apple Coasters – Pattern, it’s important to gather all the necessary supplies. Having everything ready will make the process smoother and more enjoyable.
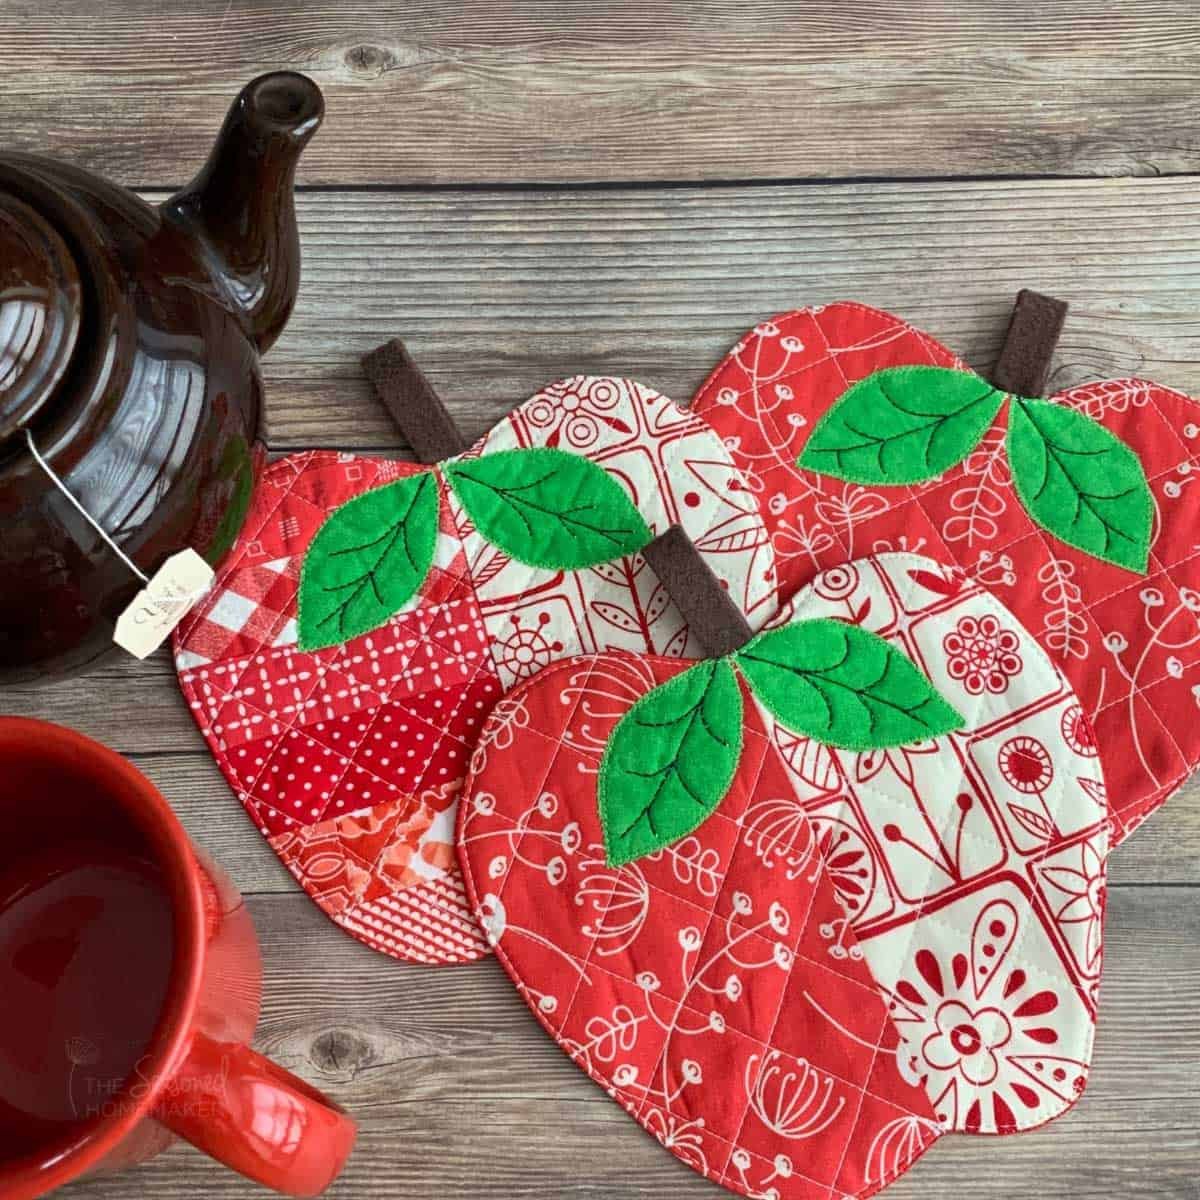
Start with fabric selection. Cotton is the most commonly used material for coasters because it’s absorbent, easy to work with, and comes in endless patterns. For the apple design, choose a red or green fabric for the outer layer, a brown or black fabric for the stem, and a leafy green fabric for the leaf.
For the padding, consider using cotton batting or fusible fleece. This gives the coasters a soft but firm feel, and helps protect your furniture from heat or moisture. You’ll only need small scraps, so it’s a great way to use leftover batting from larger projects.
You’ll also need basic sewing tools such as fabric scissors, pins, a fabric marking pen, a sewing machine, and a hot iron. If you prefer hand-sewing, a needle and strong cotton thread will do the trick, although it may take a bit more time.
Having a printed or drawn template of an apple shape will make cutting your fabric much easier. You can either find a free downloadable template online or draw one by hand. Just be sure the size accommodates standard cups or mugs.
If you plan to make a set of coasters, organize your materials into stacks for each coaster before you begin sewing. This makes assembly faster and keeps you from accidentally mixing fabrics or forgetting steps during construction.
Lastly, consider pre-washing your fabric. This ensures your coasters won’t shrink or warp after the first wash. Iron the fabric afterward to make cutting cleaner and more accurate.
2. Cutting and Assembling the Fabric
Now that your materials are ready, it’s time to start building your Padded Apple Coasters – Pattern. Precision in cutting and preparation will give you a polished final result.
Begin by using your apple-shaped template to trace and cut two apple shapes from your main fabric—this will be the front and back of the coaster. Cut one additional apple shape from your batting or fleece for the padding.
For the apple stem and leaf, cut small rectangles or custom shapes from your selected fabric. These will be sewn into the top seam, so be sure they’re the right size—not too bulky but large enough to show when the coaster is finished.
Once all your pieces are cut, create a fabric sandwich. Layer the bottom apple shape with the right side facing down, then place the stem and leaf near the top, angled inward. Lay the batting on top, then place the second apple shape right side up.
Pin all the layers together, especially around the edges where the seams will be sewn. Make sure the stem and leaf are securely pinned in place so they don’t shift during sewing. If you’re adding embellishments like embroidery or buttons, do so before assembling the layers.
Using your sewing machine, stitch around the edge of the apple with a 1/4″ seam allowance, leaving a 2″ opening on one side so you can turn the coaster right side out. Be sure to backstitch at both ends of the opening to prevent unraveling.
After sewing, clip the curves and trim any excess fabric to reduce bulk. Then, turn the coaster inside out through the opening. Use a blunt tool like a chopstick or pencil to gently push out the curved edges and get a smooth, rounded shape.
3. Finishing Touches and Quilting Details
With your Padded Apple Coasters – Pattern now turned right side out, it’s time to add some finishing touches that will make your coaster look neat, sturdy, and professional.
Start by pressing the coaster flat with an iron, making sure the seam edges are fully extended. Carefully fold in the raw edges of the opening and press them to match the seam. Pin this spot closed in preparation for topstitching.
Topstitch around the entire edge of the coaster, about 1/8″ from the edge. This will not only close the opening but also give the coaster a clean, finished look. It also helps the shape hold up better over time, especially after washing.
For a quilted touch, consider sewing a few lines of stitching through the middle of the coaster. You could follow the contour of the apple shape, add vertical lines, or even quilt in a leaf-vein design if you want something unique.
If you want to personalize your coasters, you can add embroidery with initials, decorative hand stitching, or appliqué features like seeds or a heart in the center of the apple. These details make your Padded Apple Coasters – Pattern more special, especially for gifting.
Washability is an important factor in coaster use. Be sure to backstitch at the start and end of all your stitching lines and secure loose threads tightly. This ensures your coaster will withstand multiple washes without falling apart.
You can now repeat the process to create a full set. Whether you want four, six, or even twelve coasters, having a consistent method makes batch production easier and more efficient.
4. Creative Ideas and Gift Inspiration
The Padded Apple Coasters – Pattern is versatile and lends itself to many seasonal and gift-worthy interpretations. You can let your imagination run wild and tailor your project to the occasion.
For a back-to-school gift, create a set of red apple coasters and package them with a thank-you note for a teacher. Add a cute ribbon or wrap them in brown paper for a thoughtful, handmade surprise.
In the fall, consider making your apple coasters from flannel or autumn-themed prints. Use orange, mustard, or deep green tones to match the season, and pair them with cinnamon or apple-scented candles for a cozy gift set.
For a farmhouse or rustic kitchen, use neutral tones and natural linen. These minimalist Padded Apple Coasters – Pattern variations bring a modern aesthetic while still feeling warm and handmade.
Kids love playful coasters too. Use fabric with fun prints like polka dots, animals, or cartoon apples. You can even let kids help design their own coaster by picking fabrics or drawing shapes to be appliquéd.
For holidays, consider turning the apple shape into ornament-inspired coasters. Use red and white holiday prints and metallic threads for a festive touch. These coasters make lovely stocking stuffers or party favors.
If you sell handmade items, this pattern is perfect for craft fairs and online shops. They’re quick to make, easy to ship, and universally useful. Plus, with the right fabrics, they can be marketed to a wide range of buyers throughout the year.
FAQ: Padded Apple Coasters – Pattern
Q1: Can I make the Padded Apple Coasters – Pattern without a sewing machine?
A: Yes, you can hand sew the coasters using a backstitch for the seams and a slip stitch to close the opening. It takes longer but works just as well.
Q2: What’s the best fabric for this project?
A: Quilting cotton is ideal due to its softness, ease of use, and wide variety of prints. You can also experiment with flannel or linen for different textures.
Q3: How thick should the padding be?
A: A single layer of cotton batting or fusible fleece is sufficient. You want the coaster to be padded but not too bulky for mugs to sit flat.
Q4: Can I wash these coasters?
A: Absolutely. Use washable materials and backstitch all seams securely. Machine washing on a gentle cycle and air drying is recommended.
Q5: Are these coasters heat resistant?
A: While they provide moderate protection against heat, avoid placing extremely hot pots or pans on them. They’re best suited for warm drinks.
Q6: Can I resize the pattern for larger mugs?
A: Yes, simply scale up the template before cutting your fabric. Make sure the padding and stem proportions adjust accordingly for balance.
Conclusion
Creating your own Padded Apple Coasters – Pattern is a fun, functional, and heartwarming sewing project. It blends creativity, practicality, and a touch of charm into a handmade item that’s perfect for your home, gifts, or craft sales.
Throughout this guide, you’ve learned how to select materials, cut and assemble your pieces, add decorative quilting, and evenexplore creative variations. With just a bit of fabric and imagination, you can turn a simple apple shape into a beautiful set of coasters that will brighten anyone’s day.
If you enjoyed this tutorial, please leave a sincere opinion and share your suggestions. Your feedback helps us improve and inspires more creative projects for everyone to enjoy.