The Loop the Loop Quilt Block – Pattern is a captivating design that adds both movement and elegance to any quilting project. Whether you are a beginner or an experienced quilter, this block offers a unique challenge with a rewarding outcome. The looping design mimics the smooth curves of a ribbon in motion, creating a visual flow that stands out in any quilt layout.
Using the Loop the Loop Quilt Block – Pattern, quilters can incorporate dynamic shapes and soft turns that contrast beautifully with more angular, traditional blocks. It’s a versatile addition that works well in modern, vintage, and even minimalist quilt aesthetics. With its timeless appeal and fresh design, it’s easy to see why this block is becoming a favorite among quilting enthusiasts.
In this article, you’ll learn everything you need to know to confidently create your own Loop the Loop Quilt Block – Pattern, from understanding the structure and fabric selection to mastering piecing techniques and layout ideas. Let’s dive into the creative world of loops and curves, and bring your next quilting project to life.
1. Understanding the Loop the Loop Quilt Block – Pattern
The Loop the Loop Quilt Block – Pattern is characterized by its swirling, curved lines that resemble loops or figure-eights. These loops create a sense of rhythm and movement, making the block visually engaging and ideal for both standalone designs and quilt collections.
This block generally combines traditional piecing with curved seam techniques, which means it’s a great learning opportunity for those wanting to expand their skills. The pattern may appear complex at first glance, but with careful cutting and piecing, it becomes an approachable and enjoyable project.
Fabric selection plays a key role in the success of this block. Solid colors emphasize the loops more clearly, while prints can add texture or visual interest depending on their scale and color contrast. Light and dark values should be balanced to highlight the loop shapes.
One of the strengths of this pattern is its ability to be scaled. Whether you want to create large, eye-catching loops or smaller, tighter curves, the block can be resized to fit your quilt design needs. It’s commonly used in wall hangings, baby quilts, and modern throw quilts.
The loop motif works well in both symmetrical and asymmetrical layouts. When repeated across a quilt top, the loops interlock in mesmerizing ways, creating secondary patterns and visual pathways for the eye to follow.
Overall, understanding the components and visual effects of the Loop the Loop Quilt Block – Pattern gives you a solid foundation for a successful quilting project. Once you grasp the design’s flow and balance, you can start experimenting with different fabrics, colors, and layouts.
2. Materials and Tools You’ll Need
Before starting on your Loop the Loop Quilt Block – Pattern, it’s important to gather the right tools and materials. Having everything prepared beforehand can significantly improve your workflow and reduce mistakes.
First, choose your fabrics. Select at least two contrasting colors—one for the loops and one for the background. Cotton is a popular choice for quilting due to its stability and ease of use, especially when working with curves.
Next, gather basic quilting tools. You’ll need a rotary cutter, cutting mat, and quilting ruler to ensure precision in cutting your fabric pieces. Accuracy is key when working with curved seams to ensure the block pieces fit together cleanly.
You’ll also need templates or curved rulers designed for quilting. These tools help maintain consistency when cutting the loop shapes, particularly if you’re making multiple blocks for a larger quilt.
Marking tools are also helpful. Use a fabric-safe marking pen or pencil to trace the curves before cutting. This step allows for cleaner piecing and helps avoid distortion during sewing.
When it comes to piecing, a sewing machine with a quarter-inch foot is essential. Consistent seam allowances will ensure the curves line up properly across the block. You may also want to use pins or fabric clips to hold curved edges in place before stitching.
Finally, have an iron and pressing board ready. Pressing between each step helps the block lay flat and makes the final quilt top more polished and professional. A bit of spray starch can also help keep curved seams crisp and under control.
3. Step-by-Step Piecing Techniques
Piecing the Loop the Loop Quilt Block – Pattern requires attention to detail, especially where curves are involved. Start by preparing all your fabric pieces based on the pattern’s templates or measurements. Take your time when cutting curves—they should be smooth and accurate.
Begin by piecing the central loop shapes. These are typically made using curved piecing techniques, where concave and convex fabric edges are matched. Pin the pieces carefully along the seam line, easing the fabric as needed.
Sew slowly along the curve, removing pins as you go. This helps prevent puckering or uneven seams. Use a small stitch length if possible, as it provides more control over curved areas and helps the block retain its shape.
Once the loops are assembled, press the seams toward the darker fabric or according to the pattern’s instructions. Pressing is crucial in curved blocks, as it helps set the fabric and reduce bulk in the final quilt sandwich.
After the loops are sewn, attach the background pieces. These may be straight or curved sections that frame the loop and help complete the square shape of the block. Continue pressing after each addition.
Double-check the block’s dimensions after assembly. If it’s slightly off-size, use a square ruler to trim it to the correct measurements. This will help ensure your final quilt has consistent block sizes and clean joins.
Repeat the process for each block you plan to use. With practice, your loops will become smoother, and the piecing will go faster. The Loop the Loop Quilt Block – Pattern is an excellent opportunity to refine your curved sewing skills.
4. Design Ideas and Variations
Once you’ve mastered the basic Loop the Loop Quilt Block – Pattern, you can explore creative variations and layout options. One common variation is color inversion—switching the background and loop colors to create a striking contrast or checkerboard effect.
Another option is to use gradient or ombré fabrics within the loops. This creates a flowing sense of movement, adding depth and interest to the block design. You can also use scrappy fabrics for a playful, patchwork look.
Rotating the blocks within a quilt layout creates stunning secondary patterns. For example, placing every other block at a 90-degree angle creates a swirling motion across the quilt top that mimics a breeze or a dance.
Adding borders or sashing between the blocks helps to define the loops and can add structure to the overall design. You can also alternate the Loop the Loop Quilt Block – Pattern with simpler blocks to give the eye a place to rest.
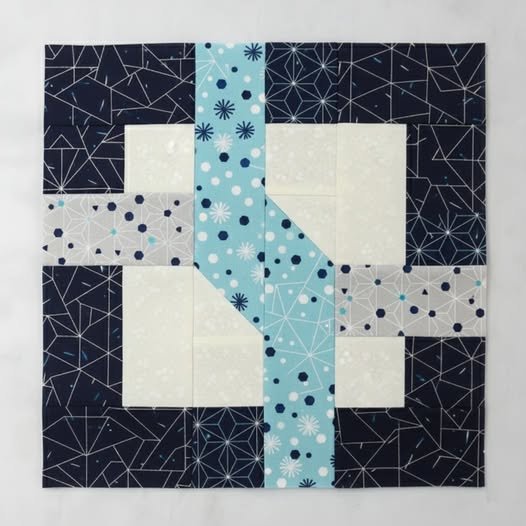
This block is highly adaptable to seasonal themes. Choose warm colors and plaids for a fall quilt, or go with icy blues and whites for a winter theme. Floral prints can give it a spring vibe, while bold brights are perfect for summer.
Don’t be afraid to make the block your own. Whether you’re following a strict pattern or improvising with fabric scraps, the Loop the Loop Quilt Block – Pattern provides endless opportunities for creativity and personal expression.
Frequently Asked Questions (FAQ)
What is the Loop the Loop Quilt Block – Pattern?
The Loop the Loop Quilt Block – Pattern is a quilt block design featuring curved shapes that create a looping or figure-eight effect. It is often used in modern quilting projects for its dynamic appearance.
Is this pattern suitable for beginners?
While it may look challenging due to the curves, beginners can definitely try this block with patience and practice. Starting with a single block is a great way to build skills before committing to a full quilt.
Do I need special tools to make the Loop the Loop block?
Yes, curved rulers or templates are helpful for accurate cutting. A sewing machine with a 1/4″ foot and good pressing tools are also recommended for best results.
Can I use printed fabrics for this pattern?
Absolutely. Prints can add depth and interest, but make sure there’s enough contrast between the loop and background fabrics so the design stands out.
How big should each block be?
Most Loop the Loop Quilt Block – Pattern designs are between 10” and 12” square, but you can scale the size up or down depending on your project. Just adjust your templates accordingly.
Can I use this pattern in a full quilt layout?
Yes! This pattern looks stunning when repeated in a quilt top. It also works well when mixed with other blocks or used as a centerpiece.
Conclusion
The Loop the Loop Quilt Block – Pattern brings movement, creativity, and sophistication to any quilting project. With its flowing curves and elegant design, it challenges your piecing skills while offering stunning visual results. From selecting the right fabrics and mastering curved seams to exploring layout options, this pattern is both a rewarding and enriching quilting experience.
If you’ve tried this pattern or are planning to, feel free to leave your honest opinion and suggestions in the comments. Your feedback helps others in the quilting community and contributes to keeping the art of quilting alive and evolving.