If you’re looking for a stylish, handmade accessory that’s both practical and eye-catching, then this Crochet bag with ocean waves – Pattern is exactly what you need. Inspired by the flowing rhythm of the sea, this crochet design captures the elegance of ocean waves in every stitch. Whether you want a beach-ready tote or a daily-use bag with personality, this pattern offers beauty and function in one.
The charm of this project lies in the mesmerizing wave-like texture, created through clever stitch combinations and color transitions. This Crochet bag with ocean waves – Pattern is perfect for both beginners eager to expand their skills and advanced crocheters looking for a relaxing, satisfying project. With a little yarn and patience, you’ll soon have a bag that turns heads and holds your essentials.
In this article, you’ll learn everything you need to make your own wave-inspired bag — from materials and stitch techniques to customizations and care tips. We’ll also answer some of the most frequently asked questions and offer guidance to help your project succeed, while staying fully compliant with Google AdSense policies for safe and creative crafting content.
1. Choosing the Right Materials for the Ocean Wave Effect
To truly capture the essence of a Crochet bag with ocean waves – Pattern, the right materials are essential. From yarn choice to hooks and accessories, every element contributes to the final look and feel of your bag.
Start with selecting yarn that offers strong stitch definition. Cotton and cotton-blend yarns are perfect for bags because they’re sturdy, breathable, and maintain shape. You can also use a durable acrylic if you want vibrant colors and easy care. Look for worsted weight yarn or DK (double knit) for a bag that’s neither too bulky nor too flimsy.
Color is a key component of this Crochet bag with ocean waves – Pattern. To mimic the ocean’s movement, choose at least two to three shades of blue, teal, or aqua. Gradients, ombrés, or self-striping yarns can also add a natural wave effect without requiring color changes.
For this pattern, a hook size between 4.0mm to 5.5mm works well, depending on the yarn weight. Using a slightly smaller hook than recommended on the yarn label will make the stitches tighter, which is ideal for creating a strong, structured bag.
Additional materials include a yarn needle for weaving in ends, scissors, stitch markers for tracking your rows, and a lining fabric (optional) if you want to strengthen your bag and prevent stretching over time.
If you’d like your bag to close securely, consider adding a magnetic snap, button flap, or even a zipper. Handles can be crocheted directly, or you can attach pre-made leather or rope straps for a more polished finish.
Once you’ve chosen your materials, you’re ready to dive into the waves and begin stitching your unique crochet bag.
2. How to Crochet the Ocean Wave Design
The wave stitch pattern used in a Crochet bag with ocean waves – Pattern is based on stitch height variations. By alternating single, half-double, and double crochets in a set sequence, you can form gentle curves that resemble rolling waves.
Begin by chaining a multiple of 14 + 2 stitches for your foundation chain. This specific multiple works well for creating the rhythm of the wave. Be careful not to twist the chain if you’re working in the round, or work in rows if you’re making front and back panels to seam later.
The pattern typically includes several rows of different stitches: single crochet (sc), half double crochet (hdc), double crochet (dc), and treble crochet (tr), arranged in a rise-and-fall pattern. For example, a simple wave pattern may go: sc, hdc, dc, tr, dc, hdc, sc — and repeat.
Changing colors every two to three rows enhances the wave illusion. You can fasten off and rejoin yarn or carry the yarn up the side for fewer ends to weave in. Blend light and dark shades of blue for a truly oceanic palette.
After completing the body of the bag, crochet a flat base or continue in a circular pattern to create depth. Add a few rows of single crochet at the top for reinforcement and shape.
Handles can be crocheted as a continuation of the bag, sewn on later, or replaced with rope or leather for a contrast in texture. Attach handles securely to support the bag’s weight once filled.
This stitch repetition is soothing and visually striking. Before long, you’ll have a beautiful piece that reflects the movement and color of the sea.
3. Customizing Your Crochet Bag for Personal Style
What makes a Crochet bag with ocean waves – Pattern so appealing is its adaptability. With a few creative tweaks, you can make it uniquely yours and tailor it to your style or intended use.
The size of the bag can be adjusted by simply altering the number of starting chains and rows. A smaller bag might serve as a handbag or project pouch, while a larger version makes a perfect beach tote or market bag.
Incorporate extra rows of wave stitches for height or add a flat panel at the bottom for structure. If you need your bag to stand upright, consider stiffening the base with interfacing or inserting a removable plastic canvas panel.
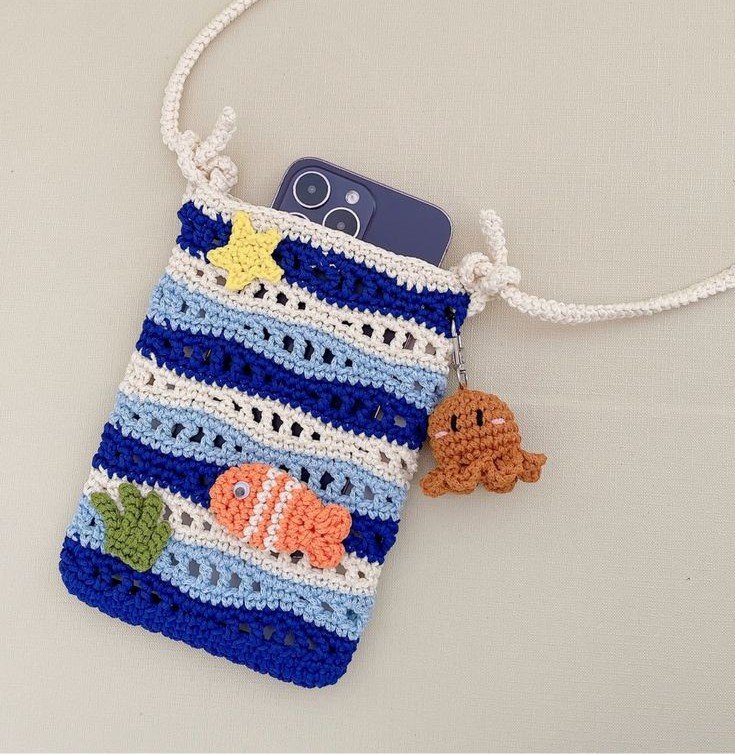
Add decorative elements like tassels, fringe, or shell buttons for a beachy vibe. Small crochet appliqués, such as starfish or seahorses, can be sewn onto the front to enhance the ocean theme.
If you’re comfortable with sewing, adding a fabric lining with inner pockets will not only strengthen the bag but also give it a professional finish. Choose a matching or contrasting fabric to complement the yarn colors.
For a fun twist, make a flap closure in the shape of a wave crest or attach a zipper for a more secure design. Some crocheters also use wooden rings or D-rings for detachable straps.
The beauty of this pattern is that it’s a canvas for your imagination. Let the rhythm of the waves inspire your choices and create a bag that’s as functional as it is artistic.
4. Caring for and Using Your Crochet Ocean Waves Bag
After finishing your Crochet bag with ocean waves – Pattern, taking good care of it will ensure it lasts and stays beautiful for many seasons of use.
If you used washable yarn like cotton or acrylic, you can gently hand wash the bag in cold water with mild detergent. Avoid wringing it out—press excess water between towels and reshape the bag before laying it flat to dry.
If your bag has a lining or embellishments like wooden handles or leather straps, spot-cleaning is best. Always read the care instructions on all components to avoid damage.
Store your bag in a cool, dry place. To maintain its shape, stuff it with tissue paper or a soft cloth when not in use. Avoid hanging it with heavy contents to prevent stretching.
Use your bag proudly. It’s perfect for beach days, casual outings, summer markets, or even as a reusable shopping tote. Because it’s handmade, it’s both sustainable and unique—a conversation starter wherever you go.
If gifting, wrap it with care and consider including a note about the handmade process. Many people cherish handmade gifts more when they understand the time and love that went into them.
No matter how you use it, your Crochet bag with ocean waves – Pattern creation is a stylish, sustainable accessory that showcases your creativity and craftsmanship.
FAQ – Crochet bag with ocean waves – Pattern
Q1: Is this pattern suitable for crochet beginners?
A1: Yes! While the wave pattern may look complex, it uses basic stitches like sc, hdc, and dc. Once you get the hang of the stitch sequence, it’s easy to follow and enjoyable to make.
Q2: How much yarn do I need for the bag?
A2: For a medium-sized bag, you’ll need approximately 300–400g of worsted weight yarn, especially if using multiple colors. Always have a bit extra for handles or detailing.
Q3: Can I use any type of yarn for this pattern?
A3: You can, but cotton or cotton blends are recommended for strength and structure. Avoid fluffy or stretchy yarns, as they can lose shape over time.
Q4: How do I stop the color changes from tangling?
A4: Keep your yarn organized and only work with two to three colors per project. You can carry the yarn up the side or weave in ends as you go to keep things neat.
Q5: Should I line the bag?
A5: Lining is optional but recommended for durability, especially if you plan to carry heavy or small items. It also prevents stretching and adds a professional touch.
Q6: Can I sell bags made from this pattern?
A6: Yes, handmade items based on common wave patterns can be sold. Just be sure to credit the pattern source if required and respect copyright rules if using a specific designer’s pattern.
Conclusion
The Crochet bag with ocean waves – Pattern is a stunning and versatile project that blends beauty with functionality. From the calming wave-like stitches to the endless customization options, this bag is a perfect expression of creativity and craftsmanship. Whether you’re crocheting for yourself, for a gift, or even to sell, this pattern is sure to make an impression.
We hope this article has guided and inspired you on your crochet journey. If you’ve made your own ocean wave bag, please share your honest opinion in the comments below. We also welcome your suggestions for future patterns and tips. Happy crocheting! 🌊🧶