The holiday season is a perfect time to add handmade charm to your decorations, and one of the most unique and eye-catching crafts you can make is the Christmas Wind Spinner Crochet – Pattern. This festive crochet project creates a beautiful, twirling decoration that catches light and movement, bringing a playful, cozy touch to your Christmas setup. Whether hung on a tree, by a window, or outside in the winter breeze, these spinners are a true celebration of creativity and festive joy.
The Christmas Wind Spinner Crochet – Pattern is a beginner-friendly project that only requires basic crochet stitches, yet the result looks stunning and intricate. You can customize the spinner’s size, color, and texture to match your Christmas theme—whether you prefer traditional red and green or modern metallic tones like silver and gold. It’s also a fun way to use up leftover yarn from other projects, making it both creative and sustainable.
In this article, you’ll discover everything you need to know to make your own Christmas Wind Spinner Crochet – Pattern, including material selection, crochet instructions, decoration ideas, and care tips. We’ll also answer the most common questions about this festive craft in our FAQ section. Let’s dive in and get your hooks ready to create a decoration that spins with Christmas cheer.
1. Gathering Materials and Preparing for Your Project
Before you start crocheting your Christmas Wind Spinner Crochet – Pattern, it’s important to gather the right tools and materials. Having everything ready ensures your crafting process is smooth and enjoyable from start to finish.
Yarn choice plays a big role in how your spinner turns out. For a crisp, well-defined structure, cotton yarn is ideal, as it holds its shape well. However, if you want a softer, more textured look, acrylic yarn works wonderfully too. Using variegated or glittery yarn adds a festive sparkle, perfect for holiday decorations.
Choose a crochet hook that matches your yarn weight—usually between 3.5 mm and 4.5 mm for medium-weight yarn. The tighter your stitches, the firmer your spinner will be, which helps it maintain its spiral shape. Beginners can use slightly larger hooks for easier handling.
Other tools you’ll need include scissors, a yarn needle for weaving in ends, and a measuring tape if you want your spinner to have a specific length. Some crafters also use a small ring at the top of the spinner for hanging, though a simple yarn loop works just as well.
For added durability and structure, consider stiffening your spinner using fabric stiffener or a light starch spray once it’s finished. This step helps your Christmas Wind Spinner Crochet hold its elegant, swirling form, even after years of use.
Lastly, choose your color palette carefully. Classic Christmas hues like red, green, and white always stand out, but you can also experiment with icy blues, golds, or silvers for a more modern festive look. A combination of two or three colors creates a dynamic, eye-catching effect when the spinner twirls.
2. Step-by-Step Guide to Making the Crochet Wind Spinner
Once your materials are ready, it’s time to start creating your Christmas Wind Spinner Crochet – Pattern. The process is surprisingly easy, and once you master the basic technique, you’ll want to make several of these to decorate your home or give as handmade gifts.
Begin by chaining a long foundation—usually between 60 to 100 chains, depending on how long you want your spinner to be. The longer the chain, the larger and more dramatic your spinner will appear. Keep your tension even throughout to ensure smooth spirals later.
Next, work your first row of stitches. Many patterns use double crochet or half-double crochet for this row. To create the spiral effect, you’ll increase stitches gradually as you go—this might mean working two or three stitches in one chain at intervals. These increases cause the fabric to naturally curl into a twisting spiral.
As you continue, you’ll see the spinner beginning to take shape. You can change colors mid-row to create a striped effect, or alternate between solid and metallic yarns for a festive shimmer. The beauty of the Christmas Wind Spinner Crochet is that there’s no single right way to make it—it’s all about creativity and fun.
Once you reach the end of your row, fasten off and weave in the ends neatly with your yarn needle. If you want to make your spinner double-sided or thicker, you can crochet two identical spirals and stitch them together along the edges.
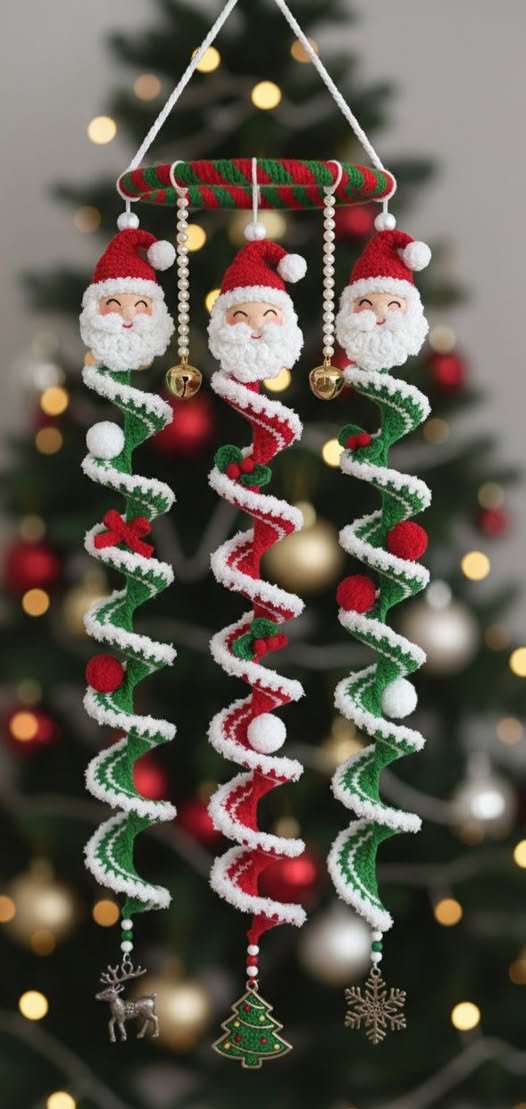
Add a loop or ring at the top for hanging. For outdoor use, consider adding a small weight, such as a bead or jingle bell, to the bottom to help it spin more freely in the wind. This not only enhances the visual effect but also adds a touch of cheerful sound to your decoration.
After finishing, block your spinner by pinning it flat and spraying lightly with water or fabric stiffener. Once dry, it will hold its beautiful spiral form perfectly, ready to dazzle wherever you hang it.
3. Creative Ideas to Customize Your Wind Spinner
The best part about working on a Christmas Wind Spinner Crochet – Pattern is the endless opportunity for personalization. Each spinner can be a one-of-a-kind creation that reflects your unique holiday style and imagination.
You can experiment with colors to match different Christmas themes. Try red and gold for a classic look, silver and white for a winter wonderland feel, or even multi-colored yarn for a playful, modern design. Variegated yarns with changing tones make beautiful gradients without needing to switch skeins.
Adding embellishments gives your spinner extra flair. Beads, sequins, and miniature bells can be sewn along the edges to catch the light as the spinner twirls. For a rustic style, use jute or twine instead of yarn, combined with wooden beads for a cozy, farmhouse aesthetic.
If you enjoy a layered look, crochet multiple spinners of different sizes and hang them together at varying heights. This creates a beautiful cascading display that looks stunning near windows, porches, or Christmas trees.
You can also use your Christmas Wind Spinner Crochet as part of a garland or wall hanging. Simply attach several spinners along a long chain of yarn, interspersed with crochet snowflakes, stars, or pom-poms for a cohesive holiday decoration.
For an extra festive touch, consider incorporating LED fairy lights into your spinner display. Wrap them gently around your hanging spinners to create a warm, glowing effect that enhances their movement and shimmer during the evening.
Lastly, these spinners make wonderful handmade gifts. Tie one to a wrapped present as a decoration, or include it in a gift basket for a personal, handcrafted touch. Everyone appreciates a gift made from the heart, and a Crochet Christmas Wind Spinner is sure to delight any recipient.
4. Maintenance and Long-Term Care for Crochet Wind Spinners
Once you’ve finished your Christmas Wind Spinner Crochet – Pattern, proper care will help keep it looking beautiful for years. Handmade crochet decorations can last for many holidays if maintained well.
Start by keeping your spinner clean. If it gathers dust, gently shake it out or use a lint roller. For a deeper clean, hand wash it carefully in cool water with mild soap. Avoid machine washing, as it can distort the spiral shape.
Drying correctly is also important. Lay your spinner flat on a towel and reshape it while it’s damp. Let it air dry completely before rehanging. Avoid direct sunlight for long periods, as it may fade your yarn’s colors over time.
If your spinner starts to lose its firmness, apply a light coating of starch spray or fabric stiffener. Pin it in its spiral shape and let it dry flat. This will restore the structure and crisp edges that make the spinner so appealing.
When storing after the holidays, keep your crochet decorations flat or loosely rolled in a tissue-lined box. Avoid placing heavy items on top, as this could crush the spirals and cause creases.
If you used metallic yarn or embellishments, wrap them separately in acid-free tissue to prevent tarnishing or tangling. With these precautions, your Christmas Wind Spinner Crochet will remain as bright and festive as when you first made it.
Finally, each year before hanging your spinners again, inspect them for loose threads or stretched loops. Small repairs, like tightening stitches or resecuring beads, can easily extend the life of your beautiful crochet work.
FAQ – Christmas Wind Spinner Crochet – Pattern
Q: Is the Christmas Wind Spinner Crochet – Pattern suitable for beginners?
Yes! It’s a simple and repetitive pattern that mainly uses basic stitches like chain and double crochet. Even beginners can achieve stunning results with minimal practice.
Q: How long does it take to make one wind spinner?
Depending on size and complexity, a Christmas Wind Spinner Crochet can be completed in one to two hours, making it a quick and satisfying project.
Q: What yarn works best for this pattern?
Cotton or acrylic yarns are ideal. Cotton gives a crisp shape, while acrylic adds softness. Metallic or glitter yarns can add festive sparkle.
Q: Can I make this pattern in different sizes?
Absolutely. Adjust the length of your starting chain and the number of increases to create smaller or larger spinners.
Q: How do I make my spinner more rigid?
Use fabric stiffener or starch spray after crocheting. Pin your spinner in shape, let it dry, and it will hold its spiral form beautifully.
Q: Can I use the spinner outdoors?
Yes, but it’s best to use durable, weather-resistant yarns like acrylic and bring them indoors during heavy rain or snow.
Conclusion
The Christmas Wind Spinner Crochet – Pattern is a delightful way to combine creativity, craftsmanship, and holiday cheer. It’s an easy, customizable project that turns simple yarn into a stunning festive decoration. With just a few materials and a bit of imagination, you can create pieces that brighten your home and make your holiday celebrations even more magical.
We hope this guide helped you understand how to make and care for your crochet wind spinner. If you try this project, please share your honest opinion and suggestions—we’d love to hear your ideas and see how you personalize your creations. Happy crocheting, and Merry Christmas!