If you’re looking for a creative and practical sewing project, the Apple and Pear Pin Cushions – Pattern is the perfect choice. These adorable fruit-shaped pin cushions are not only fun to make but also extremely useful for keeping your sewing pins and needles organized. Whether you’re a beginner looking for a small, manageable project or an experienced sewer wanting a quick, satisfying craft, these cute apple and pear designs will brighten up your sewing space and make your creative time even more enjoyable.
The charm of this Apple and Pear Pin Cushions – Pattern lies in its simplicity and versatility. You can make them in different sizes, colors, and fabrics, using materials you already have at home. They also make wonderful handmade gifts for friends who love sewing or crafting. By combining function and creativity, these pin cushions add a delightful touch of personality to any workspace.
In this article, you’ll learn step by step how to make your own Apple and Pear Pin Cushions – Pattern, along with tips for customization, materials, and presentation ideas. Let’s explore how to turn a few scraps of fabric into adorable, fruit-shaped sewing accessories.
1. Materials and Tools for the Apple and Pear Pin Cushions – Pattern
To create your own Apple and Pear Pin Cushions – Pattern, you’ll need just a few basic sewing supplies and materials. Most of these items can be found easily at home or in any fabric store.
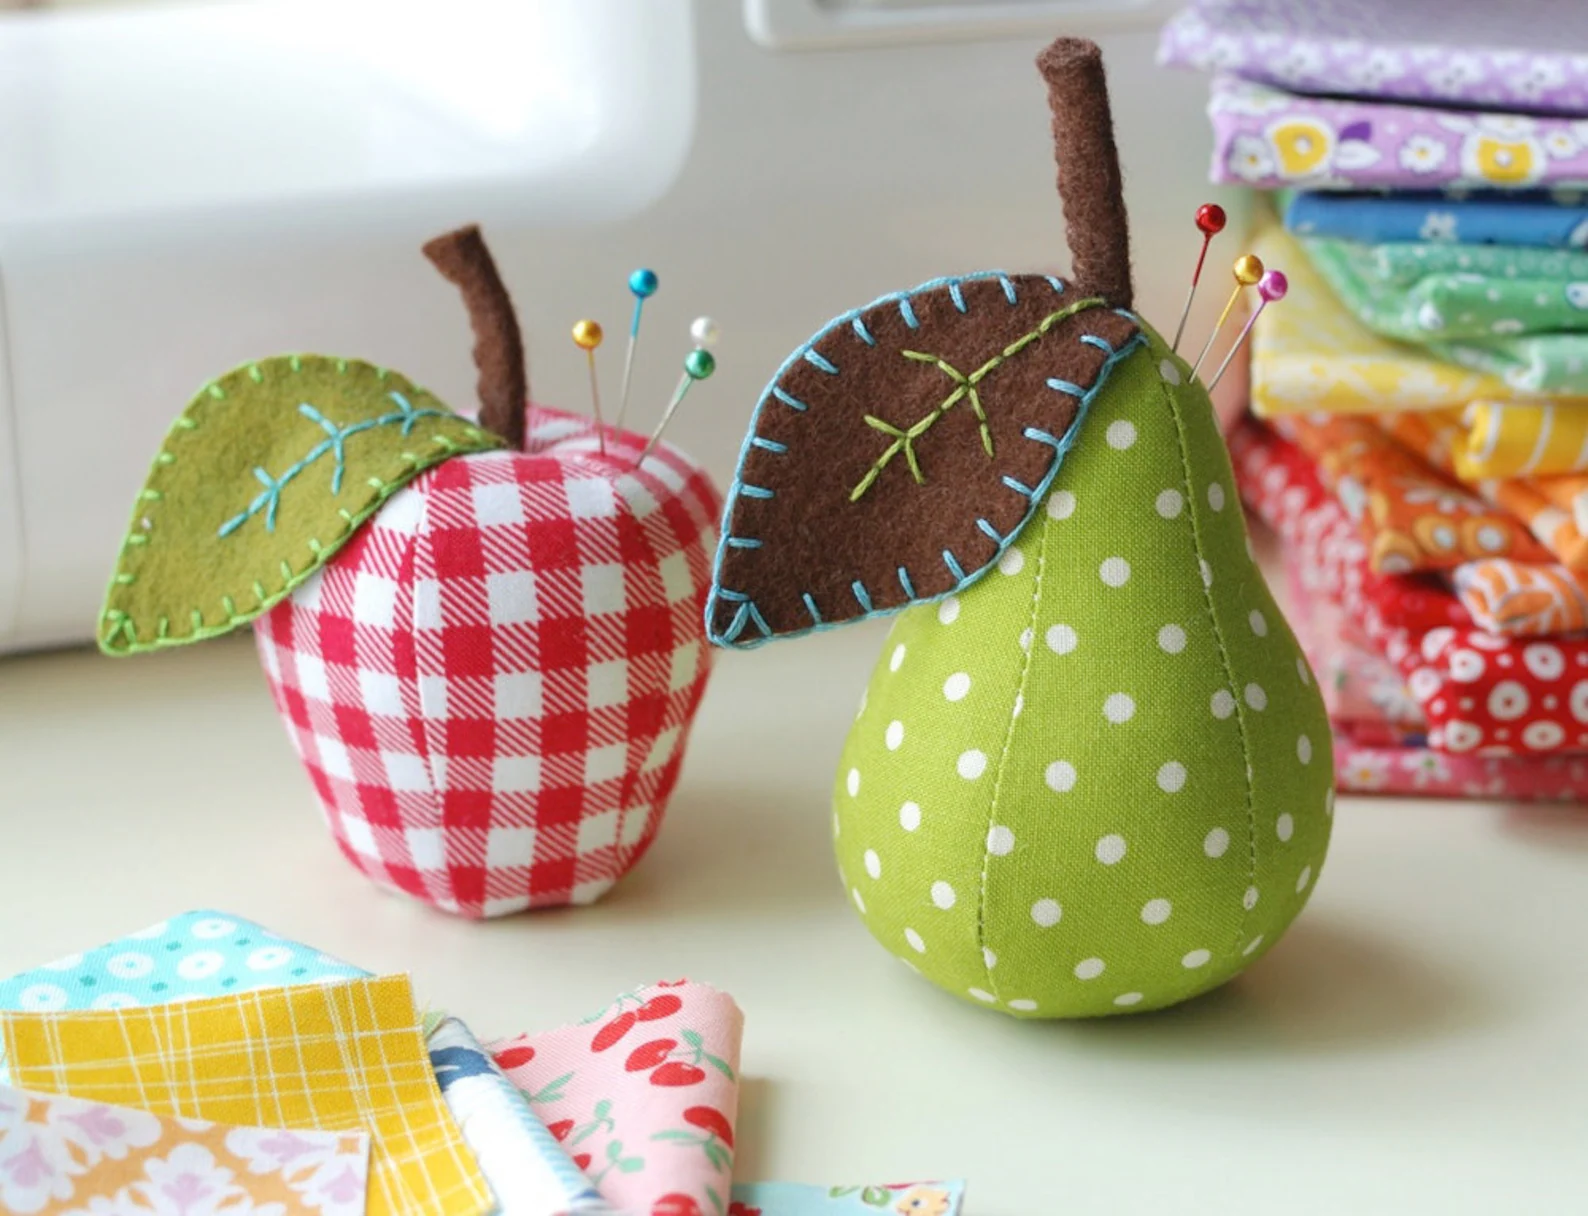
Start by gathering cotton fabric for the body of your pin cushions. Cotton works well because it’s durable, easy to sew, and holds its shape beautifully. You can use solid colors, small prints, or even leftover fabric from previous projects. For the apple, shades of red, pink, or green look charming, while for the pear, try light green, yellow, or even soft brown tones.
Next, you’ll need some stuffing material. Polyester fiberfill is ideal for creating a soft, plump cushion that can hold pins securely. If you prefer a firmer texture, you can add a bit of crushed walnut shells or emery sand inside. These help keep your needles sharp and your cushion stable.
You’ll also need felt for the leaves and a small piece of brown or green fabric (or a short stick) for the stem. Felt adds a nice texture contrast and doesn’t fray, making it easy to cut and shape. A needle, thread, scissors, fabric marker, and sewing pins will complete your basic toolkit.
If you want to make your Apple and Pear Pin Cushions – Pattern extra decorative, consider adding small embellishments like embroidery, buttons, or fabric paint. These can give each piece its own personality and charm.
Finally, it’s a good idea to print or draw the apple and pear templates before cutting your fabric. You can find free printable patterns online or sketch your own using a simple round shape for the apple and a slightly elongated one for the pear.
2. Step-by-Step Guide to Sewing the Apple and Pear Pin Cushions
Now that you have all your materials ready, it’s time to start sewing your Apple and Pear Pin Cushions – Pattern. This process is simple and enjoyable, even for those new to sewing.
Begin by cutting out your apple and pear shapes using your template. You’ll need two identical pieces of fabric for each fruit—one for the front and one for the back. Make sure to cut carefully so both pieces align perfectly when sewn together.
Place the two pieces right sides facing each other, and pin them in place. Using a small seam allowance (around ¼ inch), sew around the edge, leaving a small opening at the bottom for turning and stuffing. If you’re using a sewing machine, go slowly around the curves to keep your stitches neat. For hand sewing, a backstitch will provide a strong, secure seam.
After sewing, trim any excess fabric from the seams, especially around curved areas. This will help your cushion maintain a smooth, rounded shape when turned. Turn the piece right side out carefully through the opening, using a blunt tool like a chopstick or pencil to push out the edges fully.
Next, stuff the pin cushion with your chosen filling. Begin with small amounts and distribute evenly, pushing the stuffing into all corners to avoid lumps. The firmer you stuff it, the better it will hold your pins. Once it’s filled to your liking, hand-stitch the opening closed with a ladder stitch or invisible stitch.
Now it’s time to add the final touches. Cut a small felt leaf and attach it to the top of the cushion using a few hand stitches. For the stem, you can use a piece of felt rolled into a cylinder, a fabric scrap, or even a short twig from your garden for a rustic touch. Secure it firmly in place, and your adorable Apple and Pear Pin Cushions – Pattern are complete!
These handmade pieces are functional, durable, and add a charming touch of personality to any sewing space.
3. Creative Customization Ideas for Your Pin Cushions
One of the most enjoyable parts of making the Apple and Pear Pin Cushions – Pattern is the opportunity to personalize them in countless ways. You can experiment with colors, textures, and small details to make each one unique.
Start by playing with fabric choices. Instead of traditional cotton, try using linen, denim, or patterned quilting fabric. Each texture gives your pin cushions a different look and feel. You can even mix and match fabrics to create a patchwork-style fruit design for a more creative twist.
For an elegant touch, add embroidery details. Stitch small seeds, hearts, or initials onto the surface of your apple or pear. This makes your pin cushions not only practical but also beautiful enough to display as decorative items.
If you enjoy handcrafting with felt, you can add additional leaves, flowers, or vines around the top for a more whimsical appearance. For a realistic finish, try using variegated thread to create shading and depth on your embroidered details.
You can also turn these pin cushions into small gift sets. Make a few in different colors, arrange them in a basket, and wrap them in clear cellophane with a ribbon. They make delightful handmade gifts for sewing enthusiasts, teachers, or craft fair visitors.
Another fun idea is to attach a small magnet to the bottom of the cushion. This helps hold your metal pins securely and prevents them from scattering while you work. It’s a simple modification that adds a touch of practicality.
Lastly, consider making a mini version of the Apple and Pear Pin Cushions – Pattern that can be worn as a wrist pin cushion. Attach a fabric strap or elastic band to the bottom, and you’ll have a cute and convenient tool for all your sewing sessions.
4. Caring for and Displaying Your Apple and Pear Pin Cushions
Once your Apple and Pear Pin Cushions – Pattern is complete, you’ll want to keep them looking as cute and fresh as possible. Proper care and storage will ensure they remain functional and decorative for years to come.
To clean your pin cushions, gently spot-clean them with a damp cloth. Avoid soaking them in water, as moisture can affect the stuffing and cause mold or odors. If they become dusty, a lint roller or soft brush works perfectly to remove small particles from the surface.
If your cushions lose their shape over time, you can open a small section, add more stuffing, and re-stitch the seam. This quick fix restores their plump appearance and firmness.
For display, place your apple and pear pin cushions on your sewing table, window sill, or shelf. Their bright colors and cute shapes make them eye-catching décor pieces. You can also group them with other fruit-themed crafts or sewing notions to create a fun, themed workspace.
If you’re participating in craft fairs or online selling, these pin cushions make excellent handmade products. Their low material cost and high aesthetic appeal make them a favorite among handmade market shoppers. Consider packaging them with small sewing kits or matching fabric pieces to enhance their value.
To protect your Apple and Pear Pin Cushions – Pattern from fading, avoid direct sunlight exposure. Store them in a cool, dry place when not in use. Regularly checking for loose stitches or worn edges will also help maintain their quality and appearance.
With a little care, your handcrafted apple and pear pin cushions will remain both functional and beautiful, showcasing your creativity every time you sew.
FAQ – Apple and Pear Pin Cushions – Pattern
1. Is this project suitable for beginners?
Yes! The Apple and Pear Pin Cushions – Pattern is ideal for beginners because it involves simple cutting and sewing techniques.
2. What fabrics are best for making these pin cushions?
Cotton, linen, or quilting fabrics work best because they are easy to handle and hold their shape well.
3. Can I use different fillings?
Yes, you can use polyester fiberfill, crushed walnut shells, or even rice for a firmer feel.
4. How long does it take to make one pin cushion?
On average, it takes about 30–60 minutes to complete one, depending on your sewing speed and embellishments.
5. Are these pin cushions washable?
Spot-cleaning is recommended. Avoid machine washing to maintain their shape and texture.
Conclusion
The Apple and Pear Pin Cushions – Pattern is a delightful sewing project that combines creativity, function, and charm. From choosing fabrics to stitching the final details, every step offers an opportunity to express your personal style while creating something practical for your craft space.
These pin cushions not only serve as useful tools but also as adorable decorative accents. They’re easy to make, customizable, and perfect for gifting to fellow sewing lovers.
We hope this guide inspired you to try making your own Apple and Pear Pin Cushions – Pattern. Don’t forget to share your thoughts, honest opinions, and creative suggestions in the comments below — your feedback helps inspire other crafters to start stitching too!