The Angel Crochet – Pattern is one of the most enchanting and meaningful crochet projects for crafters of all skill levels. This delicate design captures the beauty and symbolism of angels—representing peace, protection, and light—through the intricate art of crochet. Whether you’re making it as a gift, a holiday decoration, or a personal keepsake, the Angel Crochet – Pattern offers a creative and heartfelt way to express your artistic side.
Creating your own Angel Crochet – Pattern is not only relaxing but also deeply rewarding. The design allows for endless customization in yarn type, size, and embellishments. From elegant lace angels to cute miniature ornaments, this project can be adapted for many occasions. Crocheting an angel is also a meaningful gesture—it can symbolize comfort, love, and hope, making it an ideal handmade item to share with others.
In this article, you’ll learn everything you need to know about the Angel Crochet – Pattern, including materials, techniques, styling ideas, and essential tips for perfecting your work. Whether you’re a beginner or an advanced crocheter, this comprehensive guide will help you craft a timeless piece that radiates elegance and serenity.
1. Materials and Tools Needed for the Angel Crochet – Pattern
Starting your Angel Crochet – Pattern begins with choosing the right materials and tools. The beauty of crochet is that even with simple supplies, you can create something extraordinary. Selecting high-quality materials will make your finished angel more durable and visually appealing.
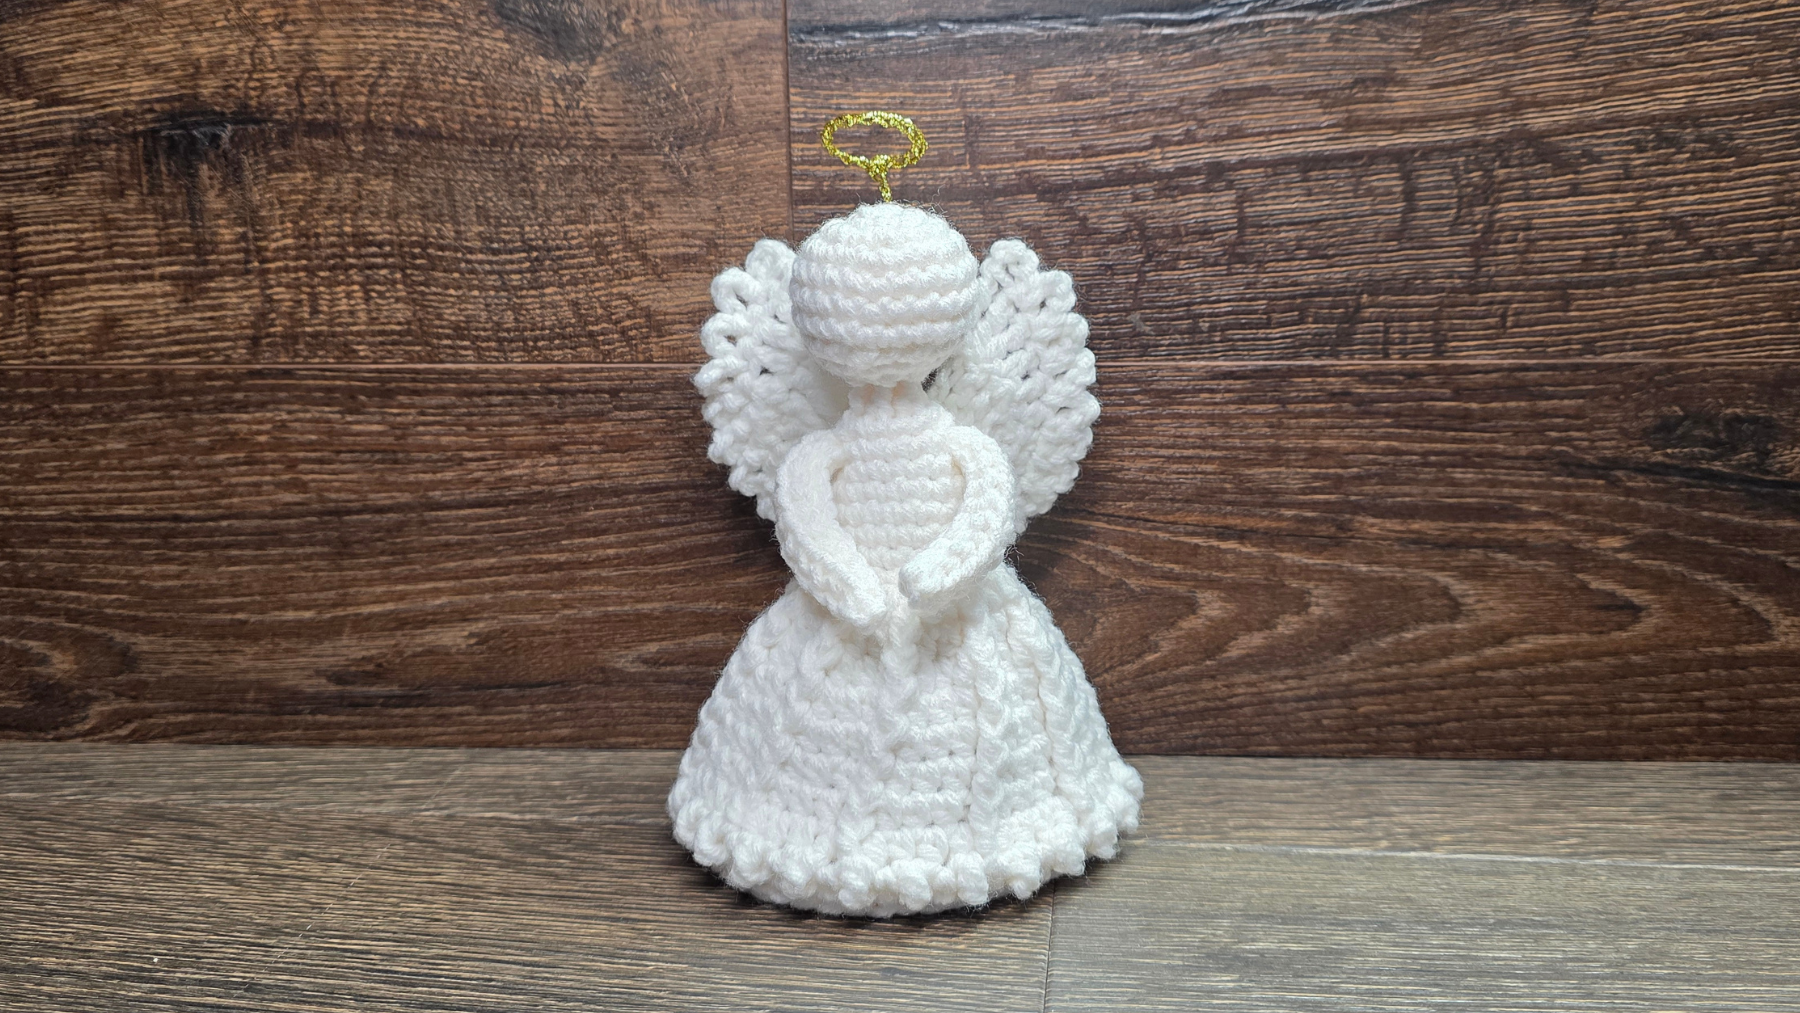
The best yarns for angel crochet are light and soft. Cotton, lace thread, or fine acrylic yarns are popular choices because they create a delicate and airy texture. For a classic angel look, opt for white, cream, or soft pastel shades. If you want a festive touch, metallic or shimmering yarns can add a celestial glow to your project.
A small crochet hook, usually between 1.5 mm and 3.5 mm, works best for intricate angel designs. Using a smaller hook gives you tighter stitches, which helps define details like wings and robes. Make sure your hook size matches your yarn weight to ensure your angel holds its shape.
Other tools you’ll need include scissors, a yarn needle, and optional items like beads or ribbons for decoration. Beads can enhance the angel’s halo or wings, while ribbons can be used to hang your finished piece. These small touches give your Angel Crochet – Pattern a personalized and elegant appearance.
Don’t forget about starch or fabric stiffener if you plan to make a standing angel. Applying a light coat helps your crochet angel maintain its shape, especially for display purposes. This step adds a professional finish to your handmade creation.
Lastly, it’s helpful to have a blocking mat and pins. Blocking your Angel Crochet – Pattern ensures symmetry, crisp edges, and even stitch definition—key elements for achieving a refined final product.
2. Step-by-Step Process for Making the Angel Crochet – Pattern
Crafting an Angel Crochet – Pattern involves creating various sections such as the body, wings, head, and halo, then assembling them into one graceful piece. Taking your time with each part will help you achieve a balanced and detailed angel.
Begin with the body of the angel. Most patterns start with a magic ring or chain base, working in rounds to form the skirt or robe. The skirt is often the centerpiece, designed with lace or shell stitches to mimic flowing fabric. Maintaining even tension ensures that your angel’s robe drapes naturally.
Next, create the wings. The wings are what make the Angel Crochet – Pattern truly special. You can design them with fan stitches, picots, or openwork patterns to create a feathery effect. Some crocheters prefer symmetrical wings, while others experiment with asymmetrical or layered styles for a dynamic appearance.
After finishing the wings, move on to the head and halo. The head can be a small crocheted sphere, often attached seamlessly to the body. The halo is typically made with golden or silver yarn, formed with simple chain stitches and secured above the head. This detail gives your angel its signature celestial charm.
Once all parts are ready, carefully assemble them. Use a yarn needle and matching thread to attach each section securely. For standing angels, insert a cone or lightweight filling inside the skirt for stability. Hanging angels can be completed with a loop or ribbon attached to the top.
Finish by blocking and stiffening your Angel Crochet – Pattern. Let it dry completely before displaying. This final step enhances the definition of your stitches and ensures your angel maintains its beautiful shape.
3. Creative Uses and Display Ideas for the Angel Crochet – Pattern
One of the most exciting aspects of making an Angel Crochet – Pattern is discovering all the ways you can use and display your finished creation. From home décor to meaningful gifts, crocheted angels bring warmth and elegance wherever they appear.
For Christmas decorations, the Angel Crochet – Pattern is a timeless favorite. You can hang small angels on your Christmas tree or use larger ones as centerpieces for your holiday table. Their soft, handcrafted charm perfectly complements festive lights and ornaments.
Crochet angels also make thoughtful gifts. Giving someone a handmade angel can symbolize love, guidance, or remembrance. They are especially meaningful for occasions like baptisms, weddings, or memorials. Adding a personalized note makes the gift even more special.
If you enjoy home décor, your Angel Crochet – Pattern can be displayed year-round. Place one on a mantel, bookshelf, or windowsill as a symbol of peace and protection. Using soft pastel colors can match any interior style, from modern minimalist to vintage.
Crafters who sell handmade items will find that Angel Crochet – Pattern projects are popular at craft fairs and online shops. Many people seek unique, handmade gifts that carry emotional significance, and crochet angels fit perfectly into this category. Be sure to photograph your creations beautifully for listings or social media promotion.
You can also turn the Angel Crochet – Pattern into accessories like brooches, keychains, or bookmarks. Miniature versions of the design make versatile items that are easy to gift or sell. With creativity, this simple pattern can open endless opportunities.
4. Helpful Tips for Perfecting Your Angel Crochet – Pattern
Every crocheter knows that small adjustments can make a big difference in the final look of a project. Here are essential tips to ensure your Angel Crochet – Pattern turns out beautifully every time.
First, practice your tension before starting the final project. Consistent tension is key to achieving even stitches and a balanced shape, especially for delicate designs like angel wings or halos. Uneven tension can distort the angel’s proportions.
Second, always read through your entire pattern before you begin. Understanding the sequence helps you avoid mistakes and identify any special stitches or abbreviations. If you’re following a chart, highlight key sections for easier reference.
Third, experiment with different yarn types and colors. While traditional angels are white, using soft gold, silver, or even pastel hues can create a fresh and modern look. Metallic threads add shimmer and elevate your Angel Crochet – Pattern for festive occasions.
Fourth, take care when joining parts. Use invisible or slip-stitch techniques to keep seams neat. A well-assembled crochet angel looks professional and polished. Pay special attention to symmetry when attaching wings and halos.
Fifth, block your finished work properly. Use pins to shape your angel while it dries, ensuring the wings and skirt remain open and defined. Blocking not only improves the final appearance but also gives your angel a lightweight, ethereal quality.
Finally, have patience and enjoy the process. Crocheting is as much about relaxation as it is about creating something beautiful. Every Angel Crochet – Pattern you make tells a story of your creativity and care.
FAQ About the Angel Crochet – Pattern
Q1: Is the Angel Crochet – Pattern beginner-friendly?
Yes. Many simple patterns are perfect for beginners and use only basic stitches. As you gain confidence, you can explore more advanced designs.
Q2: What is the best yarn for making crochet angels?
Lightweight cotton or lace yarn works best for detailed patterns, while metallic or shimmer yarns are great for festive looks.
Q3: How long does it take to complete an angel crochet project?
Depending on size and detail, a small angel may take 2–4 hours, while larger decorative angels can take a few days.
Q4: Can I sell crochet angels I make?
Absolutely. Handmade angels are popular items in craft markets and online shops. Be sure to credit the pattern designer if required.
Q5: How do I make my crochet angel stand upright?
Use starch or a light stiffener and let it dry over a cone or mold. This helps the angel keep its form beautifully.
Q6: Can I customize my Angel Crochet – Pattern?
Yes! You can experiment with colors, yarn textures, and decorations like beads or ribbons to make each angel unique.
Conclusion
The Angel Crochet – Pattern is more than just a craft—it’s a creative expression of peace, beauty, and hope. From choosing your materials to adding final touches, every step offers an opportunity to infuse your own personality and love into the piece. Whether you make it for yourself, as a gift, or for sale, this crochet project will always hold meaning and elegance.
We hope this guide has inspired you to start your own Angel Crochet – Pattern today. Share your honest thoughts and suggestions below—we’d love to hear how your project turned out and what creative ideas you added to make your angel truly one of a kind!