The Fish Crochet – Pattern is a delightful project that allows crafters to combine creativity, color, and technique to make something both fun and decorative. Whether you want to make a toy for children, a hanging ornament, or an addition to a sea-themed décor, this crochet project offers endless possibilities. With just a few materials and a bit of imagination, you can bring to life charming little fish in various shapes, sizes, and colors.
Crocheting fish is an excellent way for beginners to practice different stitches while exploring new techniques like shaping, color changes, and small details such as fins and tails. The Fish Crochet – Pattern also provides an opportunity to use leftover yarns, making it an eco-friendly project that reduces waste. You can craft entire schools of colorful fish in an afternoon, each one unique and full of character.
This article will guide you through everything you need to know to create your own Fish Crochet – Pattern, including materials, step-by-step instructions, customization ideas, and practical tips. Whether you’re a beginner or an experienced crocheter, you’ll find inspiration and guidance to create the perfect fish design for your next project.
1. Materials and Tools for the Fish Crochet – Pattern
Before you begin your Fish Crochet – Pattern, it’s important to prepare all the necessary materials and tools to ensure your work goes smoothly. Having the right supplies will not only make your fish more durable but also enhance its final appearance.
The most commonly used yarn for crocheting fish is cotton yarn because it provides excellent stitch definition and structure. Acrylic yarn is also a great option, especially if you want to make soft and colorful fish toys. You can mix and match yarns to create multicolored designs that mimic tropical fish patterns.
Choose a crochet hook that matches your yarn’s weight. For small fish, a 2.5 mm or 3 mm hook works well, while larger designs might require a 4 mm hook. A smaller hook will give tighter stitches, helping the fish maintain its shape.
Other essential tools include a yarn needle for sewing parts together, scissors for trimming ends, and stitch markers to help you keep track of your rounds. If you plan to make stuffed fish, have some fiberfill or cotton stuffing ready. For decorative or keychain fish, you may skip stuffing and keep them flat.
Optional embellishments like safety eyes, beads, or embroidery thread can add personality to your fish. If you prefer a more handmade touch, you can embroider the eyes directly onto the body using black yarn. For safety reasons, embroidered or felt eyes are better for fish intended for young children.
Finally, prepare a comfortable workspace with good lighting. Crocheting small details like fins and tails requires precision, and proper lighting helps you see every stitch clearly. With everything ready, you’re set to dive into your Fish Crochet – Pattern journey.
2. Step-by-Step Instructions for Making the Fish Crochet – Pattern
Creating the Fish Crochet – Pattern is simple and enjoyable. The fish is usually made in several parts: the body, fins, and tail, which are later assembled to form the complete figure. You can follow the basic pattern below and adjust it according to your creativity.
Start with the body. Make a magic ring and work single crochet stitches in the round, increasing evenly to form an oval or circular base. Continue working without increasing for several rounds to build the fish’s body length. Depending on the look you want, you can make the body slightly elongated or rounder.
Next, begin decreasing gradually to close the back of the fish. Leave a small opening if you plan to add stuffing. Once filled, finish closing the body by stitching the last few stitches together. This will create a firm and smooth shape for your fish.
For the tail, crochet a triangle or fan shape using double crochet stitches. You can make the tail more decorative by adding picot stitches around the edges or alternating colors for a striped effect. Attach the tail securely to the back of the body using a yarn needle.
Then, create the fins. Crochet two small triangle or oval shapes for the side fins and one for the top. Attach them symmetrically along the body. The fins give your Fish Crochet – Pattern a realistic and playful appearance.
Finally, add details such as eyes, mouth, and scales. You can embroider the eyes with black yarn or attach safety eyes. Use contrasting yarn to create decorative lines or patterns on the body. Once complete, weave in all loose ends carefully, and your crocheted fish is ready to swim into your collection.
3. Creative Variations and Design Ideas for the Fish Crochet – Pattern
One of the most enjoyable aspects of the Fish Crochet – Pattern is the ability to customize it to reflect your personality or theme. With just a few creative tweaks, you can design fish that look whimsical, elegant, or even realistic.
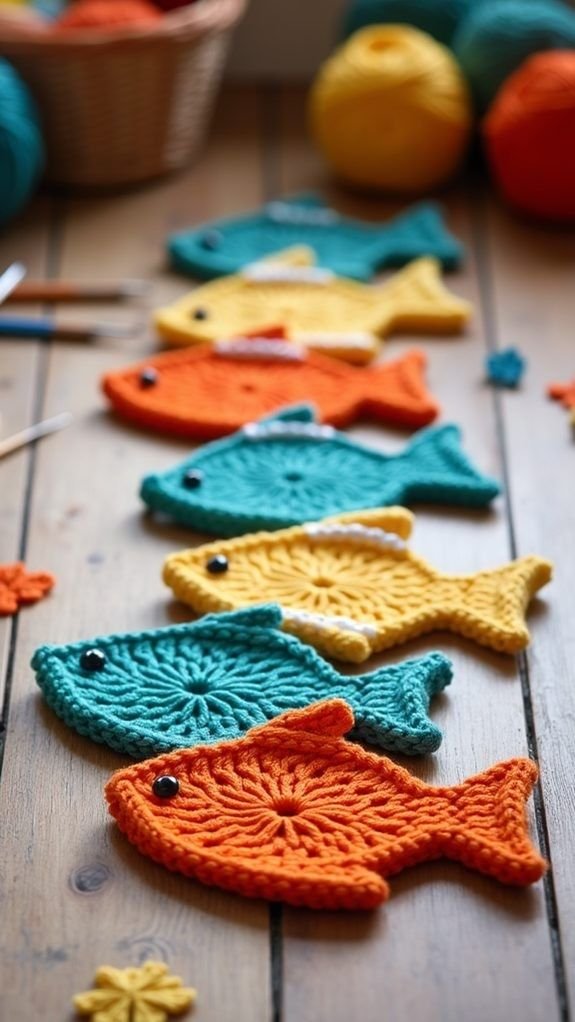
For a tropical touch, use bright colors like yellow, blue, orange, and green. Alternate stripes or use variegated yarn to create vibrant fish that resemble real-life species such as clownfish or angelfish. If you prefer a minimalist style, choose monochromatic colors or pastel tones for a softer look.
You can also experiment with textures. Using different stitch types, such as puff or bobble stitches, can simulate scales and add depth to your design. Mixing smooth and textured yarns creates interesting contrasts that make each fish unique.
Another creative idea is to turn your Fish Crochet – Pattern into functional items. For example, flat fish designs can be used as coasters, appliqués, or keychains. Larger stuffed fish can become toys, pillows, or baby nursery decorations. Add a loop or magnet to the back for easy hanging or display.
If you enjoy themed projects, you can create an entire underwater collection. Combine your crocheted fish with other sea creatures like turtles, seahorses, and starfish. Display them together in a crochet “aquarium” or use them to decorate children’s rooms.
Personalization is key. You can embroider initials, attach beads for sparkle, or crochet tiny bubbles around your fish. The possibilities are endless, and each Fish Crochet – Pattern you make can tell a story of its own.
4. Tips and Tricks for Perfecting the Fish Crochet – Pattern
Although the Fish Crochet – Pattern is easy to follow, a few professional tips can help you achieve a polished and durable result. Paying attention to detail and technique will make your finished fish look cleaner and more professional.
First, keep your stitches tight and consistent, especially when making small pieces like fins. Loose stitches can cause stuffing to show through or parts to lose shape over time. If needed, use a slightly smaller hook for better control.
Second, always stuff your fish lightly. Too much filling can stretch the stitches, while too little can make the body sag. Use small amounts of fiberfill at a time to achieve a balanced shape.
Third, block your crochet pieces before assembling them. Lightly steaming or dampening the parts helps them hold their shape and makes it easier to sew them evenly.
Fourth, plan your color changes carefully. When crocheting stripes or patterns, carry the yarn neatly inside your work to avoid bulky edges. You can also weave in the yarn ends as you go to save time later.
Fifth, if you want to hang or display your fish, crochet a small loop at the top of its back. This makes it easy to turn your Fish Crochet – Pattern into an ornament or decoration.
Lastly, have fun with it! Crocheting should be a relaxing and creative experience. Don’t worry if your first fish isn’t perfect—the more you practice, the more skilled and confident you’ll become.
FAQ About the Fish Crochet – Pattern
Q1: Is the Fish Crochet – Pattern suitable for beginners?
Yes! It’s a beginner-friendly project that uses simple stitches and basic shaping techniques.
Q2: What type of yarn works best for crocheting fish?
Cotton yarn is ideal for structure, while acrylic yarn offers softness and color variety.
Q3: Can I make the fish larger or smaller?
Absolutely. Adjust the hook size and number of stitches to scale your fish up or down.
Q4: How can I make my fish look more realistic?
Use multiple shades of the same color for depth and add textured stitches for scale effects.
Q5: Are these fish safe for children?
Yes, as long as you use child-safe materials. Avoid small detachable pieces like beads for young kids.
Q6: Can I sell items made from this pattern?
Definitely! Handmade fish are popular for gifts, markets, and online stores—just credit the pattern designer if required.
Conclusion
The Fish Crochet – Pattern is a charming and creative project that combines simplicity with endless customization. It’s perfect for using leftover yarn, exploring color combinations, and practicing your crochet skills. From playful decorations to thoughtful handmade gifts, these little fish can brighten any space or occasion.
We hope this guide has inspired you to create your own Fish Crochet – Pattern and explore new design ideas. Share your honest opinions and suggestions below—we’d love to hear about your favorite colors, techniques, and creative twists. Dive into this fun crochet adventure and let your imagination swim free!