Creating an Amigurumi Santa Claus – Pattern is one of the most heartwarming and festive crochet projects you can make. This charming handmade Santa is the perfect decoration for the holiday season and makes a delightful gift for friends and family. Whether you are a beginner or an experienced crocheter, making an Amigurumi Santa Claus – Pattern brings joy and creativity to your Christmas crafting.
The beauty of this pattern lies in its simplicity and versatility. With just a few basic crochet stitches, you can bring Santa to life, complete with his red suit, white beard, and cheerful smile. The process of crocheting each part and assembling them together creates not just a decoration, but a keepsake filled with holiday spirit.
In this complete guide, you will learn how to create your own Amigurumi Santa Claus – Pattern step by step. We will go over the materials needed, the crochet techniques involved, tips for assembly, and creative ideas for customizing your Santa. By the end, you’ll have a jolly and adorable Amigurumi Santa ready to brighten up your home for Christmas.
1. Materials Needed for an Amigurumi Santa Claus – Pattern
Before starting your Amigurumi Santa Claus – Pattern, it’s important to gather all the right materials. Having the correct supplies ensures your project comes together easily and beautifully.
First, choose the right yarn. Cotton or acrylic yarn works best for amigurumi because it holds shape well and is comfortable to work with. For Santa, you’ll need red, white, black, beige, and a small amount of pink for the details on his face.
Next, select your crochet hook. The ideal hook size depends on your yarn, but a 2.5 mm to 3.5 mm hook is commonly used for amigurumi. A smaller hook creates tighter stitches, ensuring that your stuffing does not show through.
You will also need fiberfill stuffing to give your Santa Claus his rounded, cuddly shape. Use soft polyester filling that’s easy to shape and holds its form well inside your amigurumi.
Other essentials include safety eyes or small black beads for the eyes, a tapestry needle for sewing parts together, and scissors for trimming yarn ends. You can also use pink embroidery thread for adding rosy cheeks.
Lastly, consider using stitch markers to help you track your rounds, as amigurumi is typically worked in continuous spirals. Once you have all these materials ready, you’re set to begin your festive crochet project.
2. Step-by-Step Instructions for the Amigurumi Santa Claus – Pattern
Creating the Amigurumi Santa Claus – Pattern is done by crocheting different parts separately and then assembling them. Let’s go through the process step by step.
Start with the head. Using beige yarn, begin with a magic ring and work in single crochet stitches. Gradually increase the rounds to form a sphere shape. Once it reaches the desired size, insert the safety eyes and lightly stuff the head with fiberfill before closing.
Next, make the body using red yarn. Begin with a magic ring again and increase the stitches to create a rounded base. After a few rounds, switch to white yarn to create the trim of Santa’s coat, then continue with red for the upper body. Stuff it firmly but not too tightly.
For the arms and legs, use red yarn for the clothing and white yarn for the cuffs and boots. Crochet each limb separately and stuff them before attaching them to the body.
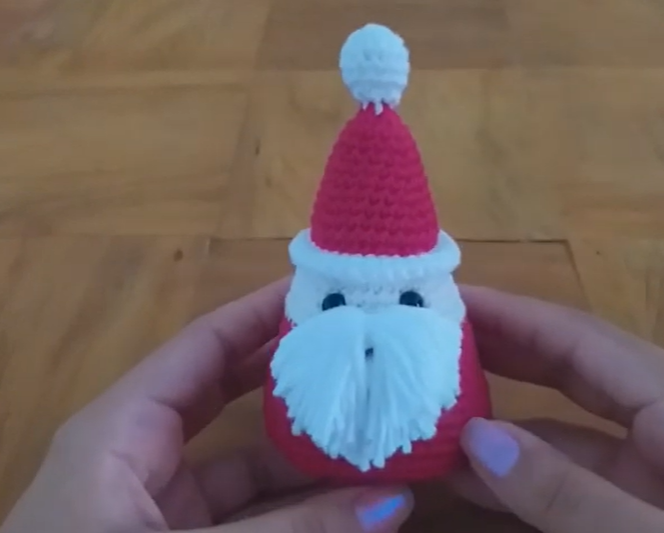
The hat is one of the most iconic parts of the Amigurumi Santa Claus – Pattern. Use red yarn to make a cone shape, finishing with a white trim and a fluffy pom-pom at the top. You can crochet the pom-pom or use a small white yarn ball for an authentic touch.
Now, create Santa’s beard and mustache using white yarn. You can either crochet small curls or simply use strands of yarn attached to the face and trimmed to shape. This detail brings your Santa to life, adding warmth and personality.
Finally, assemble all the parts together. Use a tapestry needle to sew the arms, legs, head, and hat onto the body securely. Adjust the stuffing if needed, and add final details like a belt made of black yarn or a small gold buckle for an extra festive touch.
3. Creative Ideas for Your Amigurumi Santa Claus – Pattern
Once you’ve completed your Amigurumi Santa Claus – Pattern, there are many creative ways to use and display it. These handmade figures make beautiful decorations and thoughtful gifts during the holiday season.
One popular idea is to use your amigurumi Santa as a Christmas ornament. Simply attach a small loop of yarn to the top of his hat, and he’s ready to hang on your tree.
Another option is to make a set of Santas in different sizes. Use various yarn thicknesses and hook sizes to create a charming family of Santas for your mantelpiece or tabletop.
You can also pair your Santa with other amigurumi characters, such as a reindeer, snowman, or elf, to create a complete Christmas scene. This makes for a lovely centerpiece or holiday display.
If you love gift-giving, your Amigurumi Santa Claus – Pattern can be turned into a thoughtful handmade present. Wrap it nicely with a tag and a personalized message—handcrafted gifts always hold special meaning.
For crafters who sell their creations, amigurumi Santas are popular items at holiday markets. They’re festive, charming, and appeal to both adults and children alike.
Lastly, you can use your amigurumi Santa as holiday décor. Place him on shelves, in stockings, or even under the Christmas tree to add warmth and personality to your decorations.
4. Tips for Perfecting Your Amigurumi Santa Claus – Pattern
Even though the Amigurumi Santa Claus – Pattern is beginner-friendly, a few tips can help make your creation look even more professional and polished.
First, always maintain consistent tension while crocheting. Tight, even stitches prevent stuffing from showing through and help your Santa maintain his shape.
Second, when switching yarn colors, make sure to change colors neatly at the end of a round to avoid visible joins. Weaving in yarn ends properly will give your amigurumi a smooth, seamless finish.
Third, stuff each piece gradually and shape it as you go. Too much stuffing can distort your Santa’s proportions, while too little can make it look flat.
Fourth, practice facial embroidery for the details. A gentle smile and well-placed cheeks can give your Santa Claus a friendly, joyful look.
Fifth, take your time sewing the pieces together. Proper assembly is crucial for balance and durability. Use strong yarn and tight stitches to ensure your Santa lasts for many holiday seasons.
Lastly, don’t hesitate to customize your Amigurumi Santa Claus – Pattern. Try different beard styles, change the hat color, or add tiny accessories like a gift sack or candy cane to make it unique.
FAQ About Amigurumi Santa Claus – Pattern
1. Is the Amigurumi Santa Claus – Pattern suitable for beginners?
Yes! This pattern uses basic stitches like single crochet and magic ring, making it perfect for beginners who want to create festive crochet figures.
2. What yarn is best for amigurumi projects?
Cotton or acrylic yarn is best because it holds its shape and offers vibrant colors. Both are easy to work with and washable.
3. How long does it take to make an Amigurumi Santa Claus?
Depending on your skill level, it can take between 4 to 8 hours to complete one Santa Claus.
4. Can I sell my finished Amigurumi Santa Claus?
Yes, you can sell your handmade creations. Just ensure you credit the pattern’s designer if you’re following a specific one.
5. Can I make different versions of the Santa pattern?
Absolutely! You can change yarn colors, add accessories, or create themed Santas, like a vintage-style or mini Santa for ornaments.
6. How do I clean my Amigurumi Santa Claus?
Hand wash it gently in cold water with mild detergent and let it air dry to maintain its shape.
Conclusion
Creating an Amigurumi Santa Claus – Pattern is a fun and rewarding project that captures the spirit of Christmas. You’ve learned how to gather materials, crochet each part step by step, explore creative uses, and apply helpful tips for perfection. With time and practice, your handmade Santa will become a cherished holiday keepsake.
Now it’s your turn! Try making your own Amigurumi Santa Claus and share your results. Leave your honest opinion and suggestions below — your feedback helps inspire others and improve future guides. Merry crocheting and happy holidays!