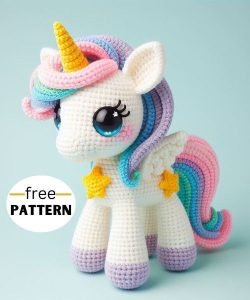
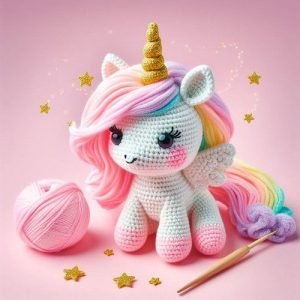
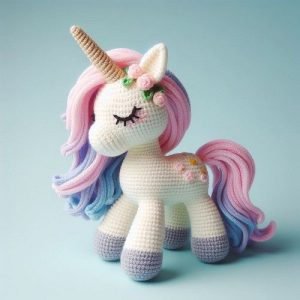
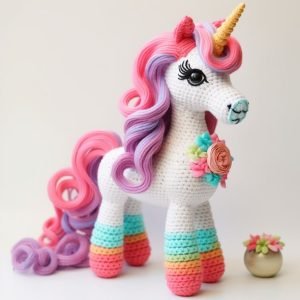
Creating a Unicorn Amigurumi is a delightful and rewarding project for crocheters of all skill levels. Amigurumi, the Japanese art of knitting or crocheting small stuffed animals and creatures, has gained immense popularity around the world.
Among the various designs, the unicorn stands out as a whimsical and enchanting creation, perfect for gifting or as a playful addition to any collection.In this tutorial, we will guide you through the steps to create your very own unicorn amigurumi.
From selecting the right yarn and tools to assembling the final pieces, you’ll learn everything you need to know to bring this magical creature to life.

Materials and Tools Needed for Unicorn Amigurumi
Before diving into the creation process, gather the following materials and tools:
- Yarn: Choose a soft, lightweight yarn (such as DK weight) in white for the body, and pastel colors like pink, blue, and yellow for the mane, tail, and horn. You’ll need approximately 100-150 yards of white yarn and small amounts of colored yarn for the accents.
- Crochet Hook: A 2.75mm or 3.0mm crochet hook is recommended for this project, depending on your tension.
- Stuffing: Polyfill or any soft stuffing material to fill your amigurumi.
- Safety Eyes: 9mm safety eyes to give your unicorn a cute, expressive look.
- Tapestry Needle: For sewing the pieces together and weaving in the ends.
- Scissors: For cutting the yarn.
Selecting the right materials is crucial for achieving a soft and cuddly unicorn. Opt for yarn that is smooth and easy to work with, as this will ensure that your stitches are even and your amigurumi holds its shape.
Step-by-Step Unicorn Amigurumi Tutorial
Step 1: Crocheting the Body
Start by crocheting the body of your unicorn. Use the white yarn to create a magic ring, and then work in continuous rounds to form a spherical shape. The body will be crocheted in a series of increases and decreases to create a rounded, plump form.
Body Pattern:
- Round 1: 6 single crochets (SC) into the magic ring.
- Round 2: Increase in each stitch around (12 SC).
- Round 3: 1 SC, increase around (18 SC).
- Round 4: 2 SC, increase around (24 SC).
- Continue increasing in this pattern until you reach the desired width for the body, then work even rounds to create the length.
Once the body is the right size, begin decreasing to close the bottom. Be sure to stuff the body firmly before finishing the last round to ensure that it holds its shape. The final step is to weave in the ends securely.
Step 2: Creating the Head
The head is crocheted separately and will be attached to the body later. Similar to the body, the head is created using continuous rounds of single crochet. The key to making a cute unicorn face is to ensure that the head is slightly larger and more spherical than the body.

Head Pattern:
- Round 1: 6 SC into the magic ring.
- Round 2: Increase in each stitch around (12 SC).
- Round 3: 1 SC, increase around (18 SC).
- Round 4: 2 SC, increase around (24 SC).
- Continue increasing until the head is the desired size, then work even rounds.
Before closing the head, attach the safety eyes and stuff it firmly. Finish the head by decreasing in the same manner as the body and secure the end.
Step 3: Assembling the Unicorn
Now that you have the body and head, it’s time to assemble your unicorn. Start by sewing the head onto the body using a tapestry needle. Take your time to ensure that the head is centered and securely attached.
Next, crochet the arms, legs, ears, and horn. These smaller pieces are also worked in continuous rounds and should be stuffed lightly before being sewn onto the body.
Arms and Legs Pattern:
- Round 1: 6 SC into the magic ring.
- Round 2: Increase in each stitch around (12 SC).
- Round 3: Work even rounds for the desired length.
Horn Pattern:
- Round 1: 4 SC into the magic ring.
- Round 2: Increase in each stitch (8 SC).
- Round 3: 1 SC, increase around (12 SC).
- Work even rounds for a few rows, then decrease to close.

Once all the pieces are crocheted and stuffed, sew them onto the body, taking care to position them evenly. The final step is to attach the mane and tail using the colored yarn. Simply cut strands of yarn in your chosen colors, loop them through the stitches on the head and back, and secure them with a knot.
Tips for a Perfect Unicorn Amigurumi
Tip 1: Pay Attention to Tension
Maintaining consistent tension is essential for creating a smooth and even surface on your unicorn amigurumi. If your stitches are too tight, the fabric may become stiff, making it difficult to shape the amigurumi. On the other hand, if your stitches are too loose, the stuffing may show through. Practice on a small swatch before starting your unicorn to ensure your tension is just right.
Tip 2: Embellish Your Unicorn
Add personality to your unicorn by embellishing it with additional details. Consider adding embroidered eyelashes, a small blush on the cheeks, or even a tiny crocheted flower on the ear. These little touches can make your unicorn unique and add to its charm.
Tip 3: Use a Stitch Marker
Amigurumi is often worked in continuous rounds without joining, which can make it easy to lose track of your rounds. Use a stitch marker to mark the beginning of each round, so you can easily keep track of your progress. This will help you avoid mistakes and ensure that your unicorn’s body and head are symmetrical.
Advanced Unicorn Amigurumi Variations
Variation 1: Rainbow Unicorn
For a more colorful version of your unicorn amigurumi, consider creating a rainbow mane and tail. Use a variety of bright, contrasting colors to crochet strands that cascade down the back and head. This variation is perfect for a fun and whimsical look, especially for kids who love bright colors.
Variation 2: Baby Unicorn
To create a smaller, baby version of the unicorn, simply reduce the number of rounds in the body, head, and limbs. Use a smaller crochet hook and finer yarn for a more delicate appearance. Baby unicorns make adorable keychains or ornaments, and they’re also great for quick gifts.
Variation 3: Unicorn with Wings
Transform your unicorn into a mythical Pegasus by adding a pair of crocheted wings. The wings can be made using the same technique as the ears, with a few additional rows to create the wing shape. Attach the wings to the back of the unicorn to complete this magical creature.

The Unicorn Amigurumi is a delightful crochet project that allows for creativity and personalization. With its enchanting design and endless customization options, this project is perfect for crocheters looking to create something special.
Whether you’re making it as a gift or adding it to your own collection, the unicorn amigurumi is sure to bring joy and magic to anyone who sees it.
By following this step-by-step tutorial, you’ll be able to craft a beautiful unicorn amigurumi that showcases your crochet skills and brings a touch of fantasy to your crafting repertoire. Happy crocheting!

