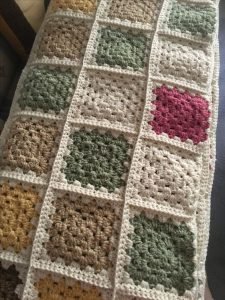
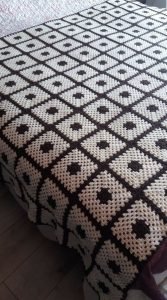
The Granny Square Blanket is a classic and timeless crochet project that has been adored by crafters for generations.
With its simple, yet versatile design, it offers endless possibilities for creativity and color combinations. Whether you’re a beginner or a seasoned crocheter, making a Granny Square Blanket is a satisfying project that results in a beautiful and cozy blanket.
In this tutorial, we’ll guide you through the process of creating your very own Granny Square Blanket, from selecting the right yarn to finishing your project.

Why Choose a Granny Square Blanket?
The Granny Square Blanket is a fantastic project for various reasons. First, it’s an excellent way to use up leftover yarn from previous projects.
The small squares can be made in different colors, allowing you to create a vibrant and colorful blanket without the need to purchase new materials. Additionally, the repetitive nature of making granny squares makes this project both relaxing and meditative.
Another advantage of the Granny Square Blanket is its portability. Because you’re working on small squares rather than a large blanket, you can easily take your project with you wherever you go.
This makes it a perfect on-the-go project for traveling or working on during spare moments throughout your day.
Materials Needed for a Granny Square Blanket
Before you begin, you’ll need to gather your materials. Here’s what you’ll need for your Granny Square Blanket:
- Yarn: Choose medium-weight yarn in your preferred colors. The number of skeins will depend on the size of your blanket.
- Crochet Hook: A 4mm (G-6) or 5mm (H-8) hook works well with medium-weight yarn.
- Scissors: For cutting yarn.
- Tapestry Needle: To weave in the ends.
Selecting the right yarn is crucial for the success of your project. Opt for a soft, washable yarn that’s comfortable to work with and durable enough to withstand frequent use. Acrylic yarns are a popular choice for blankets due to their affordability, easy care, and wide range of colors.
Step-by-Step Granny Square Blanket Tutorial
Step 1: Making the First Granny Square
To start your Granny Square Blanket, you’ll first need to create a basic granny square. Begin by making a slipknot and chaining four stitches. Then, join the chain into a ring by slipping your hook into the first chain and making a slip stitch. This small ring will be the center of your granny square.
Next, chain three stitches to form the first double crochet of the round. Work two more double crochets into the ring, then chain two stitches to form the first corner. Repeat this process three more times, working three double crochets and two chains into the ring to form the other three corners. To finish the round, slip stitch into the top of the first chain three.
Step 2: Expanding the Granny Square
After completing the first round, you’ll expand the square by working into the corners created in the previous round. Start by chaining three to form the first double crochet, then work two more double crochets into the same corner space. Chain one, and move on to the next corner.
In each corner space, work three double crochets, chain two, and then work three more double crochets into the same space. This creates a larger square with four distinct corners. Repeat this process for all four corners, and then join with a slip stitch at the end of the round.
As you continue to add rounds to your granny square, the pattern remains the same. Work three double crochets into each chain-one space along the sides, and work three double crochets, chain two, and three more double crochets into each corner. You can make your squares as large or small as you like, depending on the desired size of your blanket.
Step 3: Joining the Granny Squares
Once you’ve completed all of your granny squares, it’s time to join them together to form your blanket. There are several methods you can use to join your squares, including whip stitching, slip stitching, or using a join-as-you-go technique.
One of the easiest and most popular methods is to slip stitch the squares together. To do this, place two squares with the right sides facing each other. Insert your hook into the corner space of both squares, yarn over, and pull through all loops on the hook. Continue slip stitching along the edges of the squares, working into the back loops only to create a nearly invisible join.
Another method is to whip stitch the squares together using a tapestry needle and yarn. Place the squares side by side, with the right sides facing up. Insert the needle under the top loops of the squares and pull through, creating a neat and secure join. Whip stitching is a bit more time-consuming than slip stitching but creates a flat, clean finish.

Tips for a Perfect Granny Square Blanket
Tip 1: Color Coordination
Choosing the right color combination can make or break your Granny Square Blanket. Consider using a color wheel to select complementary or contrasting colors that work well together. For a classic look, opt for a monochromatic palette, or go bold with bright, contrasting colors for a modern twist.
To avoid color clashes, it’s helpful to lay out your squares before joining them to see how the colors work together. Experiment with different arrangements until you find a pattern that’s visually pleasing. If you’re unsure about your color choices, consider making a small sample square to test the colors before committing to a full-sized blanket.
Tip 2: Blocking Your Squares
Blocking is an essential step in ensuring that your granny squares are all the same size and shape. After completing each square, lay it out flat on a blocking mat or a soft surface like a towel. Pin the corners and edges into place, ensuring that the square is straight and even.
Once pinned, lightly mist the square with water and let it dry completely. Blocking helps to straighten any wonky edges and ensures that all your squares are uniform in size, making the joining process much smoother. It also gives your blanket a more professional, polished look.
Tip 3: Adding a Border
Adding a border to your Granny Square Blanket not only enhances its appearance but also provides a clean, finished edge. There are many border options to choose from, ranging from simple single crochet borders to intricate lace patterns.
To add a basic border, work a round of single crochet stitches around the entire edge of the blanket, placing three single crochets in each corner. If you want a more decorative border, consider adding scallops, picots, or shells in a contrasting color. The border is an opportunity to showcase your creativity and personalize your blanket.

Advanced Granny Square Variations
Variation 1: Solid Granny Square
The traditional granny square features open spaces between the clusters of double crochets, but you can create a solid version by eliminating these spaces. Instead of chaining between the clusters, work into each stitch of the previous round to create a more solid and dense square. This variation is ideal for projects that require more warmth or structure.
Variation 2: Granny Square with a Flower Center
For a more intricate design, you can incorporate a flower motif in the center of your granny square. Start by crocheting a small flower, such as a daisy or a rose, and then work the granny square pattern around it. This variation adds a charming and whimsical touch to your blanket, making it perfect for a nursery or a gift.
Variation 3: Hexagon Granny Square
If you’re looking to switch things up, consider making hexagon granny squares instead of traditional square ones.
The process is similar, but instead of working with four corners, you’ll create six. Hexagon granny squares are great for making blankets with a different geometric shape, and they offer a fresh and modern twist on the classic granny square.

The Granny Square Blanket is a timeless and versatile crochet project that allows you to explore your creativity with colors and patterns. Whether you’re making it for yourself or as a gift, this blanket is sure to become a cherished item.
By following this step-by-step tutorial and incorporating the tips and variations mentioned, you’ll be well on your way to creating a beautiful Granny Square Blanket that you can be proud of.
Happy crocheting!

