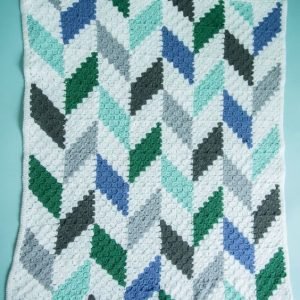
The Herringbone Blanket is a striking crochet project known for its elegant and sophisticated pattern. This design features a distinctive herringbone stitch that creates a textured, diagonal appearance reminiscent of the herringbone weave found in textiles.
The result is a cozy, stylish blanket that adds a touch of refinement to any living space.In this tutorial, we will walk you through the process of creating your own Herringbone Blanket.
From gathering your materials to mastering the herringbone stitch, this guide is designed to help you achieve a beautifully crafted blanket that showcases your crochet skills.

Why Choose the Herringbone Blanket?
The Herringbone Blanket is a fantastic choice for those looking to create a unique and eye-catching crochet piece. Its textured pattern adds visual interest and depth, making it a perfect addition to any home decor. The herringbone stitch is not only beautiful but also durable, making this blanket suitable for both decorative and practical use.
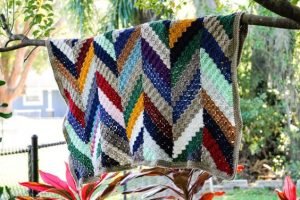
Additionally, this pattern is versatile and can be customized with different yarn colors and textures. Whether you prefer a classic, monochromatic look or a vibrant, multi-colored design, the Herringbone Blanket can be adapted to fit your personal style.
Materials Needed for the Herringbone Blanket
Before starting your Herringbone Blanket, gather the following materials:
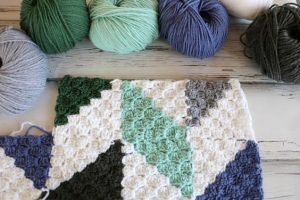
- Yarn: Choose a soft, medium-weight yarn (worsted weight) for your blanket. You will need approximately 1200-1500 yards of yarn for a standard-sized blanket.
- Crochet Hook: A 5mm (H-8) crochet hook is recommended for worsted weight yarn.
- Scissors: For cutting the yarn.
- Tapestry Needle: For weaving in ends and finishing touches.
Selecting high-quality yarn will enhance the overall appearance and feel of your blanket. Opt for yarns that are soft and comfortable, ensuring that your finished blanket will be cozy and enjoyable to use.
Step-by-Step Herringbone Blanket Tutorial
Step 1: Create the Foundation Chain
Start by making a slipknot on your crochet hook. For a standard-sized blanket, create a foundation chain of 120 stitches. This chain determines the width of your blanket. Ensure that your chain is not too tight, as it needs to accommodate the width of the herringbone stitch pattern.
Once you have completed the foundation chain, work the first row of herringbone stitches into each chain stitch. This initial row establishes the base for your pattern. Turn your work at the end of the row to prepare for the subsequent rows.
Step 2: Start the Herringbone Pattern
To create the herringbone pattern, you will use the herringbone double crochet stitch. Yarn over, insert your hook into the next stitch, yarn over again, and pull up a loop. You should have three loops on your hook. Yarn over and pull through the first two loops, then yarn over and pull through the remaining two loops to complete the stitch.
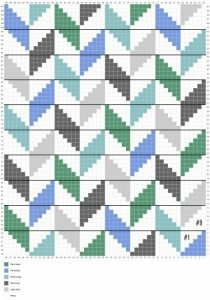
In the following rows, alternate the direction of your herringbone stitches to create the diagonal pattern. Work a herringbone double crochet stitch into each stitch of the previous row, making sure to maintain the diagonal alignment. This will give your blanket its characteristic herringbone appearance.

Step 3: Continue Building the Herringbone Pattern
Repeat the herringbone pattern rows until your blanket reaches the desired length. For a standard throw blanket, you will typically work around 60-70 rows. Ensure that each row aligns properly with the previous rows to maintain a consistent pattern.
As you work, you can experiment with different yarn colors or textures to add visual interest to your blanket. If you wish to change colors, complete the last herringbone stitch of the row with the new color and continue with the pattern.
Tips for a Perfect Herringbone Blanket
Tip 1: Consistent Tension
Maintaining consistent tension throughout your Herringbone Blanket is crucial for achieving an even and professional-looking finish. Regularly check your tension and adjust your grip on the yarn as needed. Practicing the herringbone stitch on a small swatch before starting the blanket can help you get a feel for the tension.
Tip 2: Blocking the Blanket
Blocking your finished Herringbone Blanket can help to shape and smooth out any uneven areas. After completing your blanket, gently wash it in cold water and lay it flat on a towel to dry. Use blocking mats or pins to shape the blanket and ensure that the herringbone stitches lay flat and are well-defined.
Blocking also enhances the overall appearance of the blanket and helps to even out the stitches. Follow the care instructions on your yarn label to ensure that your blanket maintains its color and texture.
Tip 3: Choosing the Right Yarn
Selecting the right yarn for your Herringbone Blanket is essential for achieving the best results. Opt for yarn that is soft and durable, with good stitch definition. Avoid yarns that are too thick or too thin, as they may affect the appearance of the herringbone pattern. Experiment with different yarns to find the perfect match for your project.

Advanced Herringbone Blanket Variations
Variation 1: Color Block Herringbone Blanket
Add a modern twist to the classic Herringbone Blanket by incorporating color blocks. Alternate between different colors of yarn in each section to create a bold and graphic design. This variation adds a contemporary touch to the traditional herringbone pattern.
Variation 2: Herringbone Baby Blanket
Adjust the size of your Herringbone Blanket to create a cozy and soft baby blanket. Use softer, baby-friendly yarn and reduce the number of stitches and rows to fit a smaller size. This version is perfect for baby gifts and adds a touch of handmade charm to any nursery.
Variation 3: Textured Herringbone Blanket
Enhance the texture of your Herringbone Blanket by adding additional stitch patterns between the herringbone rows. Incorporate stitches such as bobbles or popcorns to create a multi-dimensional effect. This variation adds extra visual interest and complexity to your blanket.

The Herringbone Blanket is a beautiful and sophisticated crochet project that combines texture and elegance. By following this tutorial, you will be able to create a stunning blanket that showcases your crochet skills.
With its distinctive herringbone pattern and customizable design, the Herringbone Blanket is a versatile and rewarding project that will enhance any home decor.
Happy crocheting!

