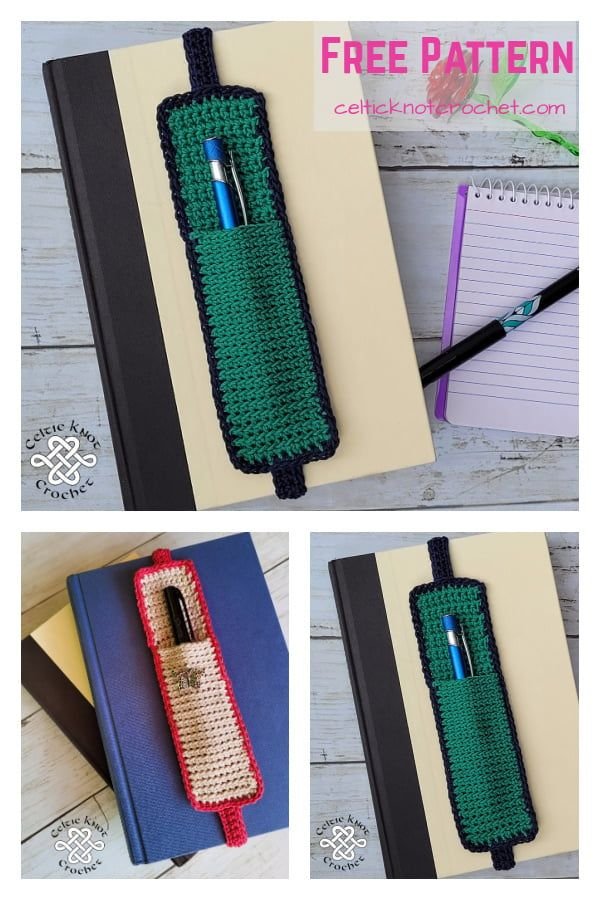
If you’re someone who loves to read, write, or crochet—or maybe all three—then the 3 Crochet Pen Holder Bookmark – Pattern is a charming, functional project you’ll love.
This practical and stylish bookmark not only holds your place in a book but also keeps a pen or pencil neatly in place. It’s the perfect blend of creativity and everyday usefulness.
The 3 Crochet Pen Holder Bookmark – Pattern is great for students, teachers, journal keepers, or anyone who wants a handmade touch in their daily reading or writing routine. It’s quick to make, ideal for using up yarn scraps, and easy to personalize. You can make them as gifts, use them at the office, or simply enjoy crafting a set for yourself.
In this article, we’ll explore everything about the 3 Crochet Pen Holder Bookmark – Pattern, including its benefits, materials you’ll need, detailed steps, creative variations, and answers to common questions. Whether you’re a beginner or an experienced crocheter, this project is sure to become a favorite in your handmade collection.
1. Why Choose the 3 Crochet Pen Holder Bookmark
The 3 Crochet Pen Holder Bookmark – Pattern offers more than just a simple crochet item—it’s a small, thoughtful design with practical purpose. It’s not just cute—it’s clever and useful.
First, this pattern is perfect for multitaskers. It combines the functionality of a bookmark with a pen holder, making it an ideal companion for note-takers, students, and diary keepers who always want their writing tools close.
Second, it’s a time-saving project. Each bookmark takes very little time to complete—usually under an hour. This makes it a satisfying project when you want a quick crochet win or need last-minute handmade gifts.
Third, it’s eco-friendly and scrap-busting. Have leftover yarn from bigger projects? This pattern uses a small amount of yarn, which helps reduce waste and lets you make something adorable from odds and ends.
Fourth, it adds a handmade personal touch to everyday life. Whether you’re tucking it into your planner, journal, or favorite book, it adds a pop of personality and warmth that mass-produced bookmarks can’t replicate.
Fifth, it’s beginner-friendly, but also fun for experienced crocheters. It offers room for customization with stitches, colors, and decorative elements, making it a flexible pattern for all skill levels.
Finally, it’s a wonderful gift idea. Everyone uses pens and reads something—whether it’s a book, recipe, planner, or notes. This pattern makes thoughtful gifts for teachers, coworkers, students, and book lovers alike.
2. Materials Needed to Crochet the Bookmark
To create the 3 Crochet Pen Holder Bookmark – Pattern, you’ll need just a few basic supplies, most of which you probably already have if you crochet regularly. It’s a low-cost project with high reward.
Start with your yarn. Light worsted weight or DK weight yarn is ideal. Cotton yarn is a great choice because it holds its shape and has a clean finish. You can mix and match colors or stick to one solid color for a minimalist look.
Next, you’ll need a crochet hook. A 3.5 mm (E) or 4.0 mm (G) hook usually works well for this project. Using a smaller hook helps keep the stitches tight, ensuring the pen holder stays secure and the bookmark lays flat.
Other essential tools include scissors, a yarn needle for weaving in ends, and stitch markers if you like keeping track of your rows. You may also want a measuring tape to ensure your bookmark is the right size.
For the pen holder portion, some crafters add a button, snap, or elastic loop to hold the pen more securely. You can also crochet a small pocket or loop using chain stitches and slip stitches.
Optional embellishments include beads, appliqués, or embroidery. These add charm and uniqueness to your design, especially if you’re gifting the bookmark.
And don’t forget the most important part—a pen or pencil! Make sure your design can comfortably hold standard writing tools. Try testing with different pen sizes as you go to adjust the loop or pocket as needed.
3. Step-by-Step Instructions for the Crochet Pen Holder Bookmark
Now let’s walk through the basic steps of the 3 Crochet Pen Holder Bookmark – Pattern. This simple guide covers the structure, from the base of the bookmark to the pen-holding feature and final finishing touches.
Start by crocheting the base bookmark. Most designs are rectangular—around 1.5 inches wide and 6–7 inches long. You can use single crochet (sc), half double crochet (hdc), or double crochet (dc) depending on your preferred texture.
Once the base is done, create the pen holder section. This can be a horizontal band or loop at the top of the bookmark. Try chaining 10–15 stitches (depending on your pen size), and attach both ends to the bookmark with slip stitches to form a loop.
Another method is to crochet a small pocket on one end of the bookmark. Simply create a rectangle wide enough to hold the bottom of a pen and sew or crochet it onto the base. This version holds the pen more securely.
Secure your edges with a border. Adding a round of single crochet around the bookmark gives it a neat, professional finish. You can use a contrasting color or the same yarn for a subtle look.
Next, test the pen holder. Insert a pen or pencil to see if it fits snugly. Adjust the tightness of your loop or pocket if necessary. If it’s too loose, try reducing the number of chains or rows.
Finally, add finishing touches like buttons, bows, or embroidered initials. This step is optional but helps personalize each bookmark, especially if you’re making a set of three or gifting them to others.
4. Customization Ideas and Creative Variations
One of the best parts about the 3 Crochet Pen Holder Bookmark – Pattern is the freedom to get creative. You’re not limited to one style—there are endless ways to make it unique and suited to your taste.
Try using color blocks or stripes. Alternate two or three colors throughout the rows of your bookmark. You can also do a fade effect by gradually changing yarn colors in ombré style.
Incorporate themed designs. For example, make a cat-themed bookmark with ears and whiskers, a floral bookmark with a crocheted flower appliqué, or a minimalist one with clean lines for a modern look.
Use different stitch textures. Instead of basic stitches, try the moss stitch, waffle stitch, or mini bean stitch for added interest and dimension. This gives the bookmark extra grip and charm.
Add a charm or tassel to the end of the bookmark for flair. This can be crocheted or made from yarn or beads. Tassels especially give the bookmark a polished, classic appearance.
Make a matching set with slight variations. Each of the three bookmarks can use the same base design but with different yarn colors, stitch patterns, or embellishments to form a cohesive collection.
Lastly, consider functional twists—like adding a tiny notepad pocket or keyring attachment. These upgrades turn the bookmark into a mini toolkit for your planner or journal.
FAQ – 3 Crochet Pen Holder Bookmark – Pattern
Q1: Is this project suitable for crochet beginners?
Yes! It’s a great project for beginners as it uses simple stitches and techniques. Plus, the small size makes it manageable.
Q2: What type of yarn is best?
Cotton yarn is highly recommended due to its durability and clean look. It also holds its shape well.
Q3: How long does it take to make one bookmark?
On average, it takes 30–60 minutes to complete one bookmark, depending on your skill level and design complexity.
Q4: Can I sell bookmarks made from this pattern?
Yes, you can usually sell handmade bookmarks, especially if you’re using a free pattern or have the designer’s permission. Be sure to credit the source when required.
Q5: How do I adjust the size for different pen types?
Simply adjust the number of chain stitches or rows in the loop/pocket section. Always test with the pen you plan to use.
Q6: Can I wash the bookmark?
Yes, if made with washable yarn like cotton or acrylic. Hand wash gently and lay flat to dry to maintain shape.
Conclusion
The 3 Crochet Pen Holder Bookmark – Pattern is a fun, functional, and fast project that’s sure to become one of your favorites. Whether you’re making it for yourself or as a thoughtful handmade gift, it brings together creativity and practicality in the most delightful way.
In this article, we covered why this project is worth making, the materials you’ll need, step-by-step instructions, and creative ideas to personalize your bookmarks. We also answered the most common questions to help you get started confidently.
Have you tried this pattern or plan to make your own set soon? We’d love to hear your honest opinion, suggestions, and creative twists in the comments below. Your input helps build a stronger, more inspired crochet community. Happy hooking! 🧶📚✍️