Creating an Amigurumi Stethoscope Cover Crochet Pattern is a fantastic way to blend medical professionalism with a touch of handmade warmth and personality. Whether you are a healthcare worker looking to brighten a patient’s day or a crafter searching for the perfect gift for a nursing student, this project offers a unique creative outlet. The beauty of the Amigurumi Stethoscope Cover Crochet Pattern lies in its versatility, allowing you to transform a cold, sterile medical instrument into a friendly character, such as a bear, a cat, or even a colorful flower. By following a well-structured crochet pattern, you can ensure that the cover fits snugly without interfering with the stethoscope’s functionality, making it both a practical and charming accessory for any medical setting.
In the world of pediatric care, an Amigurumi Stethoscope Cover Crochet Pattern serves a vital purpose beyond mere decoration. Children are often intimidated by medical equipment, and seeing a familiar animal face or a vibrant crochet design can act as an immediate icebreaker, reducing anxiety and building trust between the clinician and the young patient. This “distraction therapy” is a subtle yet effective tool in a provider’s kit. Beyond the clinical benefits, working on an Amigurumi Stethoscope Cover Crochet Pattern is a rewarding experience for the maker, as it involves mastering basic amigurumi techniques like working in the round, increasing, and decreasing to create three-dimensional shapes that bring joy to the workplace.
If you are ready to start your journey with an Amigurumi Stethoscope Cover Crochet Pattern, it is essential to understand the materials and steps involved. To get the best results, you should use high-quality cotton yarn or a soft acrylic blend that can withstand frequent handling and cleaning. Because these covers are used in medical environments, choosing a washable yarn is a top priority for hygiene. This article will guide you through the intricacies of selecting the right crochet hook, understanding the stitch abbreviations, and assembling your masterpiece. By the end of this guide, you will be well-equipped to create a stunning Amigurumi Stethoscope Cover Crochet Pattern that stands out for its craftsmanship and heart.
1. Choosing the Right Materials for Your Amigurumi Stethoscope Cover Crochet Pattern
Selecting the appropriate yarn is the foundational step of any successful Amigurumi Stethoscope Cover Crochet Pattern. You want a fiber that is soft to the touch but durable enough to handle daily wear and tear in a hospital or clinic. Most experts recommend a mercerized cotton because it has a slight sheen, doesn’t pill easily, and holds its shape exceptionally well over time.
The hook size you choose for your Amigurumi Stethoscope Cover Crochet Pattern is equally important. To achieve that classic amigurumi look where the stuffing doesn’t peek through, you should use a hook that is slightly smaller than what the yarn label suggests. A 2.5mm or 3.0mm crochet hook is usually the “sweet spot” for standard DK weight yarn, ensuring your stitches are tight, neat, and professional.
Safety and hygiene are paramount when dealing with medical accessories, so ensure your stuffing material is hypoallergenic. High-quality polyester fiberfill is the standard choice for the Amigurumi Stethoscope Cover Crochet Pattern, as it provides the necessary volume for the character’s head or limbs without adding excessive weight. Remember, the cover should be lightweight so it doesn’t drag on the healthcare professional’s neck.
You will also need a few essential notions to complete your project. A sharp pair of scissors, a tapestry needle for weaving in ends and sewing pieces together, and stitch markers are indispensable. Since you will be working in continuous rounds for most of the Amigurumi Stethoscope Cover Crochet Pattern, markers help you keep track of where each row begins and ends.
For the facial features of your character, consider using safety eyes. These plastic eyes lock into place, making them very secure; however, if you are making a cover for a neonatal unit, you might prefer embroidered eyes for maximum safety. Embroidery allows you to customize expressions even further, giving your Amigurumi Stethoscope Cover Crochet Pattern a truly unique and soulful personality.
Lastly, don’t forget the fastening mechanism. Most Amigurumi Stethoscope Cover Crochet Patterns utilize either a button closure or a Velcro strip at the bottom of the tube. This allows the user to easily slide the cover onto the stethoscope tubing and secure it so it doesn’t slip down during a physical exam, ensuring the tool remains fully functional at all times.
2. Essential Stitches and Techniques for the Amigurumi Stethoscope Cover Crochet Pattern
To master the Amigurumi Stethoscope Cover Crochet Pattern, you must be comfortable with the Magic Ring (or Magic Circle). This technique is the secret to starting circular pieces without leaving a hole in the center. It provides a clean, professional finish for the top of the character’s head or the beginning of the decorative elements that make your crochet cover special.
The core stitch used in nearly every Amigurumi Stethoscope Cover Crochet Pattern is the single crochet (sc). In the UK, this is known as a double crochet, but most modern patterns use US terminology. By working single crochet stitches in a continuous spiral, you create a dense fabric that is perfect for holding shape and concealing the stuffing inside the 3D elements of your design.
Increasing and decreasing are the “shaping tools” of the Amigurumi Stethoscope Cover Crochet Pattern. An increase (inc) involves placing two stitches into one, while an invisible decrease (inv dec) allows you to join two stitches together with minimal bulk. Mastering the invisible decrease is a game-changer, as it prevents the unsightly gaps often seen in beginner crochet projects.
The “tube” section of the Amigurumi Stethoscope Cover Crochet Pattern is perhaps the most straightforward part but requires consistency. You will essentially be crocheting a long cylinder that fits over the stethoscope’s rubber tubing. Using back loop only (BLO) stitches for certain rows can create a ribbed texture, which adds visual interest and a bit of stretch to your handmade cover.
Color changing is another vital skill for a vibrant Amigurumi Stethoscope Cover Crochet Pattern. Whether you are creating stripes or switching from the body color to the head color, a clean color change ensures there are no jagged lines. Always complete the final pull-through of the previous stitch with the new color to keep your transitions looking seamless and professional.
Finally, finishing techniques like the invisible finish and weaving in ends are what separate an amateur project from a high-quality gift. When you finish your Amigurumi Stethoscope Cover Crochet Pattern, take the time to hide all yarn tails securely inside the stuffing. This ensures the cover can be washed and handled repeatedly without unraveling, maintaining its beauty for years to come.
3. Step-by-Step Construction of the Amigurumi Stethoscope Cover Crochet Pattern
The construction of an Amigurumi Stethoscope Cover Crochet Pattern typically begins with the central tube. You will start by chaining a small number of stitches to create a circle that fits snugly around the stethoscope’s bell or earpiece connectors. It is vital to measure the specific stethoscope you are using, as tubing diameters can vary slightly between brands like Littmann or MDF.
Once the initial circle is formed, you will work in rounds until the tube reaches the desired length. For a standard Amigurumi Stethoscope Cover Crochet Pattern, this is usually between 12 and 15 inches. It is better to make the tube slightly shorter than the actual rubber part of the stethoscope to prevent it from bunching up near the earpieces, which could be uncomfortable for the wearer.
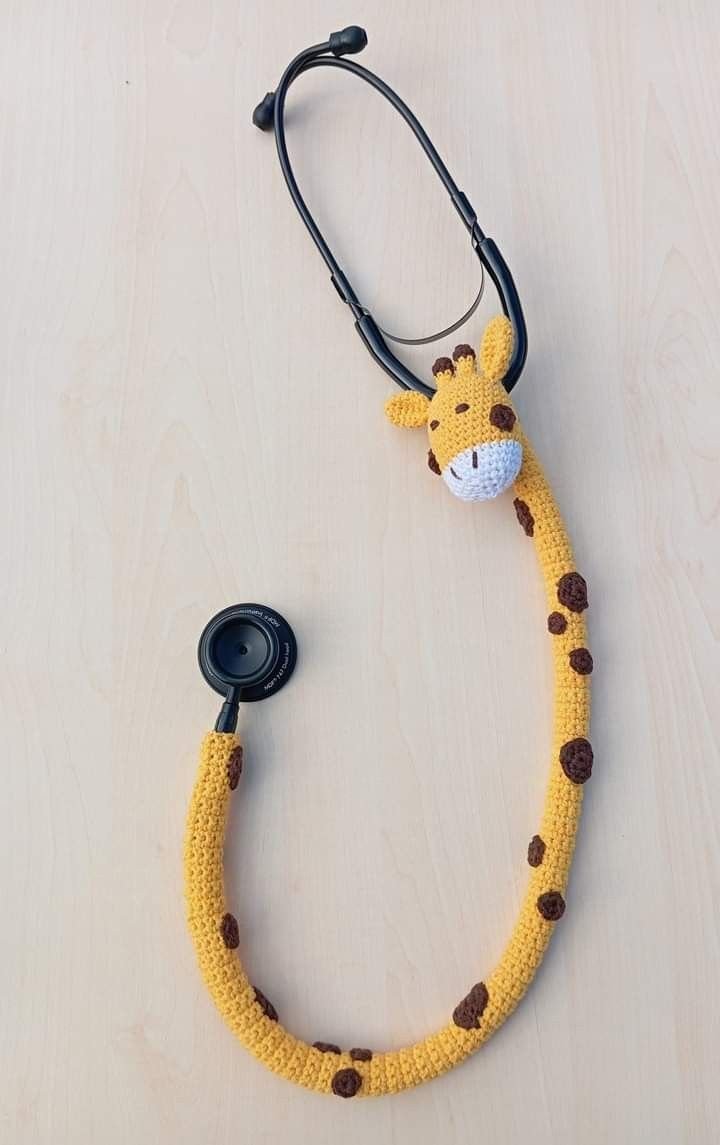
After the tube is complete, you move on to the “Amigurumi” portion of the Amigurumi Stethoscope Cover Crochet Pattern. This is usually a small animal head or a decorative shape like a heart or a star. You will follow the pattern to create the sphere, add the stuffing, and attach the features. This character is typically sewn onto the top part of the tube, just below where the “Y” split occurs on the stethoscope.
Attaching the character securely is a critical phase of the Amigurumi Stethoscope Cover Crochet Pattern. Use a whip stitch with the same yarn to join the head to the tube. Make sure the attachment is firm; medical professionals move a lot, and you don’t want the character to flop around or fall off during an emergency or a busy shift in the ward.
Adding personality through embroidery comes next. Use a bit of black or pink yarn to sew on a nose, a mouth, or whiskers. This step in the Amigurumi Stethoscope Cover Crochet Pattern is where the magic happens, as the inanimate object starts to look like a friendly companion. Small details, like a tiny bow or a crochet hat, can add that extra “wow” factor to your project.
The final step in your Amigurumi Stethoscope Cover Crochet Pattern is creating the opening at the bottom. Some crafters prefer to leave the tube open, while others add a button loop. This ensures the cover stays in place. Give the entire piece a gentle steam or a quick wash (if using appropriate yarn) to set the stitches, and your crochet stethoscope cover is ready to be gifted or used.
4. Tips for Customizing and Selling Your Amigurumi Stethoscope Cover Crochet Pattern
If you plan to sell your finished products or even your own Amigurumi Stethoscope Cover Crochet Pattern, customization is key. Think about seasonal themes; a reindeer cover for Christmas or a pumpkin for Halloween can be huge hits in the nursing community. Offering a variety of animals and colors allows you to cater to different tastes and specialties, from pediatrics to veterinary medicine.
Branding your Amigurumi Stethoscope Cover Crochet Pattern can help you stand out on platforms like Etsy or Instagram. Use clear, bright photography that shows the cover on an actual stethoscope so buyers can see the fit and scale. Including a small care instruction tag that explains how to wash the cover is a thoughtful touch that professionalizes your handmade business.
Optimization for SEO is crucial if you are publishing your Amigurumi Stethoscope Cover Crochet Pattern online. Use keywords like nursing gifts, pediatric nurse accessories, and handmade medical gear in your descriptions. This ensures that when people search for unique gifts for healthcare heroes, your beautiful crochet pattern or finished product appears at the top of their search results.
Pricing your Amigurumi Stethoscope Cover Crochet Pattern requires a balance between your time, material costs, and the market rate. While these are small items, the level of detail and the “niche” nature of the product allow for a premium price. Don’t undervalue your skill; the time spent perfecting those tiny amigurumi stitches and ensuring a safe fit is worth a fair wage.
Networking with local healthcare workers can also boost interest in your Amigurumi Stethoscope Cover Crochet Pattern. Word of mouth in a hospital travels fast; once one nurse has a cute crochet animal on their stethoscope, others are bound to ask where they got it. Consider donating a few to a local children’s ward to see the impact firsthand and gain some local recognition for your craft.
Finally, always keep the user’s experience in mind. A great Amigurumi Stethoscope Cover Crochet Pattern should be easy to remove for cleaning and shouldn’t muffle the sound of the stethoscope. As long as you prioritize the functionality of the medical tool while adding your creative flair, your crochet designs will be a cherished part of any medical professional’s daily routine.
FAQ – Frequently Asked Questions
1. Can I wash my Amigurumi Stethoscope Cover?
Yes, most covers made using an Amigurumi Stethoscope Cover Crochet Pattern are washable. It is best to use a mesh laundry bag and a gentle cycle, or simply hand wash with mild soap. Always air dry to maintain the shape of the amigurumi character.
2. Does the cover interfere with the sound quality of the stethoscope?
When following a proper Amigurumi Stethoscope Cover Crochet Pattern, the design should only cover the rubber tubing. It should never cover the chest piece (the bell) or the earpieces, meaning the acoustic performance remains exactly the same.
3. What is the best yarn for a hospital environment?
Cotton yarn is highly recommended for any Amigurumi Stethoscope Cover Crochet Pattern used in hospitals. It is breathable, durable, and can be washed at higher temperatures than wool, which is essential for maintaining hygiene standards.
4. How long does it take to make one?
An experienced crocheter can usually complete an Amigurumi Stethoscope Cover Crochet Pattern in 2 to 4 hours. The tube is very quick to make, while the detail work on the amigurumi head takes a bit more focus and time.
5. Is this project suitable for beginners?
Absolutely! If you know the basic stitches like the single crochet and how to work in a circle, you can tackle an Amigurumi Stethoscope Cover Crochet Pattern. It’s a great way to practice shaping and assembly on a small, manageable scale.
Conclusion
In conclusion, creating an Amigurumi Stethoscope Cover Crochet Pattern is a delightful journey that combines the art of crochet with a genuine desire to bring comfort to the medical world. Throughout this article, we have explored the importance of selecting the right materials, mastering essential amigurumi techniques, and following a structured construction process to ensure a professional result. We also discussed how to customize your designs to make them even more special for the healthcare professionals who work tirelessly every day. By focusing on quality and functionality, your handmade stethoscope cover can become a source of smiles for both patients and providers.
We hope this guide has inspired you to pick up your hook and start your own Amigurumi Stethoscope Cover Crochet Pattern. It is a small project with a huge impact, proving that a little bit of yarn and a lot of heart can truly make a difference in someone’s day. Whether you are making it for yourself, a friend, or as a product for your shop, the effort you put into each stitch is a testament to your creativity.