The Crochet Alpine Stitch – Pattern is one of the most visually striking and satisfying textures in the crochet world. Known for its deeply textured, woven look, this stitch creates a raised, almost three-dimensional effect that gives projects a cozy and luxurious feel. Whether you’re working on blankets, scarves, or home décor items, the Alpine Stitch adds a level of sophistication and depth that few other stitches can achieve.
This stitch might look complex, but it’s surprisingly simple to master. It uses a combination of front post double crochet stitches and regular double crochets, worked in alternating rows. The result is a tightly stitched fabric that feels both soft and durable, making it ideal for cold-weather accessories or baby blankets that require a bit of warmth and structure.
For anyone interested in learning a new stitch that offers both beauty and practicality, the Crochet Alpine Stitch – Pattern is a must-try. In this article, we’ll walk you through its background, how to crochet it step by step, ways to use it creatively, and answer some of the most frequently asked questions about this versatile and modern crochet pattern.
1. Understanding the Beauty of the Crochet Alpine Stitch – Pattern
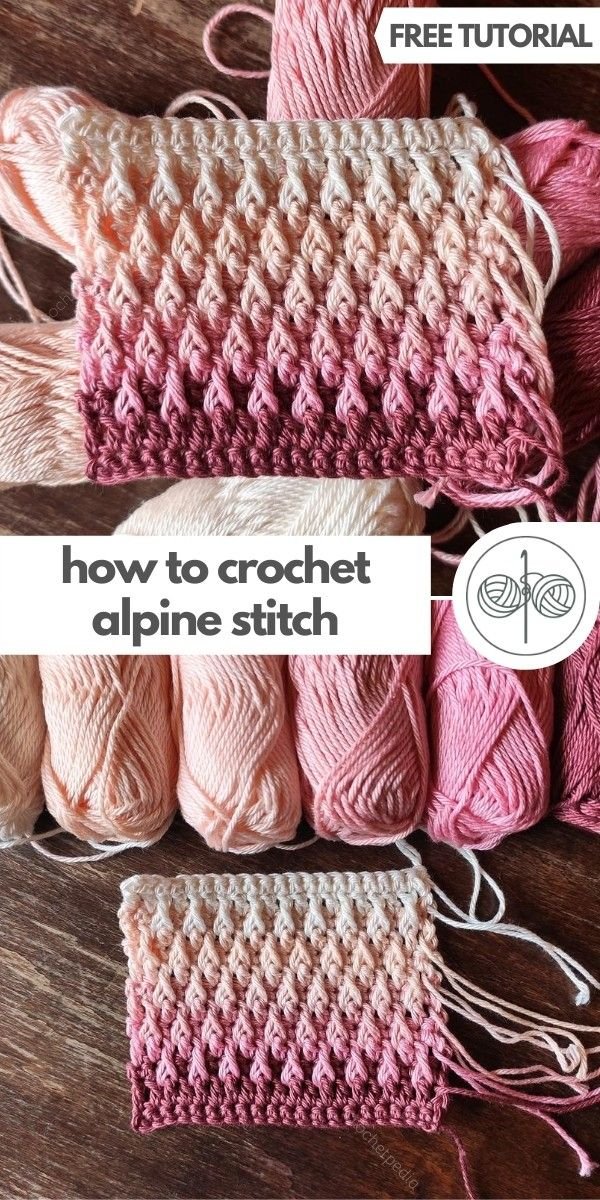
The Crochet Alpine Stitch – Pattern stands out for its texture and definition. It produces a dense, chunky fabric with an embossed appearance, often compared to woven or knitted textures. Its uniqueness lies in the alternating use of basic and post stitches.
This stitch is perfect for adding a tactile quality to your crochet projects. While flat stitches like single or half-double crochet can create clean surfaces, the Alpine Stitch introduces a raised, ridged texture that invites touch. It’s the kind of pattern that turns heads—and prompts people to ask, “How did you make that?”
Despite its professional appearance, the Alpine Stitch is very beginner-friendly once you’ve mastered the front post double crochet (FPdc). With just a bit of practice, anyone with a basic understanding of crochet can quickly get the hang of it.
The pattern also allows for excellent stitch stability. This makes it a good choice for items that need to hold their shape—like pillow covers, baskets, potholders, and winter garments. It also gives a subtle stretch, which makes it feel snug but not stiff.
One of the most attractive things about this pattern is that it looks great in solid colors. Because of its textural richness, you don’t need complex colorwork to make the pattern shine. A single-tone yarn in any color—neutral or bold—will bring out the stitch’s depth.
Lastly, the Crochet Alpine Stitch – Pattern is an ideal choice for gift-making. Whether you’re making a baby blanket, a textured scarf, or a modern-looking throw, your finished piece is sure to impress.
2. How to Crochet the Alpine Stitch Step by Step
To get started with the Crochet Alpine Stitch – Pattern, you’ll only need to know a few basic techniques. If you’re familiar with chaining, double crochet (dc), and front post double crochet (FPdc), you’re ready to begin.
Start by making a foundation chain in multiples of 2 plus 1. This ensures your stitch pattern will align properly. For practice, try chaining 21 (20 + 1) to make a small swatch.
Your first row will be a row of regular double crochet stitches. This lays the base. Work one double crochet into each stitch across. This gives you a flat surface on which to build your Alpine texture.
The second row is worked in single crochet stitches. This keeps the stitch compact and adds contrast to the post stitches in the rows that follow. Don’t skip this step—it’s essential for the stitch’s structure.
The third row is where the Alpine texture begins. Alternate between a front post double crochet (FPdc) into the stitch two rows below, and a regular double crochet into the next stitch. This alternating pattern creates the raised “peaks” that define the stitch.
The fourth row is another row of single crochet, just like the second row. This pattern of alternating textured and flat rows continues, gradually building the rich fabric that the Alpine Stitch is known for.
Repeat the pattern (Rows 3 and 4) until you reach your desired height. You’ll quickly notice how the Alpine Stitch creates a consistent, ribbed effect that looks stunning in both large and small projects.
3. Creative Projects Using the Crochet Alpine Stitch – Pattern
Once you’ve learned the Crochet Alpine Stitch – Pattern, you’ll find there are countless ways to use it in your projects. Its thick, warm nature makes it ideal for winter items and home accessories.
Blankets and throws are among the most popular uses. The stitch adds enough visual interest to make a blanket feel cozy and modern, even in a single color. You can use thicker yarn for chunkier results or lighter yarn for a more delicate texture.
Try using the Alpine Stitch for scarves and cowls. The raised stitch helps trap warmth and gives these accessories a plush, luxurious feel. You can also add tassels or pom-poms to the ends for a playful finish.
The Alpine Stitch also works well for pillow covers and cushion cases. Its structural nature means your work will hold up over time and won’t sag or lose its shape with use.
For smaller projects, consider using this stitch for potholders, mug cozies, or dishcloths. The raised texture gives a good grip, and the stitch density provides protection from heat.
Another fun project is a textured bag or purse. The Alpine Stitch gives bags a designer look, especially when paired with leather straps or metallic accents. You can even add a lining for extra durability.
And of course, don’t forget baby items! Baby blankets or hats made using the Alpine Stitch are not only adorable but also functional, offering warmth and comfort without being too heavy.
4. Tips for Mastering the Crochet Alpine Stitch – Pattern
If you’re new to this texture or want your results to look clean and professional, these tips will help you get the most out of your Crochet Alpine Stitch – Pattern.
Maintain consistent tension throughout your project. Because the Alpine Stitch uses alternating stitches, loose or tight tension can make the fabric wavy. Practice on a small swatch to find your ideal rhythm.
Pay attention to stitch placement, especially when inserting your hook for the FPdc. Always go around the post two rows below—not the previous row. This helps maintain the correct height and shape of the texture.
Use stitch markers if needed. They’re especially helpful for beginners to keep track of row changes or to mark every few stitches in large projects, preventing errors before they grow.
Blocking can dramatically improve the final look of your work. Even though the Alpine Stitch is thick, lightly wet-blocking or steam-blocking your project helps define the texture and smooth out any uneven edges.
Experiment with different yarns. Wool blends give a warm, fuzzy look, while cotton provides crisp stitch definition. Try a few swatches in different fibers to see which effect you like best.
Lastly, take your time and enjoy the process. The Alpine Stitch isn’t the fastest to work up, but its stunning results make every stitch worth it. It’s one of those patterns where the journey is just as satisfying as the final product.
FAQ – Crochet Alpine Stitch – Pattern
Q1: Is the Alpine Stitch suitable for beginners?
Yes! As long as you know how to do basic crochet stitches like double crochet and front post double crochet, this pattern is a great next step for beginners wanting to explore texture.
Q2: What type of yarn works best for this stitch?
Medium weight (worsted) yarns are ideal. Cotton and acrylic yarns provide excellent stitch definition, but wool blends work well too if you’re making something warm and plush.
Q3: Can I use the Alpine Stitch in blankets?
Absolutely. The Alpine Stitch is perfect for blankets and throws due to its thick, cozy nature and beautiful texture.
Q4: How do I keep my rows straight with the Alpine Stitch?
Count your stitches carefully, especially in the FPdc rows, and use stitch markers at regular intervals. Blocking also helps even things out at the end.
Q5: Is this stitch reversible?
Not entirely. While both sides look nice, only one side has the raised, textured Alpine pattern. The reverse has a flatter appearance.
Q6: Can I mix the Alpine Stitch with other stitches?
Yes! You can pair it with rows of single crochet or even lace stitches to create interesting patterns and textures in your projects.
Conclusion
The Crochet Alpine Stitch – Pattern is a gorgeous, textured stitch that adds dimension, warmth, and style to any project. With its easy-to-learn technique and elegant results, it’s a favorite among crocheters of all skill levels.
From scarves and blankets to home décor and accessories, this stitch has endless applications. Whether you’re crafting for fun, gifts, or even selling your creations, the Alpine Stitch is a stylish and functional choice that elevates every project.
Have you tried the Alpine Stitch yet? We’d love to hear your thoughts! Share your feedback, project ideas, or suggestions in the comments below and help inspire others in the crochet community.