The Crochet Bag – Pattern is one of the most versatile and rewarding projects you can undertake as a crafter, offering a perfect blend of functionality and artistic expression. Whether you are looking to create a sturdy market tote for your weekly grocery runs or a delicate, fashionable clutch for a night out, mastering a Crochet Bag – Pattern allows you to customize every detail to fit your personal style. In today’s world of sustainable fashion, making your own accessories is not just a hobby; it is a way to reduce waste while carrying a piece of art that is uniquely yours.
Diving into a Crochet Bag – Pattern provides a wonderful opportunity to experiment with different textures, yarn weights, and structural techniques that you might not encounter in simpler projects like scarves or blankets. The beauty of a well-constructed handmade bag lies in its durability and the rhythm of the stitches used to create a fabric strong enough to carry your essentials. For many, starting a new crochet project specifically for a bag is the gateway to learning how to shape flat pieces into three-dimensional objects, a skill that is fundamental in the world of fiber arts.
Throughout this comprehensive guide, we will explore the essential elements that make a Crochet Bag – Pattern successful, from choosing the right materials to understanding the technical terms involved in the construction. We will focus on creating a piece that is not only visually stunning but also practical and long-lasting. By the end of this article, you will feel confident in your ability to follow any bag pattern, troubleshoot common issues, and even add your own creative flair to the final product. Let’s get our hooks ready and dive into the world of crochet accessories.
1. Selecting the Perfect Materials for Your Crochet Bag – Pattern
The success of your Crochet Bag – Pattern depends heavily on the type of yarn you choose, as the material dictates the bag’s strength and stretch. For most functional bags, 100% cotton yarn is the gold standard because it is inelastic, ensuring your bag won’t sag down to your knees once you put your wallet and keys inside. Cotton also offers excellent stitch definition, making the intricate details of your Crochet Bag – Pattern really stand out to the naked eye.
When looking at a Crochet Bag – Pattern, you must also consider the yarn weight, which refers to the thickness of the strand. A worsted weight (Level 4) yarn is typically the most popular choice for beginner and intermediate bags, as it works up quickly while remaining manageable. If you are aiming for a more rugged, bohemian look, you might even consider t-shirt yarn or macramé cord, which adds a unique structural integrity to the crochet design.
The choice of crochet hook is the next critical step in your journey. For a Crochet Bag – Pattern, it is often recommended to use a hook size slightly smaller than what the yarn label suggests. This technique creates a tighter tension and a denser fabric, which prevents small items from slipping through the gaps between your stitches. An ergonomic hook is highly recommended here, as bag projects often require a firm grip and repetitive motions that can tire the hands.
Another essential material term is Lining. While not every Crochet Bag – Pattern requires a fabric lining, adding one can elevate your project from a simple craft to a professional-grade accessory. Lining your crochet bag with cotton or linen fabric protects the yarn from snagging on keys and prevents the bag from stretching over time. It also provides an opportunity to add internal pockets, increasing the utility of your handmade creation.
Don’t forget about Hardware and Closures. A complete Crochet Bag – Pattern often incorporates elements like magnetic snaps, zippers, or even wooden handles. These components are what transform a simple crochet sack into a functional fashion piece. Learning how to securely attach these items to your crochet fabric is a vital skill that ensures your bag is as secure as it is beautiful, making it ready for daily use.
Lastly, consider the Color Palette. Since a Crochet Bag – Pattern is a statement piece, choosing colors that complement your wardrobe is key. Neutral tones like beige, cream, or slate grey are timeless and match almost any outfit, while vibrant variegated yarns can turn your crochet tote into a colorful summer staple. The versatility of the Crochet Bag – Pattern allows you to play with stripes, color-blocking, or even ombre effects to achieve the exact look you desire.
2. Mastering the Base and Foundation Stitches
Every great Crochet Bag – Pattern starts with a solid foundation, which is usually the bottom or “base” of the bag. The base can be worked in a variety of shapes, including circles, ovals, or rectangles, depending on the desired silhouette. A rectangular base is often started with a foundation chain, followed by rows of single crochet to create a flat, sturdy panel that will support the weight of the bag’s contents.
A popular technique for the base of a Crochet Bag – Pattern is the Oval Base, which is worked in the round. Instead of just working back and forth, you crochet around both sides of the initial chain. This creates a smooth, continuous shape that is perfect for crossbody bags or market totes. Mastering the increases at the curves of the oval is crucial for keeping the base flat and preventing it from “cupping” or ruffling prematurely.
The Magic Ring (or Magic Circle) is another term you will see in a Crochet Bag – Pattern that features a circular bottom. This method allows you to start your project without a hole in the center, which is especially important for bags so that coins or pens don’t fall out. By pulling the tail of the yarn, you can close the center tightly, creating a professional and secure start to your round crochet bag.
As you move from the base to the sides of the bag, you will encounter the term Working in the Back Loops Only (BLO). This is a common instruction in a Crochet Bag – Pattern to create a crisp “corner” or ridge where the bottom of the bag ends and the sides begin. By only inserting your hook into the back loop of the stitch, you create a structural fold that helps the bag stand upright and gives it a more defined, boxed shape.
The Gauge Swatch is a step that many crafters skip, but in a Crochet Bag – Pattern, it is essential. Gauge refers to the number of stitches and rows per inch. If your gauge is too loose, the bag will be floppy and oversized; if it’s too tight, the bag may be smaller than expected. Taking the time to check your gauge ensures that your finished crochet bag matches the dimensions specified in the pattern, saving you from potential frustration later.
Finally, let’s discuss the Slip Stitch (sl st). While often used just to join rounds, in a Crochet Bag – Pattern, the slip stitch can be used to reinforce the top edge or to create decorative surface textures. A final round of slip stitches around the opening of your bag adds a “braided” look and provides extra stability, ensuring the opening doesn’t stretch out of shape with frequent use. This small detail significantly improves the durability of the crochet work.
3. Creating Texture and Body with Decorative Stitches
Once the foundation is set, a Crochet Bag – Pattern usually moves into the “body” of the bag, where you can let your creativity shine with different stitch patterns. The Moss Stitch (also known as the Granite or Linen stitch) is a favorite for bags because it creates a dense, woven-like fabric that is incredibly strong. This stitch uses a combination of single crochet and chain spaces, resulting in a beautiful texture that looks much more complex than it actually is.
For those who want a lighter, more breathable Crochet Bag – Pattern, the V-Stitch or Mesh Stitch are excellent choices. These are commonly used in market bags or “produce bags” because they allow the fabric to expand and stretch to hold bulky items like fruits and vegetables. These openwork patterns are not only functional but also save on yarn, making them a cost-effective choice for your DIY crochet projects.
The Bobble Stitch or Puff Stitch can be incorporated into a Crochet Bag – Pattern to add 3D texture and visual interest. These stitches create small “bumps” on the surface of the bag, giving it a playful and modern feel. When using these stitches, it’s important to remember they are “yarn eaters,” meaning they require more yarn than flat stitches, so ensure you have enough skeins on hand before you start your project.
In more advanced Crochet Bag – Pattern designs, you might see Tapestry Crochet. This technique involves carrying two or more colors of yarn at once and crocheting over the unused strands. This allows you to create intricate geometric designs, flowers, or even words directly into the fabric of the bag. Tapestry crochet produces a very thick, sturdy fabric, which is ideal for structured handbags that need to hold their shape without a lining.
Stitch Multiple is a technical term you should understand when customizing a Crochet Bag – Pattern. It refers to the number of stitches needed to complete one repeat of a decorative pattern. If you want to make your bag wider or narrower, you must increase or decrease your stitch count by this multiple. Understanding this math allows you to adapt any decorative stitch to fit the dimensions of your specific bag project perfectly.
Lastly, the Spike Stitch is a wonderful way to add a “designer” look to your Crochet Bag – Pattern. By working a stitch into a row or two below the current one, you create long, vertical loops that look like spikes. This technique is often used with contrasting colors to create a striking visual effect. It also adds an extra layer of yarn to the fabric, which increases the strength and thickness of the bag’s walls.
4. Finalizing with Handles, Straps, and Finishing Touches
No Crochet Bag – Pattern is complete without functional handles or a comfortable strap. The I-Cord is a popular method for creating thin, sturdy straps that don’t stretch as much as a regular chain. Alternatively, you can crochet a wide band using half double crochet for a more comfortable fit on the shoulder. The way you attach these straps—whether by sewing them on or crocheting them directly into the body—determines the weight-bearing capacity of your crochet tote.
Reinforcement is a key concept in the final stages of a Crochet Bag – Pattern. This involves doubling up the yarn or using a smaller hook for the areas where the handles meet the bag. Since these points experience the most stress, reinforcing them ensures that your handmade bag can handle a heavy load without the yarn snapping or the stitches pulling apart. A little extra effort here goes a long way in ensuring longevity.
The term Blocking refers to the process of wetting your finished Crochet Bag – Pattern and pinning it into the correct shape to dry. While often associated with lace or garments, blocking is very helpful for bags to even out the stitches and ensure the sides are perfectly symmetrical. It gives the finished piece a “crisp” look, making your crochet craftsmanship look professional and well-executed.
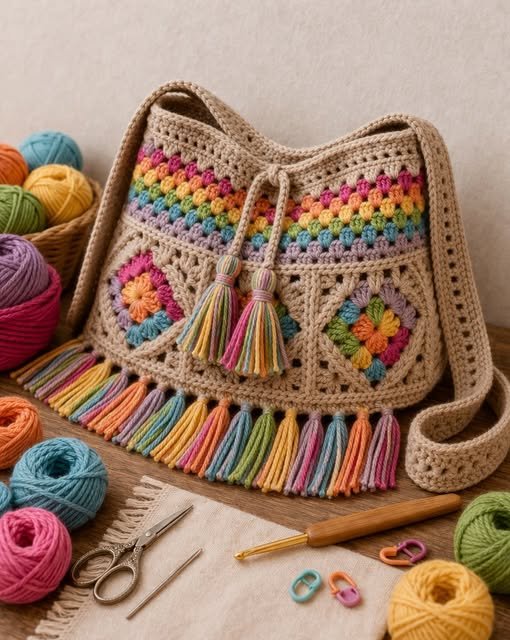
Tassels and Pom-Poms are the ultimate finishing touches for a trendy Crochet Bag – Pattern. These embellishments add a touch of personality and flair. You can easily make them using leftover yarn from your project, ensuring a perfect color match. Attaching a tassel to the zipper pull or the base of the handle is a quick way to make your crochet accessory stand out from the crowd.
Woven-in Ends might seem like a minor detail, but it is crucial for a Crochet Bag – Pattern. Because bags are moved and handled constantly, loose ends can easily wiggle out and become visible. Using a tapestry needle to weave the yarn tails in several different directions ensures they stay hidden and secure, maintaining the clean look of your finished project even after months of use.
Finally, consider the Fastener. Whether your Crochet Bag – Pattern calls for a button, a drawstring, or a zipper, the closure is what makes the bag secure. If you’re using a button, you can often create a “buttonhole” simply by chaining a few stitches and skipping a few in the previous row. A well-chosen fastener acts as both a functional tool and a decorative element, providing the perfect “cherry on top” for your crochet bag masterpiece.
FAQ: Frequently Asked Questions about the Crochet Bag – Pattern
1. Is a Crochet Bag – Pattern suitable for beginners?
Absolutely! Many Crochet Bag – Patterns use basic stitches like the single crochet and involve simple geometric shapes. Market bags and simple totes are fantastic projects for beginners to practice their tension and learn how to construct a functional item.
2. How do I prevent my crochet bag from stretching?
The best way to prevent stretching is to use cotton yarn instead of acrylic and to work with a tight tension. Additionally, sewing a fabric lining inside the bag will provide a non-stretch barrier that keeps the crochet stitches in their original shape.
3. What is the best yarn weight for a durable bag?
For a standard bag, worsted weight (Level 4) is the most common and durable. However, for heavy-duty bags, you might use bulky yarn or even multiple strands of yarn held together to create a thicker, more resilient fabric.
4. Can I wash my handmade crochet bag?
Most crochet bags made from cotton or synthetic fibers can be hand-washed in cool water with a mild detergent. Always lay the bag flat on a towel to dry to ensure it maintains its shape. Avoid the dryer, as it can cause the fibers to pill or the bag to shrink.
5. How many skeins of yarn do I need for a Crochet Bag – Pattern?
This depends on the size of the bag and the stitches used. A small crossbody bag might only need 1-2 skeins (100g each), while a large beach tote or market bag could require 4-6 skeins. Always check the pattern requirements before purchasing your yarn.
6. Do I need to line my crochet bag?
While not strictly necessary for decorative bags, lining is highly recommended for bags you plan to use daily. It prevents the crochet from stretching, hides the messy “wrong side” of your work, and keeps your belongings secure.
Conclusion
In this article, we have taken a deep dive into the world of the Crochet Bag – Pattern, covering everything from the importance of selecting cotton yarn for durability to the technical aspects of creating a solid base and foundation. We explored how different stitches like the Moss stitch and Tapestry crochet can add both strength and beauty to your work, and we discussed the essential finishing touches like lining, hardware, and blocking that turn a simple project into a professional accessory. Whether you are making a gift or a new favorite tote for yourself, the journey of following a Crochet Bag – Pattern is one filled with learning and creative satisfaction.
Mastering these techniques will allow you to create high-quality, sustainable accessories that stand the test of time. We hope this guide serves as a valuable resource for your next crafting adventure. Please leave your sincere opinion and suggestions in the comments below!