If you have been looking for the perfect DIY project to elevate your home organization, mastering a Crochet Basket – Pattern is the ideal place to start. Not only does this functional piece of home decor add a touch of warmth and personality to any room, but it also provides a practical solution for storing everything from yarn balls and blankets to children’s toys and office supplies. Whether you are a seasoned artisan or a complete beginner with a hook in hand, creating a Crochet Basket – Pattern is an incredibly rewarding experience that yields professional-looking results.
The beauty of a handmade Crochet Basket – Pattern lies in its versatility and durability. By choosing the right yarn and stitch density, you can transform simple string into a sturdy vessel that stands on its own. This project allows you to practice essential skills like working in the round, maintaining consistent tension, and understanding how to structure your work so it maintains its shape over time. Plus, it is a fantastic way to utilize scraps of yarn, making it a sustainable choice for environmentally conscious crafters.
In this comprehensive guide, we will walk you through every stage of the process, ensuring that your final product is both beautiful and functional. We will cover the selection of materials, the foundational techniques required for a sturdy Crochet Basket – Pattern, and some creative ways to customize your creation to fit your personal aesthetic. Get ready to transform your space with a custom, handmade Crochet Basket – Pattern that you can proudly display in your living room, bedroom, or workspace.
1. Choosing the Right Materials for Your Project
Selecting the correct materials is the first and most critical step when following any Crochet Basket – Pattern. The stability of your basket depends almost entirely on the type of yarn you choose. For a sturdy, rigid structure, cotton yarn or t-shirt yarn are typically the best options. These materials have less stretch than acrylic or wool, which helps the basket walls stand upright without sagging or bowing under their own weight.
Before you begin, consider the weight of the yarn. Bulky or super bulky yarns work up much faster and create a thicker fabric naturally. If you prefer to use a thinner yarn, you can experiment by holding two or more strands together to create a denser weave. This technique not only adds thickness but also allows you to mix colors for a unique, marled effect that adds depth to your Crochet Basket – Pattern.
The hook size is equally important in determining the final result of your Crochet Basket – Pattern. While many patterns suggest a specific hook size, you may need to go down a size or two to achieve a tighter, more rigid stitch. A smaller hook creates less space between the stitches, which is exactly what you want when you are creating a container designed to hold objects securely.
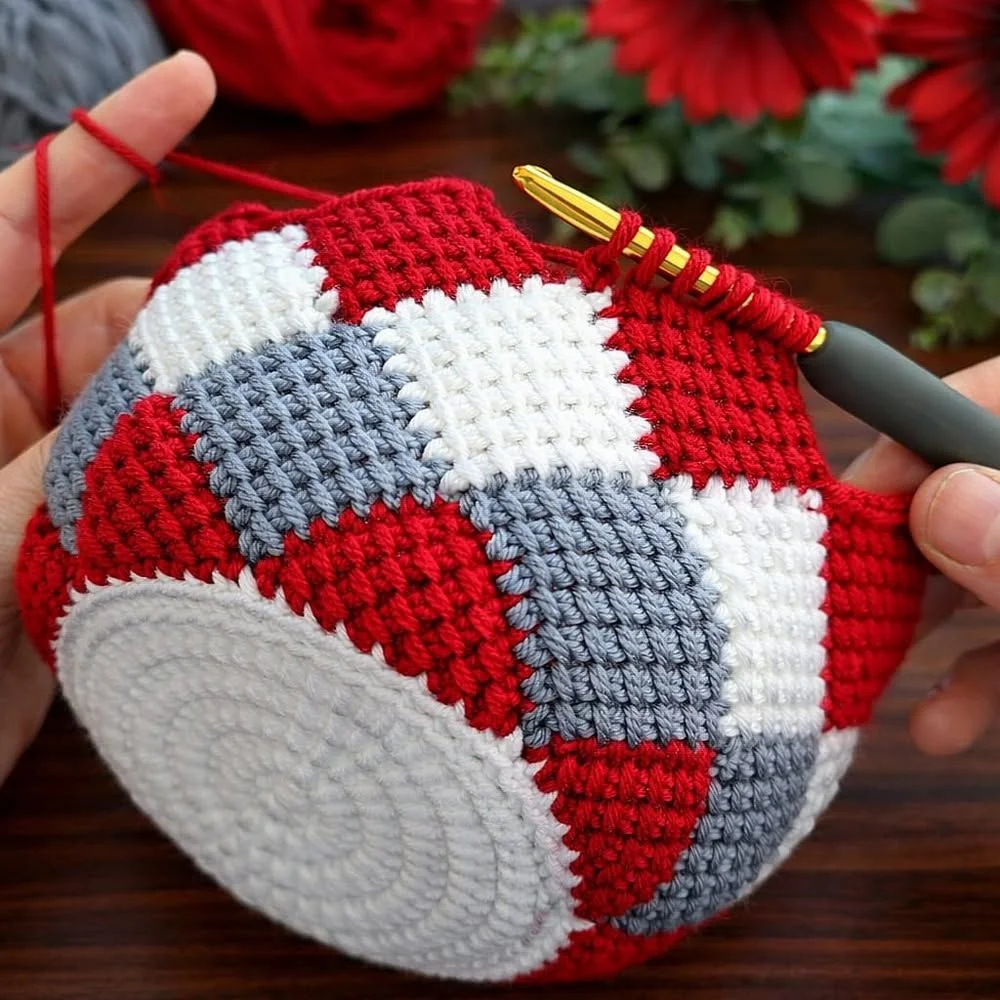
Color choice plays a significant role in the overall aesthetic. Neutral tones such as cream, beige, or soft grays often look classic and fit well in almost any home decor style. However, bold, bright colors can turn your Crochet Basket – Pattern into a statement piece. Consider where the basket will live in your home and select colors that complement your existing furniture and accessories.
Don’t overlook the importance of quality markers. Because you will be working in continuous rounds, keeping track of your starting point is essential to prevent your basket from becoming lopsided. Using a stitch marker at the beginning of each row helps you maintain your stitch count, ensuring that your Crochet Basket – Pattern remains symmetrical and balanced from base to rim.
Finally, think about potential add-ons. Some crafters love to incorporate leather handles, wooden bases, or even fabric liners to give their projects a professional, high-end feel. These extra touches can be added once the main body of your Crochet Basket – Pattern is complete. Keep these in mind while you shop for supplies to ensure your vision is fully supported by the materials you buy.
2. Mastering the Basic Crochet Basket – Pattern Techniques
The foundation of a perfect Crochet Basket – Pattern is the “magic ring,” also known as the magic circle. This technique allows you to start your round without leaving a hole in the center of the base. By pulling the tail end of your yarn, you can cinch the opening tight, creating a professional and polished start that is characteristic of a high-quality handmade item.
Once you have established your base, you will likely be using the single crochet stitch for the duration of the project. The single crochet is the workhorse of the Crochet Basket – Pattern because it is tight, short, and provides the necessary rigidity for the walls. Consistency in your tension is key here; try to keep your stitches uniform so the basket doesn’t have unsightly gaps or loose areas.
Working in the round is another essential skill. You will be increasing your stitch count in the first few rounds to create the circular base, then transitioning to “even” rounds to build the height of the basket. Mastering these increases is vital, as it determines how flat your base will lie. A flat base is a hallmark of a well-executed Crochet Basket – Pattern that won’t wobble when placed on a table.
When you are ready to build the walls, you may choose to work in the back loops only or the front loops only to create a decorative ridge. This simple change in technique can add texture and interest to the exterior of your Crochet Basket – Pattern. It also creates a natural “hinge” where the base meets the wall, helping the side panels stand up more effectively.
To ensure your basket remains upright, consider the “crab stitch” or reverse single crochet for the final border. This stitch adds a beautiful, rope-like edging to the rim of your basket, which provides extra stability and a decorative finish. Many designers include this detail in their Crochet Basket – Pattern because it reinforces the edge, preventing it from curling over time.
Finally, remember to weave in your ends securely. Because baskets are often handled, moving objects in and out, loose ends can easily become snagged. Taking the time to properly anchor your yarn tails on the inside of the basket will extend the lifespan of your work and keep your Crochet Basket – Pattern looking pristine for years to come.
3. Customizing Your Design for Home Organization
Customization is the best part of working with a Crochet Basket – Pattern. If you need a specific size to fit into a bookshelf or a cabinet, you can easily adjust the number of rounds in your base. By adding more increase rounds, you can make the base larger, or by stopping earlier, you can create a smaller, compact basket perfect for holding keys, pens, or lip balms.
You can also play with the height of your basket. If you want a tall laundry hamper style, simply continue working even rounds until you reach the desired height. If you prefer a shallow catch-all tray for your entryway table, you can stop building the walls after just a few inches. A Crochet Basket – Pattern is completely adaptable to the specific storage needs of your household.
Consider adding handles to make your basket functional for transport. You can create crochet handles by chaining a set number of stitches, skipping some stitches on the rim, and then anchoring them back into the work in the next round. This allows you to carry your basket easily from room to room, which is perfect for storing craft supplies or kids’ toys that need to be moved around.
For a unique aesthetic, try using different textures. You can alternate between single crochet and puff stitches to create a ribbed or bobble effect on the exterior. This adds a tactile element to your Crochet Basket – Pattern that makes it look like a store-bought boutique item. It’s a great way to showcase your personal style while keeping your home organized.
Lining your basket with fabric is another wonderful way to customize it. Using a simple cotton fabric, you can create a removable liner that protects your items from snagging on the crochet stitches. This is particularly useful if you are using your Crochet Basket – Pattern to store delicate items, like scarves or small accessories, and it adds a pop of color or pattern that contrasts beautifully with the yarn.
Don’t be afraid to combine techniques. You can make a basic basket and then add pom-poms, tassels, or even wooden beads to the rim. These decorative elements can change the entire vibe of the project, taking it from minimalist and modern to bohemian and playful. Your Crochet Basket – Pattern is a blank canvas, so let your creativity guide your design choices.
4. Troubleshooting Common Issues in Crochet
Even experienced crafters encounter challenges when working on a Crochet Basket – Pattern. One of the most common issues is the base “ruffling” or turning into a bowl shape too early. This usually happens because you are adding too many stitches in your increase rounds. If your base won’t lay flat on the floor, try removing a few increase stitches in the later rounds of the base construction.
On the other hand, if your base is cupping inward, it means you aren’t increasing enough. Your circle is trying to turn into a cylinder prematurely. Ensure you are following the standard circle math: increase by the same number of stitches as your starting round every time you add a new round to keep it flat. A flat base is essential for any successful Crochet Basket – Pattern.
Leaning stitches are another common annoyance. When working in continuous rounds, the starting point of each round will naturally drift slightly to the right. While this is normal, if it looks too messy, you can try closing each round with a slip stitch and chaining up before starting the next. This creates a visible “seam” but keeps your rows perfectly straight and aligned.
If your basket feels too soft or flimsy, check your tension again. You might need to drop down a hook size. Additionally, you can try “stiffening” the finished basket with a mixture of water and fabric stiffener or starch. This is a common trick used by those who follow a specific Crochet Basket – Pattern but find that their yarn is just a little too soft to hold a rigid shape.
Curling rims are a frequent complaint. If the top edge of your basket wants to roll inward, try working your final round in the back loops only or adding a round of slip stitches. This creates a firmer edge that maintains its structure. A well-finished rim is the mark of a professional-looking Crochet Basket – Pattern that will hold its shape even after years of daily use.
Finally, yarn management is crucial. If you are holding multiple strands together, they can sometimes twist and knot. Take the time to keep your balls of yarn organized or use a yarn bowl. A smoother, more consistent flow of yarn will result in a cleaner stitch, making your Crochet Basket – Pattern look much more refined and well-crafted.
Frequently Asked Questions (FAQ)
What is the best type of yarn for a Crochet Basket – Pattern?
For the best results, use sturdy, low-stretch yarns like cotton, recycled cotton, or t-shirt yarn. These materials help your basket maintain its structure and shape over time.
How long does it typically take to finish a Crochet Basket – Pattern?
Depending on the size and your experience level, a small basket can be finished in an hour, while a larger one might take a few hours or an afternoon.
Can I wash my crochet basket?
Yes, if you use cotton yarn, you can usually hand wash or machine wash on a gentle cycle, though it is best to air dry to prevent the shape from distorting.
Is a Crochet Basket – Pattern suitable for beginners?
Absolutely! Most basic patterns only require the single crochet stitch, making them a perfect project for those just learning how to crochet.
Do I need special tools for this project?
No, you only need a crochet hook, your chosen yarn, a pair of scissors, and a tapestry needle for weaving in the ends.
How do I make my basket extra stiff?
If your yarn is soft, you can use a spray starch or a mixture of water and white glue to stiffen the fabric once the basket is complete.
Conclusion
In this guide, we explored the rewarding process of creating a functional and stylish home decor item using a Crochet Basket – Pattern. We discussed the importance of choosing the right materials, such as cotton or t-shirt yarn, and how to maintain the perfect tension to ensure a sturdy, upright result. We also walked through the technical aspects of working in the round, the benefits of customizing your project with handles or liners, and how to troubleshoot common issues like leaning stitches or a non-flat base.
By mastering these basics, you now have the tools to create beautiful, long-lasting storage solutions for your home. We hope this guide has inspired you to pick up your hook and start crafting today. What did you think of these techniques, and do you have any other tips for fellow crafters? Please leave your sincere opinion and suggestions in the comments below!