If you’re searching for a fun and festive way to add charm to your holiday décor, crafting with a Crochet bells – Pattern is a wonderful option. These tiny handmade ornaments bring a nostalgic and heartwarming feel to Christmas trees, wreaths, gift wrapping, or even home décor all year round. Not only are they beautiful and customizable, but they’re also an excellent project for using up scrap yarn and practicing new crochet techniques.
One of the best things about using a Crochet bells – Pattern is its simplicity. Even beginner crocheters can follow a basic pattern to create stunning bell shapes that look intricate but are surprisingly quick to make. Whether you’re making one bell or an entire set, this project is satisfying, relaxing, and makes for lovely handmade gifts.
In this article, you’ll learn everything you need to confidently create your own crochet bells. From choosing the right yarn and hook to shaping your bell, stiffening it for structure, and adding personal decorative touches, we’ll guide you through the full process. Let’s begin with the basics to set you up for success.
1. Getting Started with the Right Materials
Starting your project with the right materials is crucial for achieving a polished and long-lasting result when working with any Crochet bells – Pattern. The beauty of this project is that it doesn’t require a lot of materials, and most of what you need might already be in your yarn stash.
Begin by selecting your yarn. Cotton yarn is the most popular choice for crochet bells because of its smooth texture and ability to hold shape when stiffened. Mercerized cotton gives a nice sheen that makes your bells look more decorative and festive. You can also use metallic thread or yarn with a sparkle for a more holiday-themed look.
Choose a small crochet hook to get tight, dense stitches. A size between 1.5 mm and 3.5 mm is typically recommended, especially when working with fine yarn or thread. Tight stitches help your bell hold its form even before stiffening, which is key for a neat appearance.
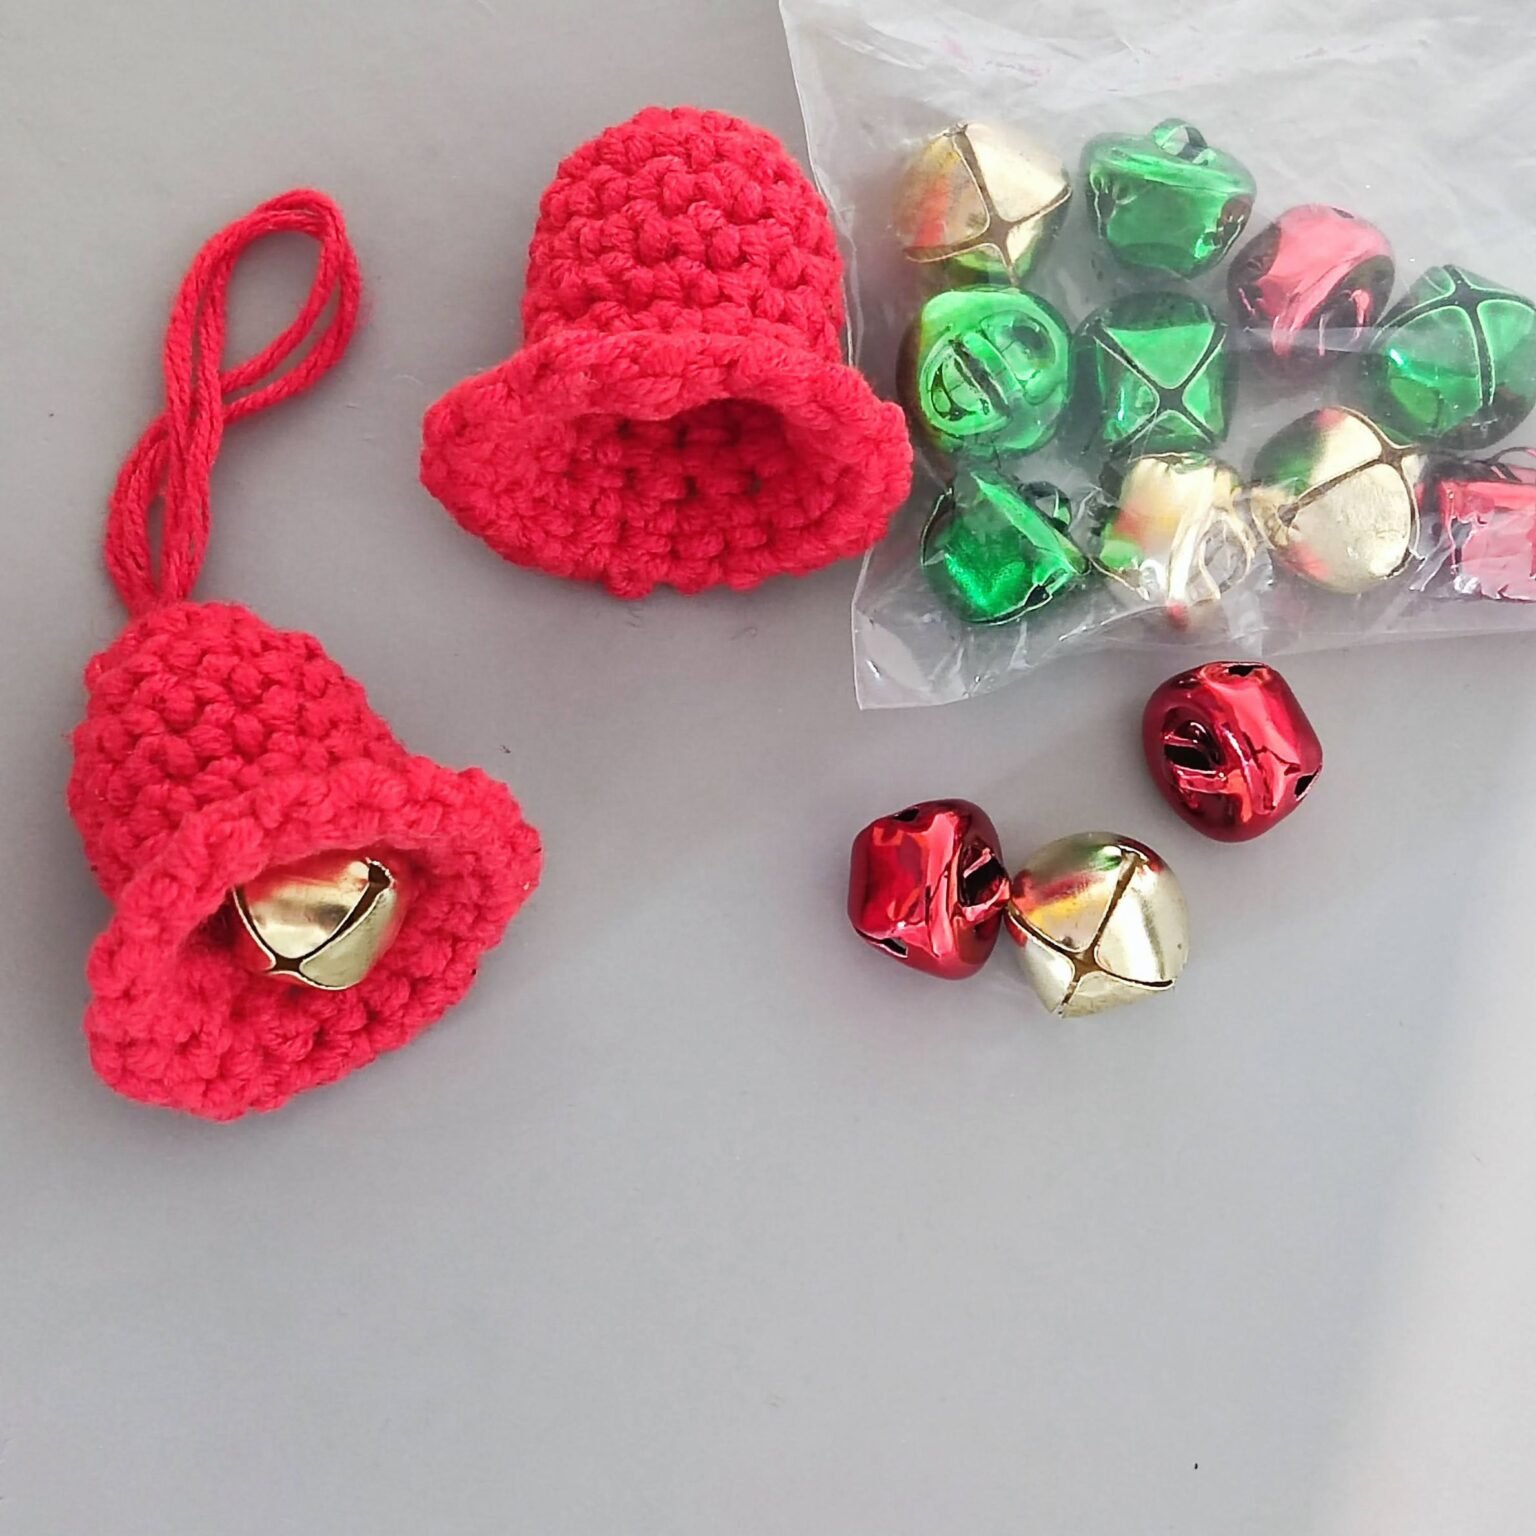
You’ll also need a yarn needle to weave in ends, a pair of sharp scissors, and optional extras like tiny jingle bells, beads, ribbon, or lace. These small additions can make a huge impact on the finished look and personalize your project for any occasion.
One important step in making crochet bells is shaping and stiffening. To do this, you’ll need a stiffening agent such as white craft glue, fabric stiffener, or a mixture of sugar and water. A foam or plastic bell mold helps form a smooth shape while drying.
Lastly, you may want some embellishment tools like hot glue, sewing thread, or even a needle and tiny decorations. Planning your materials ahead will help your Crochet bells – Pattern turn out professional-looking and durable.
With everything gathered, organize your materials and set up a comfortable space to begin your crochet bell journey. You’re now ready to dive into the pattern itself.
2. Understanding and Following a Crochet Bells – Pattern
Reading and understanding a Crochet bells – Pattern might feel overwhelming at first, but it’s actually a straightforward process once you know what to look for. Crochet patterns for bells often follow a simple structure and use basic stitches, making them approachable for all levels.
Most patterns start with a magic ring or a small number of chain stitches joined into a circle. This forms the top of the bell. From there, you’ll typically work in rounds, increasing gradually to give the bell its flared bottom shape.
Common stitches in bell patterns include single crochet (sc), double crochet (dc), and slip stitch (sl st). Some patterns may also incorporate puff stitches or picots for decorative edges. Always refer to the stitch glossary included in your Crochet bells – Pattern if you’re unsure about any abbreviations.
As you build your rounds, you’ll notice the bell taking shape. The increases are usually concentrated near the bottom half to give that classic bell silhouette. Keep your tension even for a consistent look throughout the piece.
Once your bell is complete, you may crochet a loop or chain string at the top so it can be hung. Some patterns suggest attaching a real jingle bell or crocheting a small ball inside the bell to simulate the clapper, adding both visual and audible appeal.
Finishing off involves weaving in your ends carefully and moving on to the stiffening process. This step enhances the structure and makes your Crochet bells – Pattern come to life as a functional, decorative piece.
3. Personalizing and Decorating Your Crochet Bells
One of the most exciting aspects of any Crochet bells – Pattern is the ability to personalize your bells to suit your style, season, or purpose. Whether you prefer traditional Christmas colors or something more whimsical, the customization options are limitless.
Start with color selection. Red, white, green, gold, and silver are perfect for holiday bells. But don’t be afraid to experiment with pastel shades for Easter, autumn tones for Thanksgiving, or even white-on-white for elegant wedding décor.
Add texture by using different yarn types. Metallic threads create shimmer, velvet yarn adds a soft luxurious feel, and crochet thread gives a delicate, lacy appearance. Mixing these textures can elevate even the simplest bell pattern.
You can also embellish the edges. Add crocheted picots or shell stitches to the bottom of the bell for a fancier look. These little extras take only a few minutes but make your bell look more ornate and handcrafted.
Incorporating beads or sequins during the last few rounds of your Crochet bells – Pattern is another way to add sparkle. Sew on tiny pearls, crystals, or seed beads after stiffening to avoid affecting the shaping process.
Ribbons are another popular decorative touch. A small satin bow at the top of your bell adds charm, while a gold thread loop makes it easy to hang your bell on the tree, door knob, or window.
You can also theme your bells. Create a set of matching bells in different sizes or designs to display as a garland or hang them from a wooden ring as a mobile. The creative options are truly endless with this charming pattern.
4. Benefits of Making and Using Crochet Bells
Beyond their visual appeal, working with a Crochet bells – Pattern has many benefits — from creative satisfaction to practical uses around the home or during holidays and celebrations.
First, crochet bells make fantastic handmade gifts. They’re small, quick to create, and easy to customize. A set of bells tied together with ribbon makes a heartfelt present for family, friends, teachers, or neighbors.
Second, these projects are ideal for using up yarn scraps. Since each bell requires only a small amount of thread or yarn, they’re perfect for reducing waste and making the most of leftover supplies from larger projects.
Third, crochet bells are excellent for stress relief. The repetitive motion of crochet is known to have therapeutic effects. Finishing a bell in a short time gives a quick confidence boost and a satisfying sense of completion.
Fourth, these bells are versatile décor items. Use them as Christmas tree ornaments, window hangings, gift toppers, table centerpieces, or party favors. With a little imagination, you can incorporate them into nearly any occasion.
Fifth, they can also be a source of income. Many crafters sell their handmade crochet bells at local craft fairs or on platforms like Etsy. Their charm and affordability make them attractive to customers looking for unique decorations.
Finally, learning to follow a Crochet bells – Pattern helps improve your crochet skills. You’ll become more confident in reading patterns, working in the round, and exploring different stitches and techniques — all while having fun.
FAQ – Crochet Bells – Pattern
Q: Is a Crochet bells – Pattern suitable for beginners?
A: Yes, most bell patterns use simple stitches like single and double crochet, making them beginner-friendly. Look for patterns labeled “easy” to get started.
Q: What’s the best yarn for making crochet bells?
A: Cotton or crochet thread works best because it holds shape well when stiffened. You can also use metallic or sparkly yarns for a festive touch.
Q: How do I stiffen crochet bells to hold their shape?
A: Use fabric stiffener, white glue mixed with water, or sugar starch. Shape the bell on a mold and let it dry completely before decorating.
Q: How long does it take to make a crochet bell?
A: Most small bells can be made in 30 minutes to an hour, depending on the complexity of the pattern and your experience level.
Q: Can I wash crochet bells after they’re stiffened?
A: It’s best to spot-clean them only. Washing may dissolve or weaken the stiffening agent used to hold the bell’s shape.
Q: Where can I find free and premium Crochet bells – Pattern options?
A: You can find a variety of free and paid patterns on websites like Ravelry, Pinterest, Etsy, and crafting blogs that focus on crochet tutorials.
Conclusion
Crafting with a Crochet bells – Pattern is a rewarding and joyful experience that blends creativity with tradition. These charming ornaments are quick to make, endlessly customizable, and perfect for gifting or decorating. Whether you’re a crochet novice or a seasoned maker, creating crochet bells allows you to explore new stitches, practice shaping techniques, and enjoy the meditative nature of crochet.
We hope this guide has inspired you to try your hand at making your own set of crochet bells. If you do, please share your thoughts, tips, or suggestions in the comments below. Your opinion helpsothers learn and brings our crochet community closer together.
Happy crocheting!