A crochet bow hair accessory – pattern is one of the most charming and versatile projects you can take on, whether you are a seasoned crafter or just picking up a hook for the first time. There is something incredibly satisfying about transforming a simple strand of yarn into a stylish, handmade piece that adds a touch of personality to any outfit. In this guide, we will explore everything you need to know about creating your own crochet bow hair accessory using a professional-grade pattern that ensures a beautiful result every time.
Choosing to work with a crochet bow hair accessory – pattern allows you to customize your style in ways that store-bought items simply cannot match. You can select the exact fiber, weight, and color of the yarn to complement your wardrobe or create a thoughtful, handmade gift for a friend. Because these accessories are small and require very little material, they are the perfect “stash-buster” projects for using up leftover yarn while practicing new stitches and tension techniques.
As we dive into this crochet bow hair accessory – pattern, it is important to understand that the “pattern” serves as your roadmap. It dictates the dimensions, the drape of the fabric, and the structural integrity of the bow. By following a structured pattern, you ensure that your crochet bow hair accessory maintains its shape even after multiple wears. Let’s break down the essential components, from the materials required to the finishing touches that make your handiwork look boutique-quality.
1. Essential Materials for Your Crochet Bow Hair Accessory – Pattern
The foundation of any successful crochet bow hair accessory – pattern starts with selecting the right yarn. For hair accessories, a cotton or mercerized cotton yarn is often preferred because it offers excellent stitch definition and holds its shape better than acrylic. Using a crochet bow hair accessory – pattern designed for lightweight yarn (like sport or DK weight) will result in a delicate, elegant bow that isn’t too heavy for the hair.
Your crochet hook size is the next critical element in the pattern. Generally, you want to use a hook slightly smaller than what the yarn label recommends to create a tighter, firmer fabric. This ensures that the crochet bow hair accessory doesn’t look “holey” or lose its structure when you tie the center knot. A 2.5mm or 3.0mm hook is usually the sweet spot for these types of projects.
Beyond yarn and hooks, you will need a few basic notions to complete your crochet bow hair accessory – pattern. A pair of sharp embroidery scissors, a darning needle for weaving in ends, and a measuring tape are indispensable. These tools help you maintain the precision required by the pattern to ensure both loops of your bow are perfectly symmetrical and aesthetically pleasing.
To turn your crochet piece into a functional crochet bow hair accessory, you must decide on the attachment. Alligator clips, barrettes, or elastic hair ties are the most common choices. The pattern usually involves crocheting a small “bridge” or center strip that will wrap around both the bow and the hair hardware, securing them firmly together without the need for messy glue.
Don’t forget about embellishments if you want to elevate the basic crochet bow hair accessory – pattern. Small pearls, sequins, or even a contrasting border color can make your work stand out. However, if you are a beginner, it is best to stick to the core pattern first to master the shaping before adding complex decorative elements to your crochet project.
Finally, tension is a “hidden” material in every crochet bow hair accessory – pattern. Consistent tension is what separates a professional-looking accessory from a lumpy one. If you find your stitches are too loose, the bow will flop; if they are too tight, the pattern may result in a bow that is stiff and difficult to shape. Take your time with the initial rows to find a rhythm.
2. Understanding the Crochet Bow Hair Accessory – Pattern Construction
The most common crochet bow hair accessory – pattern is built using a simple rectangular construction. You start by chaining a specific number of stitches to determine the width of the bow’s loops. By working in rows of single or double crochet, you create a flat fabric that is eventually folded and cinched in the middle to create the iconic bow silhouette.
In a more advanced crochet bow hair accessory – pattern, you might work in the round. This creates a double-layered tube of crochet fabric that is flattened. The benefit of this technique is that the bow has more “body” and thickness, making it look more substantial. This pattern style is particularly popular for oversized “statement” bows that need to stand upright on a headband.
The “cinching” process is where the magic happens in a crochet bow hair accessory – pattern. Once your rectangle is finished, you use a long tail of yarn to wrap tightly around the center. This creates the folds and pleats that give the bow its character. The pattern will usually specify how many wraps are needed to achieve the desired look and how to secure the yarn at the back.
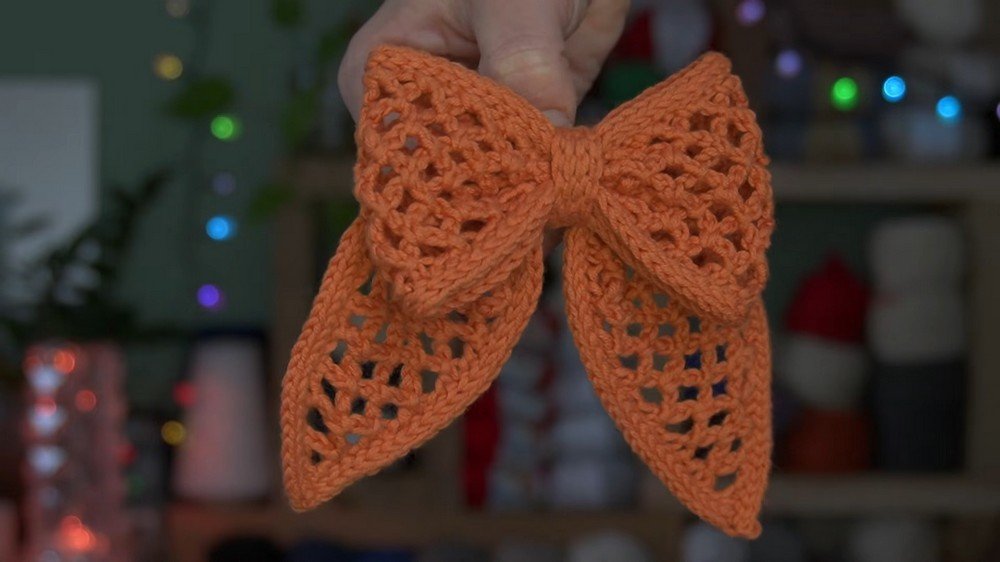
Another variation in the crochet bow hair accessory – pattern involves creating “tails” for the bow. These are two additional strips of crochet fabric that hang down from the center knot. This gives the accessory a more traditional, ribbon-like appearance. If your pattern includes tails, make sure to block them so they hang straight and don’t curl up at the edges.
Stitch choice is also a major factor in the crochet bow hair accessory – pattern. While single crochet is the sturdiest, using a half-double crochet or a moss stitch can add a beautiful texture to the fabric. Some patterns even incorporate lace-like stitches for a vintage, “shabby chic” look that is perfect for weddings or formal occasions.
Regardless of the specific pattern you choose, the key is symmetry. A good crochet bow hair accessory – pattern will provide specific row counts and stitch counts so that the left side of your bow is a mirror image of the right. Following these counts strictly is the best way to ensure your crochet bow hair accessory looks balanced and professional.
3. Step-by-Step Execution of the Pattern
To begin the crochet bow hair accessory – pattern, create a slip knot and chain a length that corresponds to twice the desired width of one bow loop. For a medium-sized bow, a chain of 30 to 40 stitches is often sufficient. The pattern will then instruct you to join the chain to work in the round or to turn and work back across the chain for a flat piece.
As you work through the rows of the crochet bow hair accessory – pattern, keep an eye on your edges. Turning chains often cause “bumps” at the ends of rows, so make sure you are placing your last stitch of the row correctly. A clean edge makes it much easier to assemble the crochet bow hair accessory later on, especially when you are wrapping the center.
Once the main body of the crochet bow hair accessory – pattern is complete, fasten off your yarn, leaving a long tail of about 10-12 inches. You will use this tail to sew the ends of your rectangle together if you worked flat, creating a continuous loop. This loop is the basis of your crochet bow hair accessory before the center is pinched.
Next, the crochet bow hair accessory – pattern will direct you to create the center strip. This is usually a very narrow rectangle, only 3 or 4 stitches wide and about 2 inches long. This piece acts as the “knot” of the bow. It covers the messy yarn wraps in the center and provides a clean, polished finish to your crochet bow hair accessory.
Position your main loop so the seam is in the dead center (where it will be hidden by the wrap). Pinch the center to create three distinct folds. Use the long yarn tail to wrap around these folds several times. The crochet bow hair accessory – pattern emphasizes doing this tightly enough to hold the shape but not so tight that it distorts the outer loops of the bow.
The final step in the crochet bow hair accessory – pattern is attachment. Place your clip or hair tie at the back of the cinched bow. Wrap the small center strip you crocheted earlier around both the bow and the clip. Use your darning needle to sew the ends of the center strip together at the back. Your crochet bow hair accessory is now ready to wear!
4. Troubleshooting and Customizing Your Pattern
If your crochet bow hair accessory – pattern isn’t turning out as expected, the most common culprit is yarn weight. If you use a yarn that is too thick for the pattern, the bow will look bulky and lose its “feminine” charm. Conversely, yarn that is too thin might result in a flimsy accessory. Always check the gauge if the pattern provides one to ensure accuracy.
Another common issue with the crochet bow hair accessory – pattern is the bow “flopping” or drooping once it’s in the hair. If this happens, try using a bit of fabric stiffener or spray starch. This is a pro-tip for anyone making a crochet bow hair accessory for a special event where it needs to stay perfectly crisp for several hours.
You can easily customize the crochet bow hair accessory – pattern by changing colors every few rows. This creates a striped effect that looks modern and fun. For a more sophisticated look, try a “variegated” yarn that changes colors gradually. The pattern stays the same, but the visual result is completely different and unique to your style.
If the pattern feels too large for a child, simply reduce the initial chain count and the number of rows. Because the crochet bow hair accessory – pattern is essentially a geometric shape, it is very easy to scale up or down. You can create “mommy and me” matching sets by simply adjusting the dimensions of the same pattern.
Don’t be afraid to experiment with different fibers. While cotton is king for a crochet bow hair accessory, a velvet yarn can create a plush, luxurious bow for the winter months. Just keep in mind that thicker yarns like velvet will require you to adjust the stitch counts in your pattern to avoid making a bow that is too massive for a standard hair clip.
Finally, remember that practice makes perfect. Your first crochet bow hair accessory – pattern might have some slight imperfections, but that is the beauty of handmade items. As you become more comfortable with the pattern, you will be able to whip these up in less than 30 minutes, making them a fantastic item to sell at craft fairs or to give as party favors.
FAQ – Frequently Asked Questions
What is the best yarn for a crochet bow hair accessory – pattern?
The best yarn is typically 100% cotton or a cotton blend in DK or Sport weight. Cotton provides the necessary stiffness to hold the bow’s shape and offers great stitch definition, making the pattern details pop.
How long does it take to complete this pattern?
A standard crochet bow hair accessory usually takes between 20 to 45 minutes to complete, depending on your skill level and the complexity of the pattern. It is one of the fastest crochet projects you can do.
Can beginners follow this crochet bow hair accessory – pattern?
Yes! This project is very beginner-friendly. If you know how to chain, single crochet, and slip stitch, you can successfully complete a crochet bow hair accessory – pattern.
How do I attach the bow to a hair clip?
The most secure way is to sew a small crochet strip (the center knot) around both the bow and the top part of the clip. This avoids the use of glue, which can sometimes fail or damage the yarn.
Is it possible to wash a crochet bow hair accessory?
Yes, but it should be done carefully. Hand wash in cool water with a mild detergent and lay it flat to dry. You may need to reshape the loops while the bow is damp to ensure it maintains the look intended by the pattern.
Can I sell items made from this pattern?
Generally, yes! Most designers allow you to sell finished products made from their patterns, though it is always a nice gesture to credit the pattern source in your product description.
Conclusion
In this article, we have explored the delightful world of the crochet bow hair accessory – pattern, covering everything from the essential materials and tools to the intricate steps of construction and customization. We learned that the secret to a perfect bow lies in the choice of yarn, consistent tension, and the precise execution of the “cinching” technique.
Whether you are making these for yourself, as gifts, or to stock your online shop, the versatility of this pattern makes it a staple for any crochet enthusiast.