The Crochet Bucket Hat – Pattern is more than just a trend—it’s a timeless accessory that’s both stylish and practical. Whether you’re shielding yourself from the summer sun or adding flair to a fall outfit, a handmade crochet bucket hat can be your perfect go-to piece. What makes it even better? You can personalize it, adjust it to your size, and craft it with your favorite yarn colors—all with just a hook and some yarn.
This project is great for beginners who are comfortable with basic stitches and for intermediate crocheters looking to create something fashionable and functional. With its simple construction and repetitive stitch patterns, the Crochet Bucket Hat – Pattern is an ideal weekend project. You can make one for yourself, gift it to a friend, or even sell it at local markets or online shops.
In this guide, we’ll walk you through everything you need to know—from choosing the right yarn and hook size, understanding sizing and shaping, to finishing and styling your hat. Plus, we’ll provide helpful tips for customization and answers to common questions. Let’s get started!
1. Materials and Tools for the Crochet Bucket Hat – Pattern
Before you begin working on your Crochet Bucket Hat – Pattern, you’ll need to gather your materials. Using the right yarn, hook, and tools can significantly affect the outcome of your finished piece.
Start with cotton yarn or a cotton blend. Cotton is lightweight, breathable, and holds its shape well, making it ideal for wearable accessories like hats. If you’re making a hat for cooler weather, consider switching to acrylic or wool-blend yarn for added warmth.
Choose a worsted weight yarn (category 4) for a sturdy and structured bucket hat. This yarn weight gives enough stiffness for the brim without being too bulky on the crown. You can also experiment with lighter (DK) or heavier (bulky) weights depending on your style preference.
For the hook size, use the recommended hook on your yarn label, usually between 4.0mm (G) and 5.5mm (I) for worsted weight yarn. If you crochet tightly, size up; if you crochet loosely, size down. Always make a small swatch to test your tension.
Other tools include a stitch marker to keep track of rounds, a yarn needle for weaving in ends, and scissors. Optionally, use a flexible measuring tape to ensure your hat fits correctly as you go.
Select colors that reflect your personality or the season. A solid-colored bucket hat gives a clean, minimalist look, while striped or color-blocked versions make for a fun statement piece.
Before starting, read through the entire Crochet Bucket Hat – Pattern you’re following. It helps to understand the structure: most hats begin from the crown, worked in the round, expanding outward, followed by the sides and finally the brim.
2. Step-by-Step Construction of a Crochet Bucket Hat
Creating a Crochet Bucket Hat – Pattern involves three main sections: the crown, the sides, and the brim. Let’s go through each part to help you craft your own from start to finish.
Start with the crown of the hat, usually formed by crocheting in the round. Begin with a magic ring or chain 4 and join to form a loop. Then, work single crochets or double crochets into the ring, gradually increasing each round. The goal is to create a flat disc about 5–6 inches in diameter for adult sizes.
Once the crown is complete, you’ll work evenly without increases to create the sides of the hat. This forms the vertical part that gives the bucket hat its distinct shape. Continue working in the round, stitch by stitch, until the hat reaches your desired height (typically 5–6 inches from the crown).
For a more defined structure, some patterns include back loop only stitches or textured stitches on the sides. This adds visual interest and makes the fabric firmer.
Now it’s time to make the brim, which gives the bucket hat its flair. Resume increases every few stitches to begin flaring the edge. The brim can be short and subtle or wide and floppy—customize it to your liking. For stability, some crocheters use a tighter gauge or stiffer yarn for this part.
Try on the hat periodically as you crochet, especially during the side and brim sections, to make sure it fits your head and feels comfortable.
Finally, weave in any loose ends using a yarn needle. Optionally, steam block your finished bucket hat to soften the stitches and shape it perfectly.
3. Styling and Customizing Your Crochet Bucket Hat
One of the best parts about making your own Crochet Bucket Hat – Pattern is the creative freedom to personalize it. There are endless ways to make your hat truly one-of-a-kind.
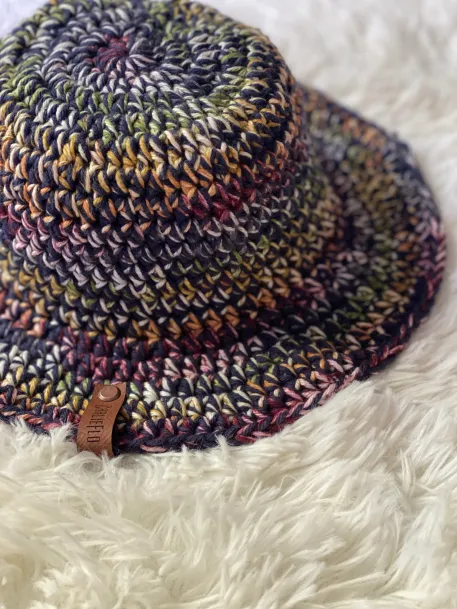
Add colorwork such as stripes, color blocking, or even variegated yarn for a vibrant finish. Try using two or more shades to match your wardrobe or the season.
Incorporate texture and stitch variations like the puff stitch, bobble stitch, or waffle stitch. These techniques add dimension and uniqueness to your bucket hat.
Want a summer-friendly option? Use lightweight cotton yarn and create openwork or mesh designs to make a breathable, lacy version. Perfect for beach days or festivals.
For added charm, sew or crochet small embellishments like flowers, patches, or appliqués on the side of the hat. You can even embroider your initials or add a button detail for flair.
If you’re into eco-conscious fashion, use recycled yarn or natural fibers. There are many sustainable options available that make your project environmentally friendly.
Want to take it further? Create a matching set—pair your bucket hat with a handmade bag, scarf, or headband using the same yarn or design motif.
4. Tips for a Perfect Fit and Long-Lasting Wear
To ensure your Crochet Bucket Hat – Pattern fits well and lasts long, follow these helpful tips throughout your project and after finishing it.
Always measure your head circumference and match it with your pattern’s sizing. You can adjust the number of stitches during the crown section to get a perfect fit.
If you’re following a written pattern, check the gauge with a swatch. This small step ensures your hat won’t turn out too big or too small.
When making hats for others, especially children or gifts, consider adding an adjustable drawstring or elastic band inside the rim for a better fit.
To maintain the structure of your hat, avoid stretching it while wet, and dry it flat after handwashing. Most cotton and acrylic yarns are machine-washable, but always check the yarn label.
Don’t skip blocking, especially if your hat curls or flops too much. Light steam blocking or wet blocking can help shape your hat and set the stitches.
Lastly, label and store your crochet hats properly. Fold them loosely or stuff the inside with tissue to retain their shape when not in use.
FAQ – Crochet Bucket Hat – Pattern
Q1: Is the Crochet Bucket Hat – Pattern beginner-friendly?
Yes! It mostly uses basic stitches like single and double crochet. Once you understand increases and rounds, it’s very beginner-friendly.
Q2: How long does it take to crochet a bucket hat?
On average, about 3–5 hours. Experienced crocheters may finish faster, while beginners may take a bit longer.
Q3: Can I use any type of yarn for this project?
Technically yes, but cotton or acrylic yarns are recommended for structure and durability. Bulky yarns can also work for winter versions.
Q4: How do I make my brim wider or narrower?
Increase more frequently for a wider brim and less frequently for a narrow or more structured brim.
Q5: Can I sell items made from this pattern?
If you’re using a free pattern or one with commercial rights, yes. Always credit the designer if required.
Q6: How do I clean a crochet bucket hat?
Handwashing is best, but some yarns allow machine washing on a gentle cycle. Lay flat to dry to preserve the shape.
Conclusion
The Crochet Bucket Hat – Pattern is the perfect blend of fashion, function, and handmade charm. With endless customization options and simple construction, it’s a project you can return to time and time again. Whether you’re crocheting for yourself, a loved one, or a craft fair, this hat is a fun and stylish way to express your creativity.
We hope this guide helped you feel more confident about starting or perfecting your own crochet bucket hat. If you’ve tried the pattern or have any tips of your own, please leave a sincere opinion or suggestion in the comments below. Your feedback not only supports our crafting community but also helps us improve future content. Happy crocheting! 🧶👒