
Crochet Bucket Hat Pattern is one of the most versatile and timeless accessories that every crochet enthusiast should try. Whether you are creating a stylish summer hat, a lightweight travel accessory, or a handmade gift, this Crochet Bucket Hat Pattern offers endless possibilities for creativity. By mastering a few basic stitches and understanding how increases and shaping work, you can create a beautiful bucket hat that is comfortable, durable, and uniquely yours.
Crocheting a bucket hat is a rewarding project because it combines simplicity with professional-looking results. Even beginners who already know the basic crochet stitches can successfully complete this project by following a structured process. More experienced crocheters can easily personalize the design by changing yarn colors, adding textured stitches, or adjusting the brim width. The beauty of a handmade hat lies in the countless customization options available for every skill level.
Throughout this guide, you will learn every important step needed to complete your own Crochet Bucket Hat Pattern using standard US crochet terminology. This article explains the materials, stitch techniques, crown shaping, body construction, brim expansion, finishing methods, and practical tips that help produce a polished final piece. By the end, you will feel confident enough to adapt the pattern to different sizes and personal styles while improving your crochet skills along the way.
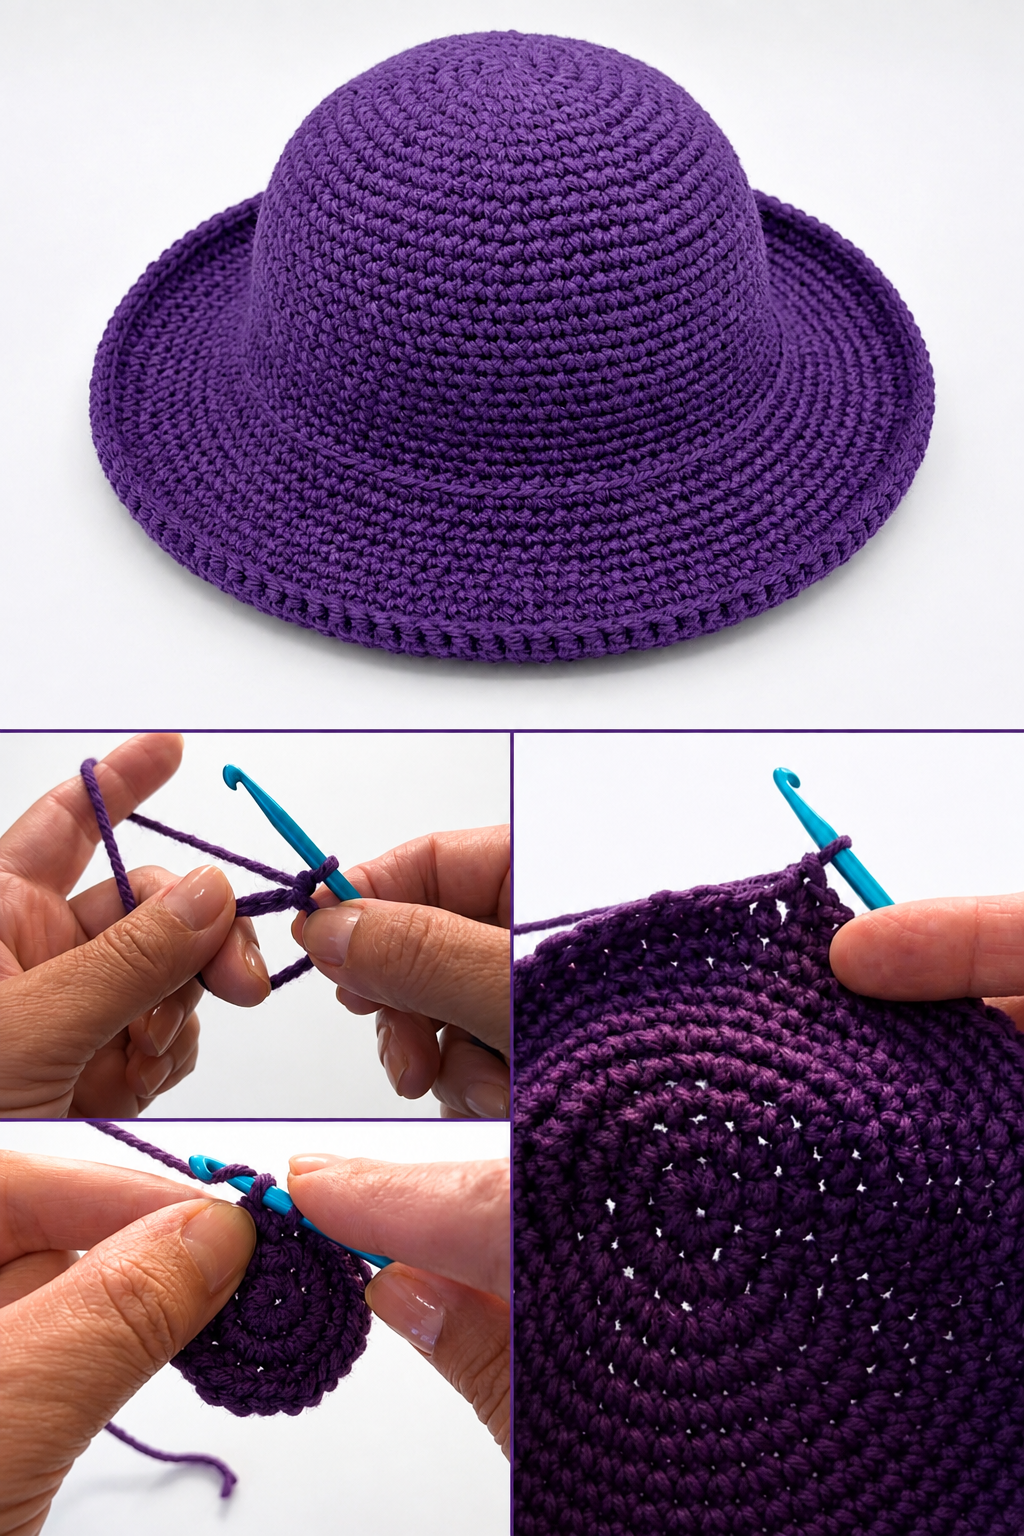
Materials and Preparing Your Crochet Bucket Hat Pattern
Before starting your Crochet Bucket Hat Pattern, gather all your supplies. Choosing quality materials makes a noticeable difference in both the appearance and durability of your finished project.
A medium-weight cotton yarn is an excellent choice because it provides structure while remaining breathable. Cotton also helps the brim maintain its shape without becoming too floppy.
Select a crochet hook that matches your yarn weight. Many crocheters use a 4.0 mm to 5.0 mm hook for bucket hats, although your gauge may require slight adjustments.
Additional supplies include scissors, a yarn needle for weaving in ends, stitch markers, and a measuring tape. Stitch markers become especially useful during increase rounds.
Learning the basic stitches beforehand makes the project much easier. This pattern primarily uses magic ring, chain (ch), slip stitch (sl st), single crochet (sc), and simple increases.
Before beginning the full hat, crochet a small gauge swatch. Although many hats are forgiving, checking your tension ensures the finished hat fits as expected.
Step-by-Step Crochet Stitches for the Bucket Hat
Begin your Crochet Bucket Hat Pattern with a magic ring. Crochet six single crochet stitches into the ring and pull the tail tightly to close the center completely.
Round two consists of increasing into every stitch. Work two single crochet stitches into each stitch from the previous round. This creates a perfectly flat circle.
Continue expanding the crown by evenly spacing increases in every new round. Each round should add six additional stitches while maintaining a smooth circular shape.
Once the crown reaches the desired diameter for your size, stop increasing. From this point forward, crochet one single crochet into every stitch around to begin forming the sides of the hat.
As the sides grow, you will notice the crochet naturally curves downward. Continue working evenly without increases until reaching the preferred hat depth.
To create the classic bucket hat brim, resume increasing gradually. Add evenly spaced increases every few stitches in each round until the brim reaches your desired width. Continue crocheting additional rounds without increases if you prefer a slightly firmer edge.
Shaping, Sizing, and Professional Finishing Techniques
Proper sizing is one of the most important parts of any successful Crochet Bucket Hat Pattern. Measure the wearer’s head circumference before beginning the project whenever possible.
The diameter of the crown determines the final hat size. A slightly larger crown produces a looser fit, while a smaller crown creates a snugger style.
Keep your stitch tension consistent throughout the project. Uneven tension can cause the brim to ripple excessively or curl upward unintentionally.
If the brim begins to wave too much, reduce the frequency of increases. If it curls upward, add a few extra increases in the next round to restore balance.
When the brim reaches the desired width, finish with one final round of single crochet or slip stitches for a clean, polished edge that helps stabilize the shape.
Weave in every yarn tail securely using a yarn needle. Light steaming or gentle blocking can further improve the overall appearance without flattening the textured stitches.
Creative Customization Ideas and Care Tips
One of the best features of a Crochet Bucket Hat Pattern is its flexibility. Changing yarn colors immediately transforms the overall style while using the same construction method.
Striped hats remain a popular option. Alternate two or three complementary colors every few rounds to create a modern and playful appearance.
Texture can also be introduced by replacing selected single crochet rounds with half double crochet, back-loop-only stitches, or decorative stitch patterns while maintaining the overall structure.
Embellishments such as crochet flowers, bows, small appliqués, or decorative cords allow you to personalize the finished hat without affecting its functionality.
To keep your bucket hat looking its best, hand wash it using mild detergent and cool water. Reshape it gently while damp and allow it to air dry on a flat surface.
Store the finished hat in a dry place without folding the brim too tightly. Proper storage helps preserve its shape so it remains ready to wear season after season.
Frequently Asked Questions
Is this Crochet Bucket Hat Pattern suitable for beginners?
Yes. Anyone who already understands basic crochet stitches such as chain, single crochet, slip stitch, and simple increases can successfully complete this project with patience and practice.
Which yarn works best for a crochet bucket hat?
Cotton yarn is generally the preferred option because it offers excellent stitch definition, breathability, durability, and structure for everyday wear.
How do I know when to stop increasing the crown?
Measure the crown diameter regularly. Once it matches the appropriate measurement for the intended head size, stop increasing and begin crocheting the sides evenly.
Can I make this hat for children?
Absolutely. Simply reduce the crown diameter and shorten the side height before beginning the brim. The construction process remains exactly the same.
Why is my brim becoming wavy?
Too many increases usually create ripples. Reduce the number of increases in the following round to achieve a smoother brim.
Why is my brim curling upward?
This often happens when there are not enough increases. Add a few evenly spaced increases to help the brim relax outward.
Can I use acrylic yarn instead of cotton?
Yes. Acrylic yarn can be used, although the hat may have a softer structure compared to cotton. Choosing a slightly smaller hook may help increase firmness.
How long does it take to finish this project?
Most crocheters complete a basic bucket hat within several hours to a weekend, depending on their experience level and the complexity of any decorative details.
Can I decorate the finished hat?
Certainly. Flowers, embroidered details, ribbons, appliqués, decorative edging, and color changes all work beautifully with this Crochet Bucket Hat Pattern.
Is blocking necessary?
Blocking is optional but highly recommended. Gentle steaming or wet blocking helps smooth stitches and gives the brim a more professional appearance.
Conclusion
Creating a Crochet Bucket Hat Pattern is an enjoyable project that combines practical construction techniques with endless creative opportunities. Throughout this guide, you learned how to choose the right materials, begin with a magic ring, increase the crown evenly, shape the sides, expand the brim correctly, maintain proper stitch tension, customize the design with different colors and textures, and finish the project using professional techniques. These step-by-step instructions provide a solid foundation that can easily be adapted for different sizes, styles, and personal preferences.
With regular practice, each new bucket hat will become more polished, allowing you to experiment with unique stitch combinations, decorative embellishments, and custom color palettes. Whether you are making a hat for yourself, as a thoughtful handmade gift, or to sell at craft fairs, the techniques covered in this article will help you produce beautiful and durable results.