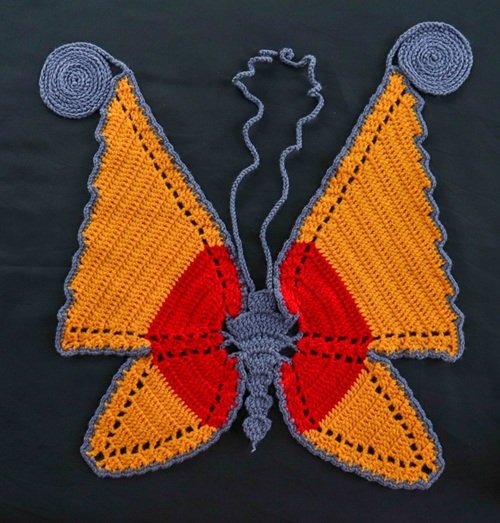
The vibrant and expressive world of crochet offers endless possibilities for creating unique garments, and few designs capture the imagination quite like the CROCHET BUTTERFLY TOP – PATTERN. This distinctive piece of wearable art, often characterized by its intricate, wing-like shape and delicate stitch work, has become a staple in handmade fashion, blending vintage charm with modern aesthetics. For crochet enthusiasts, mastering this pattern is a rewarding project that results in a beautiful, custom-fitted garment perfect for warm weather or layering.
Embarking on a CROCHET BUTTERFLY TOP – PATTERN requires more than just knowing how to chain and double crochet. It demands a thoughtful approach to yarn selection, tension consistency, and an understanding of garment construction. Unlike flat projects like scarves or blankets, a top must drape and fit correctly, meaning careful gauge swatching is essential. By meticulously following the pattern and paying attention to these details, you can ensure your finished butterfly top is both comfortable to wear and visually stunning, reflecting the true artistry of crochet.
This comprehensive guide is designed to take you through every stage of creating your own CROCHET BUTTERFLY TOP – PATTERN. We will explore the best yarn fibers for achieving that signature airy texture, discuss essential modifications for a perfect fit, and provide tips on achieving consistent tension. By the end, you will have the knowledge and confidence to tackle this elegant project, transforming simple loops of yarn into an exquisite piece of crochet fashion.
1. Selecting the Perfect Yarn and Tools for Your CROCHET BUTTERFLY TOP – PATTERNThe foundation of any successful CROCHET BUTTERFLY TOP – PATTERN lies in the careful choice of materials. The yarn fiber, weight, and color all play a critical role in the final look and drape of the garment. Since the butterfly top is often worn in spring or summer, or as a delicate layering piece, selecting a lightweight, breathable material is highly recommended for optimal comfort.
For the signature airy and flowing aesthetic of the butterfly top, consider using natural fibers like cotton, bamboo, or a lightweight linen blend. These materials offer excellent stitch definition, which is crucial for highlighting the intricate wing shaping of the pattern. Avoid heavy acrylics unless you are aiming for a much warmer, heavier top; otherwise, it may feel stiff and lack the desired drape.
The yarn weight is equally important. Most CROCHET BUTTERFLY TOP – PATTERNS specify a light (DK/8-ply) or even a fingering (sock/4-ply) weight yarn. Using a weight that is too heavy will make the finished garment dense and oversized, while one that is too light might result in a flimsy piece. Always check the pattern’s recommended weight and hook size to match the designer’s tension.
Choosing the right crochet hook is tied directly to your yarn selection and your personal tension. The pattern will recommend a size, but you may need to go up or down a size to meet the required gauge. Investing in a good-quality, comfortable hook is worthwhile, especially for a large project like a top, to prevent hand fatigue and maintain the consistency required for the crochet work.
Beyond the yarn and hook, you will need a few essential notions. A set of stitch markers is crucial for keeping track of row counts, increases, decreases, and the center point of the butterfly top‘s design. A tapestry needle is needed for weaving in all the loose ends cleanly, and a measuring tape is indispensable for checking your progress against the pattern’s measurements and your personal fit requirements.
Finally, do not underestimate the importance of blocking. This final step, where the finished piece is soaked or steamed and then pinned into shape, is what truly sets a professional-looking crochet top apart. Blocking evens out the stitches, relaxes the fibers, and enhances the delicate wing structure, ensuring the CROCHET BUTTERFLY TOP – PATTERN achieves its beautiful final shape and drape.
2. Mastering the Gauge and Adjusting the CROCHET BUTTERFLY TOP – PATTERN for Fit
Achieving the correct gauge is arguably the most critical step when undertaking a garment pattern like the CROCHET BUTTERFLY TOP – PATTERN. Gauge refers to the number of stitches and rows per inch (or centimeter) that the designer achieved with their specific yarn and hook. Without matching this gauge, your finished top will not be the intended size, leading to disappointment and a poor fit.
To check your gauge, you must create a swatch—a small square of crochet using the stitch specified in the pattern. Make your swatch significantly larger than the target measurement (e.g., a $6 \text{ inch}$ square for a $4 \text{ inch}$ gauge check). Once completed, measure the central $4 \text{ inches}$ to see how many stitches and rows you have.
If your swatch has too many stitches per inch, your tension is too tight, and your finished top will be too small. The solution is to move up to a larger crochet hook size (e.g., from a 3.5mm to a 4.0mm) and try a new swatch. If you have too few stitches per inch, your tension is too loose, and your top will be too large; you should move down to a smaller hook.
Adjusting the overall size of the CROCHET BUTTERFLY TOP – PATTERN often involves scaling the design. If the pattern is worked from the center outward, increases are usually made uniformly on all sides. For a slight adjustment, you might add or subtract a few rows or increase/decrease sections. For significant size changes, you may need to choose a different pattern written for a weight class closer to your desired final size.
Furthermore, fitting a crochet top involves considering body shape. The butterfly top‘s shape is generally forgiving, but you may want to modify the neckline depth or the length of the torso section. These modifications should be planned before you begin the main body, ensuring all adjustments are symmetrical and maintain the balance of the butterfly top’s wing design.
When making modifications, always write down your changes directly onto your printed or digital pattern. Keeping a meticulous record of the altered hook size, extra rows, or changed stitch counts will be invaluable if you need to troubleshoot or create another top in the future. This level of pattern customization moves the project from a simple craft to a tailored garment.
3. Stitch Techniques and Construction of the CROCHET BUTTERFLY TOP – PATTERN
The construction of the CROCHET BUTTERFLY TOP – PATTERN can vary, but many designs utilize an ingenious central motif that expands outwards, creating the illusion of wings. Understanding the core stitches and the directional flow of the crochet work is key to successfully completing the pattern. The combination of simple and complex stitches gives the top its texture and appeal.
The most common stitches used are the chain stitch ($\text{ch}$), single crochet ($\text{sc}$), and double crochet ($\text{dc}$). Many butterfly patterns incorporate shell stitches, V-stitches, or cluster stitches to create the lacy, openwork look that characterizes the delicate nature of a butterfly’s wing. Practicing these decorative stitches until your tension is even will significantly improve the visual quality of the top.
Many CROCHET BUTTERFLY TOP – PATTERNS are worked in two main sections: the front panel and the back panel, which are later joined. The butterfly shaping often begins with a foundational chain or a magic ring, and the motif grows outwards in rows or rounds, with strategic increases to form the wide, sweeping curves of the wings. Pay close attention to where the pattern instructs you to turn or continue in the round.
The central part of the top often involves shaping the neckline and the armholes. This is typically achieved through a series of decreases and working partially along the row instead of crocheting across the full width. Markings for these shaping points are where your stitch markers will prove invaluable, ensuring that both the left and right sides of the top are shaped symmetrically.
Once the main panels are complete, the next critical step is joining them. The shoulder seams are often joined first, using either a slip stitch ($\text{sl st}$) or a single crochet seam to create a clean, durable join. The side seams are then sewn, typically leaving the required openings for the armholes and the bottom edge of the top. Ensuring the side seams are perfectly aligned is essential for a professional finish.
Finally, most patterns call for edging around the armholes and neckline. This can be a simple border of single crochet or a more decorative trim like a picot or scallop edge. The edging provides stability and a polished look, preventing the edges from stretching or rolling. This is the last bit of crochet work before the all-important blocking process.
4. Tips for Consistency, Durability, and SEO for Your CROCHET BUTTERFLY TOP – PATTERN
To ensure your handmade CROCHET BUTTERFLY TOP – PATTERN is both beautiful and long-lasting, a few expert tips on consistency and durability are necessary. Furthermore, if you plan to share or sell your finished work or the pattern itself, applying targeted SEO techniques is key to reaching your audience.
Consistency in tension is the mark of an experienced crocheter. While tension naturally varies as you work, try to maintain a uniform grip on your yarn and hook. Taking frequent short breaks is better than crocheting for hours and letting fatigue cause your tension to loosen. This level of consistency will result in stitches that are uniform in size, which is critical for a garment where texture is a key feature.
To enhance the durability of your butterfly top, especially since it is an openwork design, consider the seam construction. Instead of a simple slip stitch seam, a single crochet or even a sewn backstitch seam provides more strength and less stretch, especially along the shoulder lines which bear the garment’s weight. Reinforce the edges by working your starting chain loosely or using a slightly larger hook for the foundation row.
The way you care for your finished CROCHET BUTTERFLY TOP – PATTERN impacts its longevity. Always follow the yarn label’s washing instructions. For delicate crocheted garments, hand washing in cool water and laying flat to dry is usually the safest method. This prevents the top from being pulled out of shape by a washing machine or dryer, preserving the integrity of the crochet stitches.
For SEO optimization, when titling product listings or blog posts about your CROCHET BUTTERFLY TOP – PATTERN, use long-tail keywords that describe the garment perfectly. Examples include “Lacy Crochet Butterfly Top Pattern PDF,” “DIY Summer Crochet Bralette with Butterfly Wings,” or “Free Crochet Pattern for Butterfly Tank Top.” This specificity helps potential customers and search engines find your content.
When writing descriptions, naturally integrate related keywords like “crochet fashion,” “handmade top,” “crochet wearable art,” “summer crochet project,” and “DIY clothing”. Use bullet points to list yarn requirements and size options. High-quality, clear photographs that showcase the detail of the crochet stitch and the full fit of the top are also essential for visual SEO and attracting viewers.
Finally, think about user engagement. If sharing a tutorial, encourage readers to tag you in their finished projects. This not only builds community but also generates high-quality backlinks and social proof, which are excellent SEO signals for Google, demonstrating that your CROCHET BUTTERFLY TOP – PATTERN is valuable and popular content.
Frequently Asked Questions (FAQ) about CROCHET BUTTERFLY TOP – PATTERN
Q1: What is the ideal time commitment for completing a CROCHET BUTTERFLY TOP – PATTERN?
The time required varies greatly based on the complexity of the pattern and your speed. A simple CROCHET BUTTERFLY TOP made with DK weight yarn might take an intermediate crocheter between 15 to 30 hours of work. More intricate patterns or those using fingering weight yarn can take 40 hours or more.
Q2: Can a complete beginner attempt this kind of crochet top pattern?
The CROCHET BUTTERFLY TOP – PATTERN is generally best suited for an intermediate crocheter who is comfortable with reading patterns, checking gauge, and performing basic shaping (increases and decreases). While a determined beginner could try, they should first master the foundational stitches and gauge swatching on a simpler project.
Q3: How much yarn is typically needed for a standard adult size butterfly top?
The amount of yarn depends heavily on the yarn weight and the size of the finished top. For an adult size medium using DK weight yarn, you can expect to need approximately $800 \text{ to } 1200 \text{ yards}$ (or $730 \text{ to } 1100 \text{ meters}$). Always check the specific pattern’s requirements before purchasing your yarn.
Q4: How do I prevent my crochet top from stretching out too much after washing?
To prevent excessive stretching, choose a yarn with good stitch memory, such as a wool or acrylic blend, or a blend of cotton with a small percentage of polyester. When washing, use cool water, a gentle detergent, and never hang the top to dry. Always lay it flat, reshaping it gently, and allow it to air dry completely.
Q5: Are there options for making a sleeved version of the crochet butterfly top?
Yes, many designers offer variations that adapt the CROCHET BUTTERFLY TOP – PATTERN into a full sweater or cardigan. This usually involves continuing the crochet work in the round from the armhole opening and expanding the stitches down the arm to create a fitted or balloon sleeve, maintaining the original wing motif on the bodice.
Q6: What is the best way to line a sheer crochet butterfly top for modesty?
For modesty, you can use a nude-colored fabric (like stretch mesh or a soft knit) to sew a separate lining to wear underneath. Alternatively, you can sew the lining directly to the inside of the crochet top after the final blocking stage, treating the crochet fabric as the decorative shell of the garment.
Conclusion
The journey of creating a CROCHET BUTTERFLY TOP – PATTERN is a deeply enriching experience, resulting in a piece that beautifully showcases the craftsmanship of crochet. We have meticulously detailed the essential steps: from the initial, crucial choice of lightweight cotton or bamboo yarn for ideal drape, through the non-negotiable process of matching the gauge to ensure a perfect fit, and finally, to the advanced techniques for joining seams and applying professional edging. The success of your top relies on attention to detail—consistency in tension, correct shaping for the sleeves and neckline, and the final transformative step of blocking. By implementing the provided SEO tips, you also ensure that your efforts in creating this stunning piece of crochet wearable art can be discovered by a wider online community.
We encourage you to share your experiences and insights. Did you find a particular yarn that worked perfectly for the wing structure? Do you have any secret tips for achieving the perfect gauge? Please leave your sincere opinion on this article below and offer any suggestions for how we can continue to help you master the art of crochet garment patterns.