The crochet chicken – Pattern is currently one of the most beloved projects in the fiber arts community, bringing a sense of farmhouse charm and whimsical personality into homes across the globe. Whether you are looking to create a soft toy for a child, a rustic kitchen decoration, or a quirky doorstop, this design offers endless possibilities for customization and creativity. The rise of “cottagecore” aesthetics has fueled a massive interest in handmade poultry, making these feathered friends a staple at craft fairs and in home décor magazines alike.
Working on a crochet chicken – Pattern allows crafters to explore various shapes and textures, moving beyond simple spheres into more organic, bird-like silhouettes. The beauty of these projects lies in their accessibility; you don’t need to be an expert to produce a bird that looks professional and full of life. With just a few basic stitches and some colorful yarn, you can transform a humble skein of wool into a character-filled hen or a tiny, fluffy chick that instantly brightens up any room.
In this detailed guide, we are going to dive deep into everything you need to know about executing the perfect crochet chicken – Pattern. We will discuss the best materials for a durable finish, the essential stitches that give the chicken its distinctive plump shape, and creative ways to personalize your flock. This project is not only a great way to use up scrap yarn but also a fantastic entry point into the world of amigurumi. Let’s get our hooks ready and start building your very own yarn-based farmyard.
1. Choosing the Best Materials for Your Crochet Chicken – Pattern
Selecting the right yarn is the first and most important step when beginning your crochet chicken – Pattern. Most designers recommend a medium-weight (worsted) cotton or acrylic yarn because these fibers provide excellent stitch definition, which is crucial for making the wings and tail feathers stand out. Cotton is particularly favored for kitchen-themed chickens, such as pot holders or egg cozies, because it handles heat well and maintains a crisp, clean shape over time.
The hook size you choose will determine the “squishiness” of your crochet chicken – Pattern. For a decorative plushie, using a slightly smaller hook than recommended on the yarn label—such as a 3.25mm or 3.5mm hook—will create a tight, dense fabric. This is essential in amigurumi to ensure that the stuffing doesn’t peek through the stitches. A tight gauge makes the chicken look solid and professional, ensuring it holds its round, biddy shape even after many hugs.
When it comes to the “face” of your crochet chicken – Pattern, safety eyes are a popular choice for a polished, toy-like appearance. These plastic pegs snap into place with a washer, making them very secure for older children. However, if you are making a chicken for a baby or a pet, it is always safer to embroider the eyes using black yarn or embroidery floss. This prevents any small parts from becoming a choking hazard while adding a unique, hand-stitched charm.
Stuffing is what brings your crochet chicken – Pattern to life, and polyester fiberfill is the industry standard. For a chicken that sits upright on a shelf, you might consider adding a small pouch of plastic pellets or clean dried beans at the bottom of the body before adding the soft stuffing. This weighted base gives the bird stability, preventing it from tipping over and allowing it to serve as a functional bookend or a decorative shelf-sitter.
Color palettes for a crochet chicken – Pattern can range from realistic to fantastical. Classic white, buff, or speckled “salt and pepper” yarns create a traditional farm look that fits perfectly in a rustic kitchen. On the other hand, using vibrant teals, pinks, or even variegated yarns can turn your chicken into a modern piece of pop art. Don’t forget a small amount of bright orange or yellow yarn for the beak and red yarn for the comb and wattle!
Finally, having the right finishing tools will make the assembly of your crochet chicken – Pattern much easier. A sharp pair of scissors and a blunt-tipped tapestry needle are essential for weaving in ends and sewing the wings and beak onto the body. Many crafters also like to keep a few sewing pins handy to “dry fit” the appendages before permanently stitching them down. This ensures that your chicken doesn’t end up with lopsided wings or a crooked beak.
2. Key Stitches and Techniques for a Perfect Result
The foundation of nearly every crochet chicken – Pattern is the single crochet (sc) worked in a continuous spiral. This technique avoids the visible seam that occurs when joining rounds, resulting in a smooth, egg-shaped body that looks great from every angle. If you are new to working in spirals, using a stitch marker to identify the first stitch of each round is a lifesaver, as it prevents you from losing your place and ending up with a misshapen bird.
Increasing and decreasing are the “sculpting” tools of the crochet chicken – Pattern. To create the wide base of the chicken, you will use the “inc” stitch (two single crochets in one stitch). To taper the neck or close the top of the head, you will use the “dec” stitch. For the most professional look, many patterns suggest the “invisible decrease,” which is worked only in the front loops and leaves almost no trace of the reduction on the surface of the fabric.
Texture can be added to your crochet chicken – Pattern by using the puff stitch or the popcorn stitch to simulate fluffy feathers. Some designers incorporate these stitches on the breast of the chicken or along the wings to give the bird a more three-dimensional, “tactile” feel. Even a simple change, like working in the back loops only (BLO) for a few rounds, can create a ridge that mimics the layered appearance of real bird feathers.
The beak of the crochet chicken – Pattern is usually a small, conical shape made separately and then sewn on. This often involves very small rounds, sometimes starting with just three or four stitches. While working in such small circles can be fiddly, it pays off by giving the chicken a sharp, pointed nose. A well-placed beak can change the entire expression of the bird, making it look curious, grumpy, or happy depending on the angle of attachment.
Creating the “comb” (the red bit on top of the head) is often the most fun part of a crochet chicken – Pattern. This is usually done by working a series of chains and slip stitches directly into the top of the head or as a separate piece with “scalloped” edges. This pop of red is what truly defines the silhouette of a chicken and makes it instantly recognizable. It’s a great way to practice making shell stitches or small decorative borders.
Finally, the wings and tail of your crochet chicken – Pattern provide the finishing touches of personality. Wings can be flat, tear-shaped pieces sewn to the sides, while the tail is often a series of loops or layered “petals” at the back. Some advanced patterns even use “loop stitches” to create a shaggy, long-feathered tail. These details are where you can really let your creativity shine, choosing to make your chicken look sleek and aerodynamic or round and fluffy.
3. How to Customize and Scale Your Chicken Flock
Scaling your crochet chicken – Pattern is incredibly easy once you understand how yarn weight and hook size interact. If you want a giant, floor-pillow sized chicken, you can use the exact same pattern but switch to jumbo “chenille” or “blanket” yarn and a 10mm hook. Conversely, if you want a tiny charm for a keychain, you can use embroidery thread and a 1mm hook. The proportions remain the same, but the final size changes drastically.
Personalizing the “breed” of your bird within the crochet chicken – Pattern framework is another way to have fun. To make a “Rhode Island Red,” use deep mahogany yarns. For a “Plymouth Rock,” try alternating black and white stitches to create a barred effect. You can even add “feather” legs by crocheting extra loops around the base of the chicken, mimicking the fancy leg plumage seen on breeds like the Silkies or Brahmas.
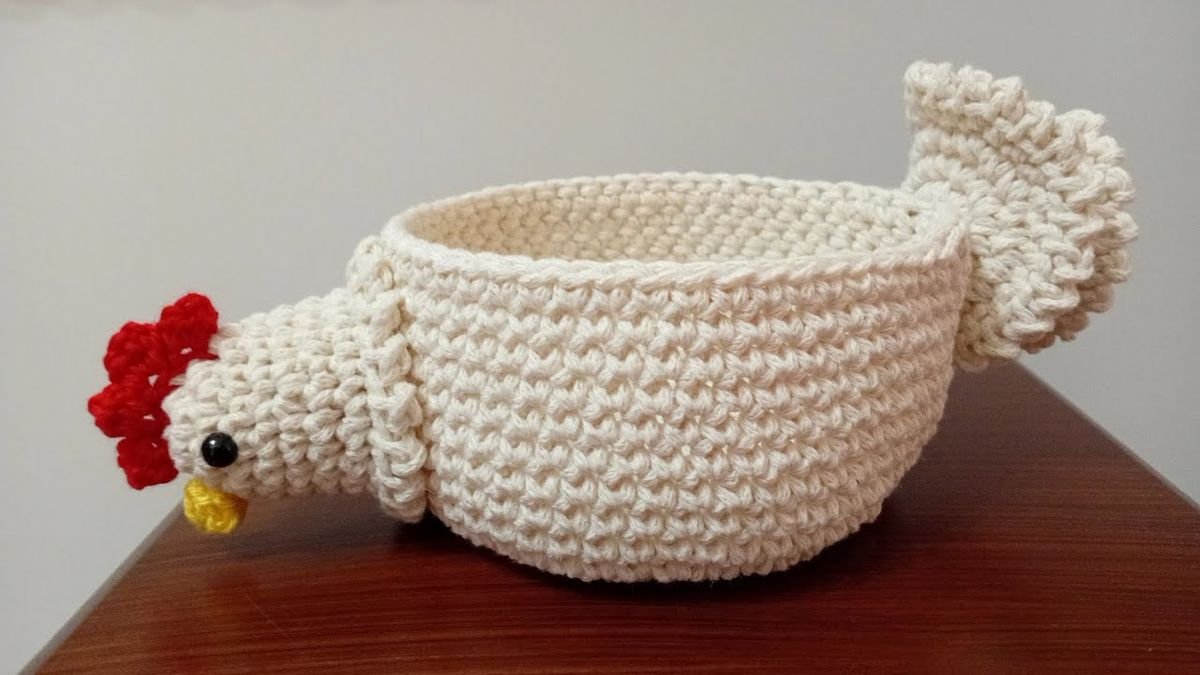
The crochet chicken – Pattern doesn’t have to stay a simple toy; it can be adapted into various functional items. By leaving the bottom open and adding a thermal lining, you can turn the pattern into a whimsical tea cozy. If you make a very small version with a loop on top, it becomes a perfect Christmas tree ornament. Many crafters even use these patterns to create “doorstops” by filling the interior with heavy sandbags rather than light stuffing.
Seasonality is another great way to use your crochet chicken – Pattern. For Easter, you can make a collection of “Spring Chicks” in pastel yellows, greens, and purples. For Thanksgiving, you can modify the colors to browns and oranges to create a turkey-like variant. Because chickens are associated with home and hearth, they make wonderful housewarming gifts that can be tailored to the recipient’s favorite colors or kitchen decor theme.
Adding accessories to your crochet chicken – Pattern is a delightful way to tell a story. You could crochet a tiny nest for your chicken to sit in, or even a few small crochet eggs to go alongside her. Some people go as far as making little hats or scarves for their chickens, especially if they are being used as seasonal decorations. These small touches turn a simple crochet project into a piece of folk art that sparks joy and conversation.
If you are feeling adventurous, you can use “surface crochet” on your crochet chicken – Pattern to add colorful embroidery-like details. By slip-stitching directly onto the surface of the finished bird, you can create intricate patterns on the wings or body without having to deal with complex color changes while you are building the main structure. This is a fantastic way to add “folk-style” decorations that make your chicken look like a hand-painted ceramic piece.
4. Care, Maintenance, and Troubleshooting Your Chicken
To keep your crochet chicken – Pattern creation looking its best, proper cleaning is essential, especially if it is a toy for a child. If you used acrylic or cotton yarn, most chickens can be placed in a mesh laundry bag and washed on a gentle cycle with cold water. However, air-drying is highly recommended. Putting a stuffed item in the dryer can sometimes cause the stuffing to clump or the yarn to pill, which takes away from the bird’s smooth finish.
If you find that your crochet chicken – Pattern is looking a bit “lumpy” after stuffing, the trick is to add the fiberfill in small, walnut-sized tufts rather than one large handful. This allows you to distribute the weight evenly and reach into the small corners of the head and tail. If the chicken is already finished and looks uneven, you can use your tapestry needle to gently “tease” the stuffing from the outside, moving it into the hollow spots.
Over time, your crochet chicken – Pattern might develop “pills” or fuzzy bits from being handled. You can easily refresh the look of your bird using a fabric shaver or a pair of small scissors to carefully trim away the excess fuzz. For cotton chickens that have lost their shape, a light steam from an iron (without touching the yarn directly) can help reactivate the fibers and make the chicken look crisp and new again.
Sometimes, despite following the crochet chicken – Pattern perfectly, the head might droop. This usually happens if the neck area isn’t stuffed firmly enough or if the head is disproportionately large. To fix this, you can sew a small “support column” inside the neck using a scrap piece of crochet fabric, or simply add more stuffing than you think you need. A well-stuffed neck is the secret to a chicken that looks alert and proud.
If you are struggling with the assembly phase of the crochet chicken – Pattern, remember that “less is more” when it comes to sewing. Use a long tail of yarn from the piece you are attaching (like a wing) to sew it onto the body. This reduces the number of knots you have to hide. Aim to catch only the top loops of the body stitches to keep the sewing invisible. If you make a mistake, it’s easy to snip the sewing thread and try again.
Longevity of your crochet chicken – Pattern also depends on the quality of your knots. When you finish a piece, leave a long tail and weave it through the interior of the stuffed body several times in different directions. This “locking” technique ensures that even if the chicken is played with roughly, the wings and beak won’t come detached. A well-constructed yarn chicken can last for decades, becoming a treasured family heirloom passed down through generations.
FAQ – Frequently Asked Questions
Is the crochet chicken – Pattern suitable for total beginners?
Yes! Many versions of the crochet chicken – Pattern are designed specifically for beginners. If you know how to make a magic ring and a single crochet stitch, you can complete a basic chicken. It is a great way to learn amigurumi basics because the shapes are simple and the project is relatively small.
How much yarn do I need for one chicken?
For a standard palm-sized chicken, you typically need less than 50 grams of the main body color. It is a fantastic “stash-buster” project because you can use small scraps for the beak, comb, and wings. If you are making a giant “blanket yarn” chicken, you will likely need one to two full skeins.
Can I make these chickens to sell at craft fairs?
Most designers allow you to sell finished products made from their crochet chicken – Pattern, provided you give credit to the pattern creator. Chickens are very popular sellers at craft fairs because they are cute, recognizable, and make great “impulse buys” for people looking for unique home decor.
How do I make my chicken stand up on its own?
The secret to a standing chicken is a flat bottom and a weighted base. You can crochet a flat circular base for the body and add a small bag of poly-pellets or clean pebbles at the bottom before stuffing the rest with fiberfill. This lowers the center of gravity and keeps the bird upright.
What is the best stuffing to use?
Polyester fiberfill is the best choice because it is washable, hypoallergenic, and holds its shape well. Avoid using cotton balls or fabric scraps for stuffing, as these can become heavy, lumpy, and will not dry properly if the chicken ever needs to be washed.
My chicken has gaps between the stitches. What am I doing wrong?
This is a common issue in amigurumi. It usually means your hook is too large for the yarn you are using. To fix this in your next crochet chicken – Pattern, try moving down a hook size (for example, from a 4mm to a 3.25mm). Keeping a tight tension is the key to a professional finish.
Conclusion
The crochet chicken – Pattern is a delightful project that combines the simplicity of basic crochet stitches with the immense joy of creating a character from scratch. We have explored the best materials to use, from 100% cotton to soft chenille, and looked at the essential techniques like the magic ring and invisible decrease that ensure a high-quality finish.
Whether you are making a realistic hen for your kitchen or a neon-colored chick for a child’s nursery, the versatility of this pattern makes it a must-try for every fiber artist. By focusing on tight tension and creative assembly, you can build a flock that is as unique as you are.