Creating a crochet dachshund 🐶 pattern is one of the most delightful ways to bring the charm of this lovable dog breed into your handmade projects. Whether you’re a seasoned crocheter or just beginning your amigurumi journey, crafting a dachshund offers the perfect combination of fun, cuteness, and creative expression.
These adorable sausage dogs, with their long bodies and tiny legs, are ideal for crochet thanks to their recognizable shape and character.
What makes a crochet dachshund 🐶 pattern so popular is not just its undeniable cuteness, but also its versatility. You can make a tiny keychain version, a plush toy for a child, or even a larger, cuddly version as home décor or a gift for dog lovers. Plus, with a little imagination, you can customize your dachshund in different colors, accessories, and even seasonal outfits.
This article will guide you through everything you need to know to create your own crochet dachshund 🐶 pattern, from materials and stitches to assembly, styling, and selling your finished product. Whether you’re making one for yourself, as a gift, or to sell at markets or online, this comprehensive guide will help you bring your little dachshund to life.
1. Getting Started with the Crochet Dachshund 🐶 Pattern
To begin your crochet dachshund 🐶 pattern, you’ll want to gather all the necessary materials. These include medium-weight yarn (usually acrylic or cotton), a crochet hook (commonly size 2.5mm to 4mm for amigurumi), stuffing (polyester fiberfill), stitch markers, safety eyes, and a yarn needle for sewing parts together.
Choose your yarn color based on how you’d like your dachshund to look. Traditional shades like brown, black, and tan are popular, but feel free to get creative with pastel hues, bold brights, or even multicolor patterns. Using the right yarn type ensures your dachshund keeps its shape and has a soft, cuddly feel.
Most crochet dachshund 🐶 patterns are made using the amigurumi technique, which involves working in continuous spirals. This helps create a smooth, seamless look for the head, body, legs, and tail. The most commonly used stitches are single crochet (sc), increase (inc), and decrease (dec).
Start with the body or head, depending on the pattern you’re following. Some crocheters prefer to start at the nose and work backward, while others begin with the body and attach the head later. Both methods work well, but maintaining stitch counts and even tension is crucial.
Use stitch markers to keep track of your rounds. Missing a stitch can throw off the shape and alignment of your dachshund, especially when working with small parts like ears, paws, or the snout.
Once you have all your parts crocheted—head, body, legs, tail, ears, and any extras—you’ll begin the assembly process. This is where your dachshund really starts to take shape, and careful stitching will ensure durability and a polished appearance.
2. Step-by-Step Construction of Your Crochet Dachshund 🐶
The construction process for a crochet dachshund 🐶 pattern typically involves making multiple parts separately and then sewing them together with precision and care.
Start with the head, shaping it with increases and decreases to create a slightly elongated snout. Most dachshund patterns include shaping at the nose and cheeks to give the head more character. Attach safety eyes or embroider features before closing the head entirely to make it easier.
Next, work on the long body. The iconic dachshund shape is defined by its extended torso. This is usually a simple tube worked in rounds, but you can add slight shaping for realism. Some patterns include a belly color change or even a little ribbed texture using front-loop stitches.
The legs and tail come next. Each leg is generally a small cylinder, stuffed and stitched into place. The tail can be a simple tube or pointed tip, depending on the style of your pattern. Some crocheters like to curl the tail slightly or add a contrasting color at the tip.
Attach the ears, which are typically floppy and fall down the side of the head. Depending on your design, they may be oval or teardrop-shaped. Sew them securely and position them evenly for balance and cuteness.
Once all pieces are complete, carefully sew everything together. Use a yarn needle and matching yarn to minimize visible seams. Stuff the body and head firmly but not too tightly—overstuffing can distort the shape.
Finish by adding final touches. You can embroider a little nose, add a bow tie, or even crochet a tiny sweater. These details make your crochet dachshund 🐶 pattern stand out and give it personality.
3. Customizing Your Crochet Dachshund 🐶 Pattern
What makes the crochet dachshund 🐶 pattern especially fun is how customizable it is. You can turn the same basic shape into dozens of different characters by switching up the yarn color, adding accessories, or changing facial expressions.
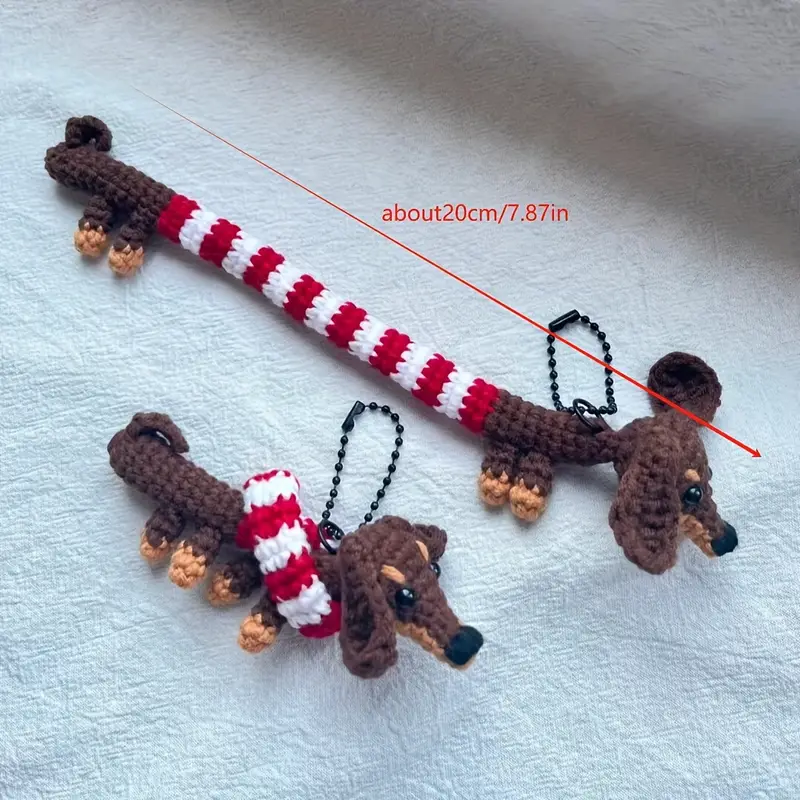
Want to make a mini dachshund? Use fine yarn like sport weight or embroidery thread and a smaller hook. These are perfect for keychains or bag charms and make excellent gifts or market items.
Create a themed version for holidays—add a red scarf for Christmas, bunny ears for Easter, or a heart for Valentine’s Day. These seasonal variations are popular with crafters and customers alike.
Give your dachshund a wardrobe! You can crochet tiny hats, sweaters, or capes to match the seasons or tell a story. Some advanced patterns include clothing as part of the design, while others let you create separate outfits.
If you’re making a memorial piece, try matching the dachshund’s coloring to a real-life pet. Use photos for reference and add personal touches like a custom collar or initials on a tag.
Try playing with textures. Use fuzzy or velvet yarns for a plush look, or cotton for a classic amigurumi feel. You can even mix yarn types to create contrast between the body and ears or paws.
Crocheting in different post stitches or adding surface embroidery can elevate your crochet dachshund 🐶 pattern to a true work of art. These creative details make your dachshund uniquely yours.
4. Sharing, Selling, and Promoting Your Crochet Dachshund 🐶 Pattern
Once you’ve perfected your crochet dachshund 🐶 pattern, it’s time to share it with the world—or even turn it into a business. Handmade pet-themed items are very popular, and your crocheted dachshund is likely to capture hearts.
Start by photographing your finished pieces. Use natural lighting and clean backgrounds to showcase your work. Add props like yarn balls or dog accessories to create engaging, themed scenes.
List your dachshunds or downloadable patterns on platforms like Etsy, Ravelry, or your own website. Be sure to use keywords such as “amigurumi dachshund,” “crochet sausage dog,” or “dog plush crochet pattern” for better SEO visibility.
If you’re selling physical products, consider offering personalization. Buyers love unique gifts, so adding a name tag or special accessory can boost your appeal and justify a higher price point.
Use social media to connect with the crochet community. Share behind-the-scenes videos, progress shots, and customer reviews. Instagram, Pinterest, and TikTok are great platforms to promote your crochet dachshund 🐶 pattern visually.
Offer a free version of your pattern or a mini tutorial to attract subscribers to your email list or blog. This builds trust and brings returning visitors who may purchase premium versions or other patterns from you.
Don’t forget to protect your work if you plan to sell your pattern. Include usage rights, and make it clear whether customers can sell finished products made from your pattern. Transparency builds community and protects your creativity.
FAQ – Crochet Dachshund 🐶 Pattern
Q1: What skill level is needed to make a crochet dachshund?
Most crochet dachshund 🐶 patterns are suitable for advanced beginners or intermediate crocheters familiar with amigurumi techniques. Basic stitch knowledge is essential.
Q2: How long does it take to crochet a dachshund?
On average, it takes 5–8 hours to complete a medium-sized dachshund. Smaller versions can be done in 2–3 hours, while more detailed ones may take longer.
Q3: What yarn is best for this project?
Worsted weight acrylic or cotton yarn is ideal for stability and shape. For a softer, plush finish, you can use velvet or chenille yarn.
Q4: Can I make my dachshund pattern larger or smaller?
Yes! Simply change the yarn weight and hook size. Thicker yarns make larger plushies, while thinner yarns create mini versions.
Q5: How do I sew the parts together neatly?
Use a yarn needle and whipstitch, matching yarn colors to the body. Pin parts in place first to ensure proper alignment.
Q6: Can I sell my finished dachshunds?
Yes, as long as the pattern’s creator allows commercial use. If it’s your own crochet dachshund 🐶 pattern, feel free to sell finished products with credit where due.
Conclusion
The crochet dachshund 🐶 pattern is a joyful project that combines creativity, charm, and versatility. From basic shapes
to personalized masterpieces, these little dogs are a favorite among crochet lovers of all skill levels. Whether you’re crafting for fun, gifting to a friend, or starting a handmade business, the dachshund is a perfect place to begin.
In this guide, we covered everything from materials and construction to customization and marketing tips. No matter where you are in your crochet journey, creating a dachshund will bring smiles and satisfaction.
Have you tried making your own crochet dachshund 🐶 pattern? We’d love to hear about your experience. Please leave a sincere opinion or suggestion below—your feedback helps us grow and provide even better content for our creative community. Happy crocheting!