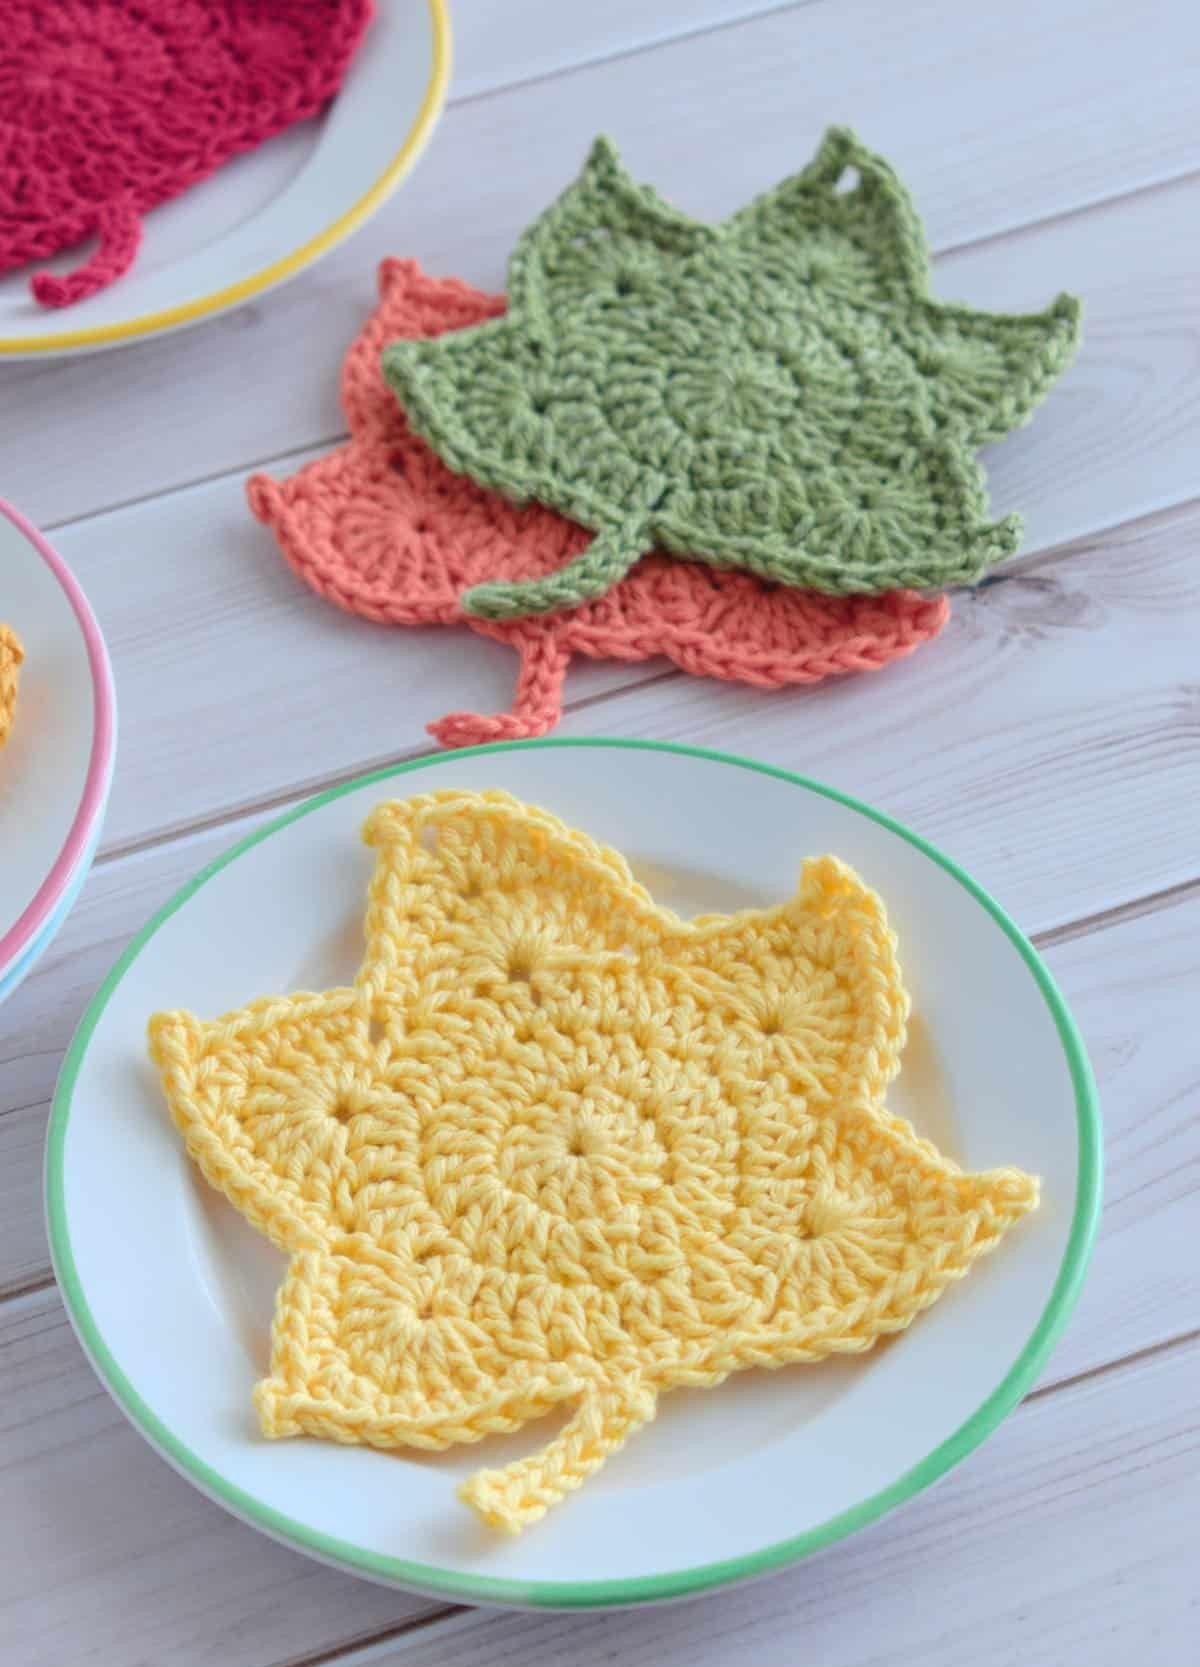
As the seasons begin to change and autumn colors start to appear, there’s no better time to embrace the cozy charm of crafting. One of the most delightful and beginner-friendly projects to try this season is the Crochet Fall Leaves – Pattern. These tiny, textured pieces bring the vibrant spirit of fall into your home, one stitch at a time. They’re quick to make, use minimal yarn, and are perfect for decorating or gifting.
The beauty of the Crochet Fall Leaves – Pattern lies in its simplicity and versatility. Whether you want to create a rustic garland, embellish a table centerpiece, or use them as appliqués on clothing or accessories, these little leaves can be customized in endless ways. Plus, it’s a fantastic stash-busting project—using up scraps of warm reds, oranges, yellows, and browns you may already have.
In this article, you’ll learn everything you need to start and finish your own collection of crochet leaves. We’ll guide you through the necessary materials, explain each step clearly, offer creative uses and customization ideas, and provide helpful beginner tips. At the end, you’ll find a well-researched FAQ and a thoughtful conclusion. Let’s dive into this colorful and comforting Crochet Fall Leaves – Pattern adventure.
1. What You’ll Need to Make Crochet Fall Leaves
To begin your Crochet Fall Leaves – Pattern, gather a few simple materials. The project is beginner-friendly, and most of what you need may already be in your craft basket.
Start with yarn in autumn-inspired colors. Worsted weight yarn (category 4) is the most commonly used for these leaves, but you can experiment with lighter or heavier yarns for different effects. Choose rich hues like burnt orange, golden yellow, deep red, forest green, and warm brown for a seasonal touch.
You’ll need a crochet hook that matches your yarn’s weight. For worsted yarn, a 5mm (H-8) hook works well. However, if you want tighter stitches for more structure, go down a hook size.
Keep a yarn needle on hand for weaving in ends and shaping your leaf’s final details. Scissors, of course, are essential. You may also find stitch markers helpful if your pattern involves turning rows or complex increases and decreases.
Optional but fun extras include fabric stiffener or mod podge to help your finished leaves hold their shape better, especially if they’ll be used for hanging decorations or as part of table centerpieces.
Lastly, having a printed or written copy of the pattern nearby helps you keep track of your progress. Once you get the rhythm of the stitches, you’ll find yourself making these leaves quickly and with ease.
2. Step-by-Step Instructions for the Crochet Fall Leaves – Pattern
The Crochet Fall Leaves – Pattern often begins with a magic ring or chain foundation and then builds in the round or in rows depending on the leaf style. There are many types of fall leaves you can recreate, such as maple, oak, or elm. We’ll go through a simple leaf design ideal for beginners.
Start with a magic ring or chain 4 and join with a slip stitch to form a small circle. This will be the center of your leaf. Chain 1 and work several single crochets (sc) into the ring to form a base. The number of sc may vary, but usually between 8–12.
Next, begin shaping the leaf by working stitches of varying heights into the same round. You’ll typically work a combination of single crochet, half double crochet, double crochet, treble crochet, and then decrease the stitch height as you go around. This gives the leaf its pointed edges and natural curve.
At the top of the leaf, you can create a picot stitch to mimic the pointed tip. This is done by chaining 3 and slip stitching into the first chain. Then continue working down the opposite side of the leaf with mirrored stitch heights.
Once you reach the bottom, chain a few stitches to form a stem, then fasten off your yarn and weave in the ends using a yarn needle. You now have a beautiful, textured fall leaf.
Repeat the process in different colors and sizes. You can also experiment with leaf shapes by modifying where you place the taller stitches and the number of stitches between increases.
If you want your leaves to be more structured, apply fabric stiffener lightly with a brush and shape the leaf on a flat surface. Let it dry completely before use.
3. Creative Ways to Use Your Crochet Fall Leaves
The Crochet Fall Leaves – Pattern is more than just a craft project—it’s a seasonal design element that can be used in countless creative ways around your home or for gifting.
One of the most popular uses is creating a garland or bunting. Simply crochet multiple leaves in different sizes and colors, then string them together using a long chain or twine. Hang them over your fireplace, along a stair railing, or across your window.
You can also use them as coasters or place settings. Just make slightly larger versions of the leaves and use sturdier yarn like cotton. Add name tags for a personalized Thanksgiving or autumn dinner table.
Another great idea is to attach your leaves to wreaths. Use hot glue or stitch them onto a foam or grapevine wreath base, along with pinecones, burlap, and mini pumpkins for a stunning fall door decoration.
They work wonderfully as gift toppers too. Instead of a traditional bow, tie a handmade crochet leaf onto your present for a thoughtful and reusable addition.
For wearable options, turn your leaf into a brooch or hair clip by gluing it onto a pin or clip base. You can also attach them to headbands, hats, or scarves for seasonal fashion.
Lastly, consider using your crochet leaves in scrapbooking, wall art, or card-making. Their flat shape and colorful appearance make them ideal for mixed media projects.
4. Beginner Tips and How to Improve Your Leaf Designs
If you’re new to the Crochet Fall Leaves – Pattern, don’t worry—there’s plenty of room for learning and experimenting. Here are some helpful tips to make your project more enjoyable and polished.
Start by practicing with one type of leaf. Choose a basic maple leaf or simple oval design to master the stitch increases and shaping. Once you’re confident, move on to more complex patterns with detailed points or curves.
Work with high-contrast yarn when starting out. Dark yarns can make it difficult to see your stitches. Choose light or bright colors until you’re comfortable with the pattern.
Pay attention to your stitch count. Since leaves often involve symmetrical increases and decreases, losing or gaining a stitch can throw off the entire shape. Count carefully at the end of each round or row.
Use blocking to help your leaves lie flat and hold their shape. After weaving in the ends, dampen your leaves and pin them to a foam board or towel. Let them dry completely before use.
Experiment with different yarn textures. A fuzzy yarn gives a rustic look, while metallic yarn adds a festive shimmer. You can even mix yarn types in one leaf for a unique visual effect.
Finally, don’t worry about perfection. Real leaves aren’t perfectly shaped either! Every handmade leaf has its own charm, and slight differences make your crochet leaves feel even more organic and natural.
FAQ: Crochet Fall Leaves – Pattern
Q1: What stitches are used in most crochet fall leaves?
Most Crochet Fall Leaves – Pattern designs use basic stitches like single crochet, half double crochet, double crochet, and sometimes treble crochet to create natural leaf shapes.
Q2: Can I make fall leaves if I’m a beginner?
Yes! Many fall leaf patterns are perfect for beginners. Start with a simple design that uses basic stitches and no color changes, then build up your skills.
Q3: What yarn is best for crochet leaves?
Worsted weight or cotton yarn works great. Choose autumn colors like rust, burgundy, mustard, and olive green to match the fall theme.
Q4: How can I stiffen my leaves for decor use?
Apply a light layer of fabric stiffener or diluted mod podge, then shape and dry them flat. This helps them keep their form when used in garlands or wreaths.
Q5: Can I use these leaves as appliqués?
Absolutely! Crochet leaves are perfect for decorating bags, hats, scarves, blankets, and even as embellishments for cards and scrapbooks.
Q6: How many leaves can I make with one skein of yarn?
A single skein can yield 20 or more leaves, depending on size and pattern complexity. This makes it a great stash-busting project.
Conclusion
Creating your own Crochet Fall Leaves – Pattern is a rewarding and relaxing way to celebrate the beauty of the autumn season. With just a bit of yarn and your favorite hook, you can craft colorful, charming leaves that bring warmth and creativity to your home.
In this guide, we covered all the essentials: the tools and yarn needed, a beginner-friendly pattern breakdown, creative uses for your finished leaves,and expert tips to improve your skills. You also found answers to the most common questions in our detailed FAQ.
We’d love to hear your thoughts! Leave your honest opinion in the comments, share photos of your fall creations, and let us know if you have any suggestions for improving this pattern. Your feedback helps the crafting community grow. Happy crocheting and happy fall! 🍂