The Crochet Hair Elastic – Pattern is one of the most delightful and quick projects you can embark on, whether you are a seasoned pro or just picking up a hook for the very first time. Creating a customized hair accessory allows you to move away from boring, store-bought elastics and embrace a world of color, texture, and personal style. This specific Crochet Hair Elastic – Pattern is designed to be gentle on your hair strands while providing a firm grip, making it a functional piece of art that you can wear every single day.
When you start working on a Crochet Hair Elastic – Pattern, you are engaging in a form of sustainable fashion that utilizes small scraps of yarn that might otherwise go to waste. These “scrunchie-style” accessories have made a massive comeback in the fashion world, and being able to follow a DIY crochet pattern means you can match your hair ties to every single outfit in your wardrobe. The beauty of this crochet project lies in its simplicity; it requires very few materials and can be completed in less time than it takes to finish a cup of coffee.
Mastering the Crochet Hair Elastic – Pattern also opens up a wonderful opportunity for handmade gifting or starting a small craft business. Because these items are small and use very little yarn, your profit margins can be excellent, and the high demand for boho-chic hair accessories ensures a steady stream of interest. Throughout this guide, we will break down the essential steps of the pattern, ensuring that your final product is durable, stretchy, and aesthetically pleasing enough to rival any high-end boutique brand.
1. Choosing the Best Materials for Your Crochet Hair Elastic – Pattern
The first step in any successful Crochet Hair Elastic – Pattern is selecting the right foundation, which is the elastic hair tie itself. You want to choose a seamless, high-quality elastic that doesn’t have metal connectors, as these can snag your hair and might break under the tension of the crochet stitches.
When it comes to yarn selection, cotton is often the gold standard for a Crochet Hair Elastic – Pattern because it is breathable and holds its shape exceptionally well over time. However, if you want a softer, more luxurious feel, you can experiment with velvet yarn or silk blends, which add a sophisticated sheen to your finished handmade accessory.
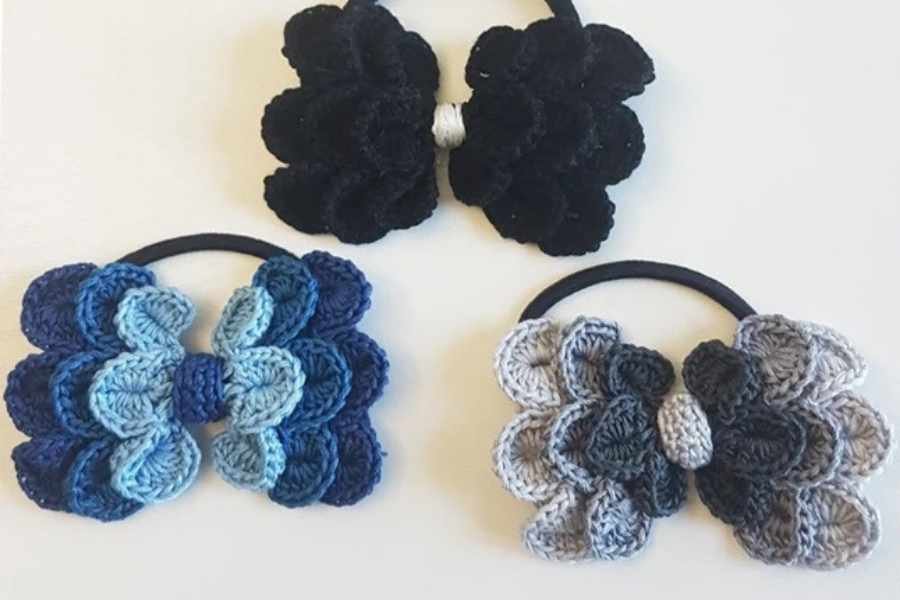
Your crochet hook size will significantly impact the “frill” and density of your hair elastic. For a tight, structured look, a smaller hook like a 3.5mm (E) is ideal, whereas a larger hook will create a looser, more ruffled effect that mimics the classic 90s scrunchie aesthetic within your pattern design.
Don’t forget to consider the weight of the yarn when following your Crochet Hair Elastic – Pattern. A fingering weight or sport weight yarn allows for intricate, delicate ruffles, while a worsted weight yarn provides a chunkier, bold statement piece that is perfect for thick hair or high ponytails.
Color theory plays a huge role in how your Crochet Hair Elastic – Pattern turns out in the end. Using variegated yarns can create a stunning “pop” without needing to change colors manually, while solid neutral tones make the hair tie a versatile staple for professional or casual environments.
Lastly, ensure you have a sharp tapestry needle ready for the finishing stages of the pattern. Weaving in the ends securely is vital for a hair accessory that will be stretched and pulled daily, ensuring that your crochet work remains intact even after multiple uses and washes.
2. Essential Stitches for a Durable Crochet Hair Elastic – Pattern
To begin your Crochet Hair Elastic – Pattern, you must master the technique of working directly onto the elastic ring. This usually starts with a slip knot on your hook, followed by a series of single crochet (sc) stitches that completely encase the rubber band, hiding it from view.
The number of stitches you place around the ring in your Crochet Hair Elastic – Pattern determines how much it will “scrunch.” To get those beautiful, dense folds, you should aim to place twice or even triple the amount of stitches that would naturally fit around the elastic when it is relaxed.
Advanced variations of the Crochet Hair Elastic – Pattern often incorporate the double crochet (dc) or treble crochet (tr) stitch. These taller stitches create more surface area and allow the fabric to fan out, resulting in a more dramatic and fashionable hairpiece that stands out in any hairstyle.
For a delicate and feminine touch, you can add a picot stitch border to the final round of your Crochet Hair Elastic – Pattern. This creates tiny decorative points along the edge, giving the crochet elastic a lace-like appearance that is perfect for special occasions or bridal party gifts.
If you are looking for more texture, the puff stitch or bobble stitch can be integrated into the pattern. These stitches add a 3D element to the hair tie, making it squishy and tactile, which is especially popular when using soft chenille yarns for a cozy winter look.
Understanding stitch counts is crucial if you want to create a consistent set of accessories. By keeping track of your rows in the Crochet Hair Elastic – Pattern, you can ensure that every hair tie you make is identical in size, which is important if you plan to sell them in sets or pairs.
3. Step by Step Guide to Finishing the Pattern
Once you have completed the base layer of stitches around the elastic, the next phase of the Crochet Hair Elastic – Pattern involves building the height of the ruffles. Most patterns suggest a second round where you perform multiple increases in every single stitch from the previous row.
This increase round is the secret sauce of the Crochet Hair Elastic – Pattern. By working three or four double crochets into each stitch, the fabric is forced to ruffle outward, creating that iconic voluminous look that characterizes high-quality crochet scrunchies.
As you reach the end of your Crochet Hair Elastic – Pattern, you will finish with a slip stitch (sl st) into the first stitch of the round. This provides a clean, seamless join that makes the beginning and end of your work nearly invisible to the naked eye.
The finishing process involves cutting the yarn, leaving a tail of about six inches. Following the Crochet Hair Elastic – Pattern instructions carefully here is key; you must thread this tail through your tapestry needle and weave it through the stitches in several directions to lock it in place.
Testing the stretch of your finished piece is an essential final step. Give the crochet hair tie a good pull to make sure the stitches slide easily along the elastic and that the yarn doesn’t restrict the band from wrapping around a ponytail at least twice.
If you find that the elastic is visible through the stitches, you may need to add more stitches in your next attempt at the Crochet Hair Elastic – Pattern. A dense coverage not only looks better but also protects the elastic from sunlight and hair products, extending the life of your accessory.
4. Customizing and Styling Your Crochet Hair Ties
One of the best ways to elevate your Crochet Hair Elastic – Pattern is by adding embellishments. You can thread beads onto your yarn before you start crocheting, sliding them up into the stitches as you go to create a sparkling, jeweled hair elastic that catches the light.
For a coordinated look, you can follow a Crochet Hair Elastic – Pattern that uses the same yarn as a larger project, like a crochet sweater or a summer top. This “matching set” trend is very popular and makes your entire outfit look thoughtfully curated and professional.
Changing the yarn texture can adapt the pattern for different seasons. A lightweight linen yarn is perfect for a breezy summer hair tie, while a fuzzy mohair or a thick wool makes for a cozy and warm accessory during the colder autumn and winter months.
You can also create a “layered” effect in your Crochet Hair Elastic – Pattern by working in the front loops only (FLO) for one round and then going back to work in the back loops only (BLO) for another round, creating two distinct tiers of ruffles.
For children, you can modify the Crochet Hair Elastic – Pattern by using smaller elastics and shorter stitches. Adding tiny crochet ears or a small flower to the side of the elastic turns a simple utility item into a whimsical character hair tie that kids will love to wear.
Selling these items at craft fairs is a great way to use your skills. Displaying a variety of colors and textures based on your Crochet Hair Elastic – Pattern will attract customers looking for unique, handmade gifts that are both affordable and high in quality.
FAQ: Frequently Asked Questions about the Crochet Hair Elastic – Pattern
1. Is the Crochet Hair Elastic – Pattern beginner-friendly?
Absolutely! This is one of the easiest crochet projects available. It uses basic stitches and is very forgiving, making it the perfect entry point for someone just learning the craft.
2. How long does it take to complete one hair elastic?
Depending on your speed and the complexity of the ruffles, a single Crochet Hair Elastic – Pattern can be finished in about 15 to 30 minutes. It’s a fantastic project for “productive procrastination.”
3. Will the yarn damage my hair?
No, in fact, it’s quite the opposite. A crochet-covered elastic is much gentler on the hair than a bare rubber band because the yarn provides a soft barrier that prevents breakage and “hair headaches.”
4. Can I wash my crochet hair ties?
Yes. If you used cotton or acrylic yarn in your Crochet Hair Elastic – Pattern, you can usually machine wash them in a mesh bag. If you used delicate fibers like silk or wool, hand washing is recommended to maintain the shape.
5. How much yarn do I need for this pattern?
Very little! You can usually make several hair elastics from a single 50g skein of yarn. This makes the Crochet Hair Elastic – Pattern an excellent “scrap buster” for those leftover bits in your stash.
6. What if the elastic breaks inside the crochet?
Unfortunately, if the internal elastic snaps, you will need to redo the project. This is why we emphasize using high-quality, seamless elastics as the base for your Crochet Hair Elastic – Pattern.
Conclusion
In conclusion, the Crochet Hair Elastic – Pattern is a versatile, fun, and highly rewarding project that allows you to express your creativity while making something truly useful. We have covered everything from the essential yarn and hook selections to the specific stitch techniques required to create voluminous ruffles.
By following this guide, you now know how to choose durable materials, execute the basic and advanced rounds of the pattern, and even how to customize your pieces with beads or different yarn weights. Whether you are making these for yourself, as gifts, or for sale, the crochet hair tie is a timeless accessory that never goes out of style.