The Crochet Hat – Pattern is one of the most versatile and enjoyable projects a crafter can take on, offering both practical warmth and a canvas for endless creativity. Whether you are looking to make a cozy beanie for the winter months or a stylish sun hat for the summer, understanding how to read and execute a Crochet Hat – Pattern is the gateway to producing high-quality handmade headwear. For many beginners, this is the first project that truly introduces the concept of working in the round, a fundamental skill that transforms a flat piece of yarn into a three-dimensional accessory that fits the human form perfectly.
Choosing a Crochet Hat – Pattern allows you to customize every aspect of your garment, from the fiber content and color palette to the specific stitch texture that best suits your personal style. In the world of fiber arts, the term Crochet Hat refers to the finished three-dimensional headpiece, while the Pattern represents the set of written instructions, diagrams, or charts that guide the maker through the necessary increases and decreases. When these two elements come together, the result is a functional item that carries the unique “signature” of its maker, something that store-bought alternatives simply cannot replicate.
In this comprehensive guide, we will delve deep into the mechanics of the Crochet Hat – Pattern, ensuring you have all the tools and knowledge required to achieve a professional result. We will explore the various styles available, from slouchy beanies to structured fedoras, and explain how to troubleshoot common issues like sizing or tension. By the end of this article, you will feel confident in your ability to select the right materials and follow any Crochet Hat – Pattern with precision, allowing you to create beautiful, long-lasting gifts for yourself and your loved ones.
1. Selecting the Right Materials for Your Crochet Hat – Pattern
The first step in successfully executing a Crochet Hat – Pattern is selecting the appropriate yarn for the season and the style of the hat. For winter wear, natural fibers like wool or alpaca are excellent choices because they offer superior insulation and moisture-wicking properties. If you are following a Crochet Hat – Pattern for a newborn or someone with sensitive skin, you might opt for a soft organic cotton or a high-quality “anti-pilling” acrylic to ensure the finished Crochet Hat is comfortable and easy to wash without losing its shape.
The weight of the yarn is another crucial factor that will be specified in your Crochet Hat – Pattern. Most standard beanie designs call for Worsted (Weight 4) or Bulky (Weight 5) yarn, which allows the project to work up quickly and provides a sturdy fabric. If you choose a yarn that is thinner or thicker than what the pattern suggests, your Crochet Hat will end up the wrong size. Always check the recommended gauge on the yarn label to ensure it aligns with the technical requirements of your chosen Crochet Hat – Pattern.
Equally important to the yarn is the choice of the crochet hook. Most patterns will suggest a specific size, such as a 5.0mm (H) or 5.5mm (I) hook, but your individual tension may require you to adjust. If your stitches are naturally very tight, your Crochet Hat may turn out too small and stiff; if they are too loose, the hat may be floppy. Using an ergonomic hook can help you maintain a steady rhythm throughout the Crochet Hat – Pattern, preventing hand fatigue during the longer rounds of the project.
In addition to the basics, you will need a few essential notions to complete your Crochet Hat – Pattern. A soft measuring tape is vital for checking the diameter of the “crown” as you work, ensuring the hat will fit the intended head size. You will also need stitch markers to keep track of the beginning of your rounds, especially if the pattern uses a continuous spiral method. These small tools prevent errors and make following the Crochet Hat – Pattern a much more organized and stress-free experience.
Don’t forget the finishing touches like yarn needles and scissors. Once you finish the last round of your Crochet Hat – Pattern, you will need to weave in your ends securely so they don’t pop out during wear. If your pattern includes a pom-pom, you might also want a specialized pom-pom maker. These accessories help ensure that the final Crochet Hat looks as professional as possible, with clean seams and well-attached decorations that can withstand daily use and multiple trips through the laundry.
Lastly, consider the “drape” of the fabric you are creating. A Crochet Hat – Pattern designed for a slouchy look requires a yarn with a lot of movement, whereas a structured brimmed hat needs something more rigid. Testing a small swatch before you begin the full Crochet Hat – Pattern is a great way to see how the yarn and hook combination will behave. This extra step ensures that the final Crochet Hat matches the vision you had when you first picked up the pattern, saving you time and frustration in the long run.
2. Understanding the Anatomy of a Crochet Hat – Pattern
Every Crochet Hat – Pattern generally follows a specific structural logic, starting from the top and moving down. This is known as “top-down” construction. It begins with a Magic Ring or a small chain loop, where you will place your first round of stitches. Understanding this starting point is essential because it sets the foundation for the entire Crochet Hat. If the center is too loose, the top of the Crochet Hat will have a visible hole; if it is too tight, it may be difficult to work the subsequent rounds of the pattern.
The “Crown” is the next phase of the Crochet Hat – Pattern, where the increases happen. This is the most technical part of the project. To create a flat circle that eventually curves into a hat shape, the pattern will instruct you to add a specific number of stitches in each round. For example, if you start with 12 double crochets, the next round of the Crochet Hat – Pattern might involve placing two stitches in every stitch from the previous round. This mathematical expansion is what determines the final circumference of the Crochet Hat.
Once the crown reaches the desired diameter, the Crochet Hat – Pattern transitions into the “Body.” During this phase, you stop increasing and simply work one stitch into every stitch from the row below. This creates the walls of the Crochet Hat, giving it its depth. Many crafters find this part of the pattern the most relaxing, as it allows you to get into a repetitive flow. The length of the body is what differentiates a “beanie” (which sits above the ears) from a “slouchy hat” (which has extra fabric at the back) in any Crochet Hat – Pattern.
The “Brim” or “Edging” is the final structural component of the Crochet Hat – Pattern. This section often uses a different stitch, such as Front Post Double Crochet or Back Post Double Crochet, to create a ribbed effect. This ribbing is crucial because it provides elasticity, allowing the Crochet Hat to stretch over the head and then snap back to fit snugly around the forehead. A well-designed Crochet Hat – Pattern will always include instructions for a brim that balances style with this necessary functional grip.
Sizing is perhaps the most requested modification in any Crochet Hat – Pattern. Most patterns provide instructions for standard sizes: Infant, Toddler, Child, Teen, and Adult. However, heads come in all shapes. To customize your Crochet Hat, you can use the “Magic Formula”: multiply the desired head circumference by 3.14 (Pi) to determine the diameter the crown must reach before you stop increasing. This mathematical approach allows you to adapt any Crochet Hat – Pattern to fit anyone perfectly, regardless of the yarn weight you are using.
Finally, reading the pattern abbreviations is a skill in itself. A typical Crochet Hat – Pattern will use shorthand like “ch” for chain, “sc” for single crochet, and “inc” for increase. Before starting, take a moment to read through the entire Crochet Hat – Pattern to ensure you are familiar with all the terms. If the pattern includes a special stitch you haven’t used before, practice it on a scrap piece of yarn first. This preparation ensures that when you start your actual Crochet Hat, your stitches will be confident and consistent.
3. Advanced Techniques and Textures in a Crochet Hat – Pattern
Once you are comfortable with basic stitches, you can look for a Crochet Hat – Pattern that incorporates advanced textures like cables, bobbles, or lace. Textured stitches add thickness to the fabric, making the Crochet Hat much warmer for extreme cold. For instance, a “Waffle Stitch” or “Basketweave” pattern creates a dense, squishy texture that looks very sophisticated. These designs require more yarn than a standard Crochet Hat, so always check the yardage requirements in the pattern before starting your shopping.
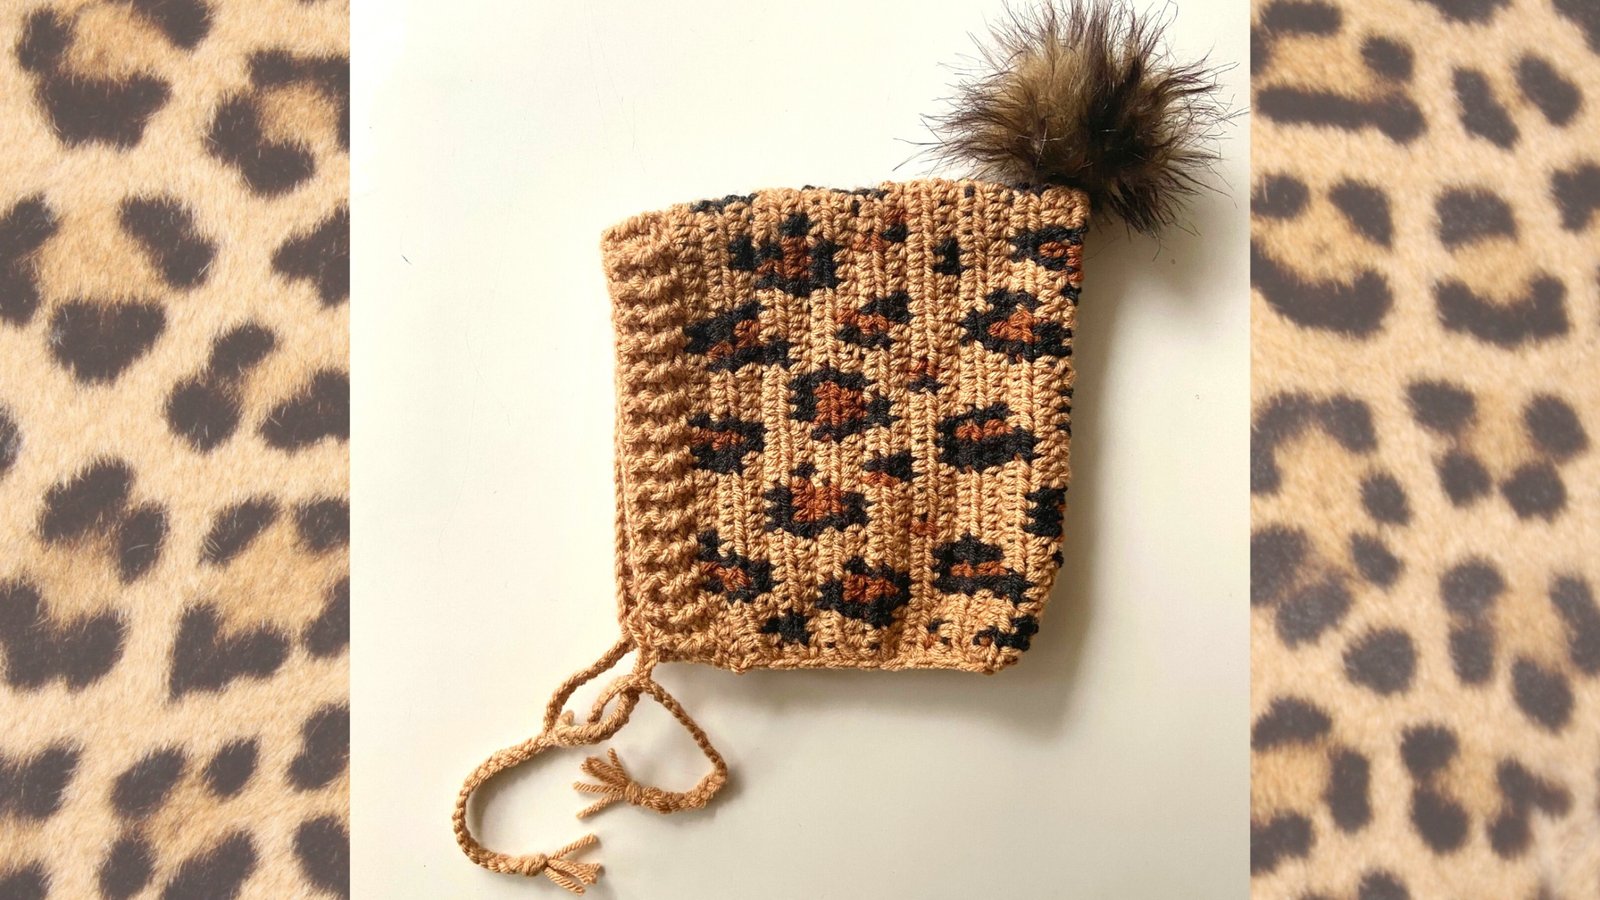
Colorwork is another way to elevate a standard Crochet Hat – Pattern. Techniques like Tapestry Crochet or Fair Isle allow you to “paint” pictures or geometric designs directly into the fabric of the hat. While this adds complexity to the pattern, the visual impact is incredible. When working with multiple colors in a Crochet Hat – Pattern, it is important to manage your yarn tension carefully so the hat doesn’t become too tight or lose its stretch, which could make the final Crochet Hat uncomfortable to wear.
For those who prefer a more delicate look, a “Lace” Crochet Hat – Pattern using lightweight yarn can create a beautiful accessory for spring or fall. These patterns often use shells, v-stitches, or picots to create open spaces in the fabric. While these won’t keep you warm in a blizzard, they are perfect for fashion-forward headwear. When following a lace pattern, using a lighter-colored yarn can help highlight the intricate stitchwork, making the details of your Crochet Hat really stand out.
Adding a brim or a visor is a popular modification to the traditional Crochet Hat – Pattern. This involves working back and forth on just a portion of the final round to create a “peak” or “bill.” To make the brim stiff enough to hold its shape, many patterns suggest using a smaller hook or doubling the yarn for that specific section. This turns a simple beanie into a “newsboy” style Crochet Hat, adding a touch of vintage flair to your handmade wardrobe.
The “Bottom-Up” construction is an alternative way to follow a Crochet Hat – Pattern. In this version, you start by crocheting the brim first—usually as a long rectangular strip that you then join into a circle. You then work the body and crown by crocheting into the edge of the brim and decreasing as you move toward the top. Some people find this method easier for ensuring a perfect fit around the forehead, and many modern Crochet Hat – Pattern designs favor this approach for its clean, professional-looking ribbing.
Finally, consider the use of Tunisian Crochet within your Crochet Hat – Pattern. This technique, which is a hybrid of knitting and crochet, creates a fabric that is exceptionally thick and warm. A Tunisian Crochet Hat has a unique woven look that is very popular in contemporary fashion. While it requires a special long hook, many find the process incredibly rewarding. Exploring different techniques like this keeps the hobby of following a Crochet Hat – Pattern fresh and exciting for years to come.
4. Care, Maintenance, and Gifting Your Crochet Hat
After spending hours following a Crochet Hat – Pattern, you want to ensure the finished product lasts as long as possible. Proper care starts with understanding the fiber you used. If your Crochet Hat is made from 100% wool, it may require hand-washing in cool water with a gentle wool wash to prevent “felting” or shrinking. Always refer to the yarn label recommended in your Crochet Hat – Pattern for specific laundering instructions, as this will preserve the stitch definition and the overall integrity of the hat.
Drying your Crochet Hat is just as important as washing it. Never wring out a handmade item, as this can stretch the stitches and ruin the shape you worked so hard to achieve while following the Crochet Hat – Pattern. Instead, roll the wet hat in a clean towel to remove excess moisture and then lay it flat on a drying rack. Reshape the Crochet Hat while it is still damp, ensuring the crown is rounded and the brim is straight, so it looks brand new once it is dry.
If you plan on selling your creations or giving them as gifts, presentation is key. Adding a custom leather tag or a “Handmade with Love” label to the brim of your Crochet Hat provides a professional touch. Many crafters who use a specific Crochet Hat – Pattern repeatedly like to attach a care card that explains how to wash the item. This ensures the recipient knows how to treat their new Crochet Hat, preventing accidental damage in a hot dryer.
Storing your handmade items properly will also extend their life. During the off-season, store your Crochet Hat in a breathable cotton bag rather than plastic to prevent moisture buildup or moth damage. If you followed a Crochet Hat – Pattern that used a very delicate or fuzzy yarn, you might want to give it a quick “refresh” with a garment steamer before wearing it again in the fall to fluff up the fibers and remove any storage creases.
Don’t be afraid to iterate on a Crochet Hat – Pattern you love. Once you’ve made a few versions, you might find ways to improve the fit or add your own unique design elements. Keeping a “crochet journal” where you note down the yarn used, hook size, and any changes you made to the pattern is a great habit. This allows you to recreate your favorite Crochet Hat exactly the same way in the future, or share your tips with other members of the crochet community.
Ultimately, the journey of following a Crochet Hat – Pattern is about more than just the finished product; it’s about the joy of making. Whether you are crocheting for charity, for profit, or for family, each stitch represents a moment of focus and care. By mastering the Crochet Hat – Pattern, you have gained a skill that allows you to provide comfort and style to those around you, one loop at a time. The world of Crochet Hat design is vast and welcoming, and there is always a new pattern waiting to be discovered.
Frequently Asked Questions (FAQ)
How do I know what size to make for a Crochet Hat – Pattern?
The best way is to measure the circumference of the person’s head just above the ears. Most Crochet Hat – Pattern guides provide a size chart. For a standard adult, the head circumference is usually between 21 and 23 inches. Remember that crochet fabric stretches, so the finished Crochet Hat should be about 1 to 2 inches smaller than the actual head measurement (this is called “negative ease”).
What is a “Magic Ring” in a Crochet Hat – Pattern?
A Magic Ring (or Magic Circle) is an adjustable starting loop used for projects worked in the round. It allows you to pull the center hole completely closed, which is essential for a professional-looking Crochet Hat. Most patterns for hats will start with this technique to ensure there isn’t a gap at the very top of the crown.
Why is my Crochet Hat turning out like a flat circle instead of a hat?
If your project is staying flat, it means you are still in the “increase” stage of the Crochet Hat – Pattern. To make the sides of the hat go down, you must stop adding extra stitches and work one stitch into each stitch from the previous round. This transition from the crown to the body is what creates the “cup” shape of the Crochet Hat.
Can I use any yarn for a Crochet Hat – Pattern?
While you can technically use any yarn, it’s best to stick to the weight suggested in the pattern. Using a different weight will drastically change the size of the Crochet Hat. For example, using “Lace” weight yarn for a pattern that calls for “Bulky” yarn will result in a hat that might only fit a doll.
How many hours does it take to finish a Crochet Hat?
This depends on your skill level and the complexity of the Crochet Hat – Pattern. A simple beanie made with bulky yarn can be finished in 2 to 3 hours. A more intricate pattern with cables or fine yarn might take 8 to 10 hours. Most people find a Crochet Hat to be a very satisfying “weekend project.”
How do I fix a brim that is too loose?
If the brim of your Crochet Hat is too loose, you can try “weaving in” a thin strand of elastic thread through the final row of stitches. Alternatively, next time you follow the Crochet Hat – Pattern, try using a hook that is one or two sizes smaller just for the brim section to make the stitches tighter and more elastic.
Conclusion
In conclusion, the Crochet Hat – Pattern is an essential project for anyone interested in the art of crochet. We have explored the importance of selecting high-quality yarns and hooks, the anatomical stages of a hat from the crown to the brim, and advanced techniques like texture and colorwork.
By following a well-written pattern and paying close attention to gauge and sizing, you can create a Crochet Hat that is both beautiful and functional. Whether you are a beginner learning the magic ring or an expert experimenting with Tunisian crochet, the process of creating headwear is a rewarding experience that combines mathematical precision with artistic flair.