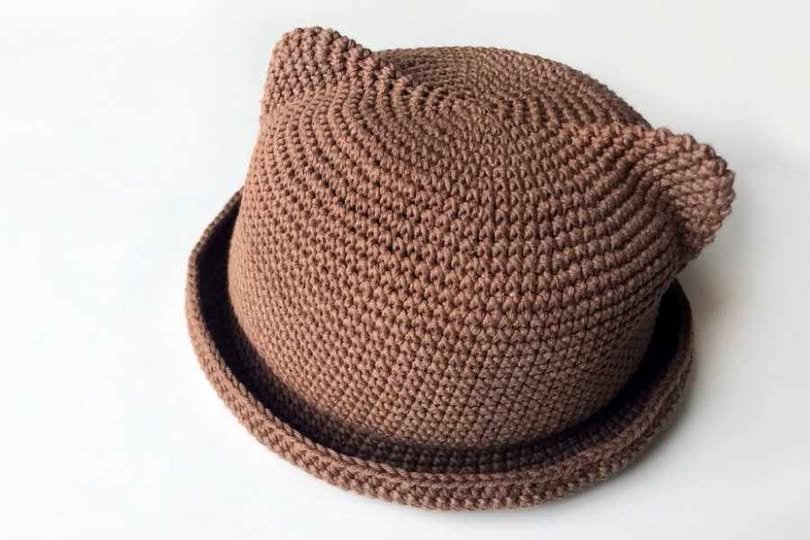
Finding the perfect Crochet hat with ears – Pattern is like discovering a secret recipe for the most adorable and functional winter accessory in your wardrobe. Whether you are crafting for a newborn, a playful toddler, or even a whimsical adult, a Crochet hat with ears adds a layer of personality and charm that a standard beanie simply cannot match. The beauty of a handmade Pattern lies in its versatility, allowing you to choose the yarn weights, colors, and ear shapes—be it cat, bear, or bunny—to suit the wearer’s unique style and the specific level of warmth required for the season.
Embarking on a project using a Crochet hat with ears – Pattern is also an excellent way for beginners to transition from simple flat projects to shaping three-dimensional garments. The process involves basic stitches like the double crochet or half-double crochet for the main body, followed by specific increases and decreases to create the structural elements of the ears. By following a well-structured Pattern, you ensure that the finished Crochet hat with ears fits snugly over the forehead and neck, providing both aesthetic appeal and practical protection against the biting cold of winter months.
In this comprehensive guide, we will dive deep into everything you need to know about mastering a Crochet hat with ears – Pattern. We will explain the technical terminology, such as the difference between a foundation chain and a magic ring, and how these choices affect the final look of your Crochet hat with ears. From selecting the right hook size to understanding how to read a written Pattern without getting overwhelmed, this article is designed to be your ultimate resource for creating high-quality, professional-looking headwear that looks like it came straight from a high-end boutique.
1. Choosing the Best Materials for Your Crochet hat with ears – Pattern
The first step in successfully executing a Crochet hat with ears – Pattern is selecting the right yarn, as the fiber content dictates both the drape and the warmth of the finished piece. For a classic Crochet hat with ears, many crafters prefer wool blends or high-quality acrylics because they offer excellent stitch definition and can withstand the frequent washing that hats often require. If you are making a Crochet hat with ears for a baby, always look for “anti-pilling” or organic cotton yarns to ensure the material is soft against sensitive skin and won’t cause irritation.
Your crochet hook is the most important tool when following a Crochet hat with ears – Pattern, and its size must match the yarn weight to achieve the correct tension. If your stitches are too loose, the Crochet hat with ears will lose its shape and the ears might flop over instead of standing upright as intended by the Pattern. Most patterns for medium-weight yarn suggest a 5.0mm or 5.5mm hook, but it is always wise to crochet a small gauge swatch first to ensure your measurements align with the designer’s specifications.
A key component of any Crochet hat with ears – Pattern is the “stitch marker,” a small tool used to keep track of the beginning of your rounds. Since most hats are worked in a continuous spiral, it is very easy to lose your place, which can lead to an asymmetrical Crochet hat with ears. Using markers ensures that you place the ears exactly where the Pattern indicates, resulting in a balanced and professional look. Without these markers, you might find one ear sitting higher than the other, which can be frustrating to fix later.
Tapestry needles are also essential when you finish your Crochet hat with ears – Pattern because you will need to weave in your ends and sew the ears onto the crown of the hat. A blunt-tipped needle allows you to sew between the fibers without splitting the yarn, ensuring a secure attachment for your Crochet hat with ears. The strength of your sewing is vital, especially for children’s hats, as the ears are often the first part of the Crochet hat with ears to be pulled or tugged during play.
Measuring tapes are non-negotiable when you are working through a Crochet hat with ears – Pattern for different age groups. Even a slight variation in your tension can change the diameter of the Crochet hat with ears, making it too tight or too loose. By frequently checking the circumference against a standard sizing chart provided in the Pattern, you can adjust your hook size mid-project if necessary. This precision is what separates a hobbyist’s work from a masterfully crafted Crochet hat with ears.
Lastly, consider the “loft” or thickness of the yarn you choose for your Crochet hat with ears – Pattern. Bulky yarns work up very quickly and create a cozy, chunky aesthetic that is currently very trendy. However, a bulkier Crochet hat with ears requires larger ears to maintain visual proportion. If the Pattern you are following was written for worsted weight yarn, you may need to adjust the number of stitches in the ears to make sure they don’t look tiny on a massive, thick hat.
3. Understanding the Core Techniques of the Crochet hat with ears – Pattern
Most modern versions of a Crochet hat with ears – Pattern begin with a “magic ring,” a technique that allows you to pull the center of your work tight, leaving no hole at the very top of the hat. This is a superior method compared to the traditional chain-3 start because it creates a cleaner finish for the Crochet hat with ears. Mastering the magic ring is a rite of passage for many crocheters, and once you learn it, you will find it much easier to start any circular Pattern with confidence.
Increases are the mathematical engine behind a successful Crochet hat with ears – Pattern. To make a flat circle that eventually curves into a hat shape, you must add a specific number of stitches in each round. If you increase too quickly, the Crochet hat with ears will ripple and look like a wavy plate; if you increase too slowly, it will turn into a long, skinny tube. Following the Pattern‘s increment logic—usually adding 6 to 12 stitches per round—is the only way to ensure the crown of the hat fits the human head perfectly.
The “body” of the Crochet hat with ears is often worked in “even rounds,” meaning you stop increasing and simply work one stitch into every stitch from the previous row. This is the most relaxing part of the Crochet hat with ears – Pattern, where you can see the depth of the hat start to form. During this stage, it is important to maintain consistent tension so that the sides of your Crochet hat with ears are smooth and uniform, preventing any unsightly gaps where wind could whistle through.
When it comes to the “ears” part of the Crochet hat with ears – Pattern, you will often use “shaping” techniques like decreases (sc2tog or dc2tog). These stitches pull two stitches together into one, allowing the Pattern to taper to a point for cat ears or round off for bear ears. Understanding how to decrease invisibly is a great skill to develop while making a Crochet hat with ears, as it keeps the texture of the ears looking identical to the rest of the project without bulky seams.
“Post stitches” are sometimes used in the brim of a Crochet hat with ears – Pattern to create a ribbed effect that mimics the stretch of knitted fabric. By working around the post of the stitch rather than into the top loops, you create a thick, elastic edge that helps the Crochet hat with ears stay securely on the head. While this technique might seem advanced, most Pattern instructions provide clear photos or videos to guide you through the front-post and back-post double crochet movements.
The “fasten off” process is the final technical step of the Crochet hat with ears – Pattern. Instead of just pulling the yarn through, leave a long “tail” for sewing. In the world of crochet, this tail is often called the sewing lead. Using this lead to attach the ears to the Crochet hat with ears ensures that the color matches perfectly and the join is as strong as the rest of the fabric. A well-executed Pattern will always specify where to leave these tails for a tidy finish.
4. How to Read and Execute a Crochet hat with ears – Pattern Correcty
Reading a Crochet hat with ears – Pattern for the first time can feel like learning a new language due to the abbreviations used, such as “sc” for single crochet or “inc” for increase. Most designers include a “Stitch Key” at the beginning of their Pattern to help you decode these terms. Before you start your Crochet hat with ears, take a moment to read through the entire document to ensure you understand the flow and have all the necessary supplies ready to go.
One of the most common mistakes when following a Crochet hat with ears – Pattern is skipping the “Gauge” section. Gauge refers to the number of stitches and rows per inch; if your gauge doesn’t match the Pattern, your Crochet hat with ears might end up big enough for a giant or small enough for a doll. To fix this, you can either change your hook size or adjust your “hand,” which is the natural tightness or looseness with which you hold the yarn while making the Crochet hat with ears.
The Crochet hat with ears – Pattern will often be divided into sections: the Crown, the Sides, the Brim, and the Ears. Tackling these sections one at a time makes the project feel much more manageable. For example, once you finish the crown of the Crochet hat with ears, you can pause to admire the circular shape before moving on to the repetitive rounds of the body. This modular approach is a hallmark of a high-quality Pattern designed for user success.
Visualizing the assembly is a crucial part of working with a Crochet hat with ears – Pattern. Before sewing the ears on permanently, many experienced crafters use “safety pins” to temporarily place the ears on the Crochet hat with ears and try it on. This allows you to check the mirror and see if the ears look centered. The Pattern usually provides a row number where the ears should be attached, but everyone’s head shape is slightly different, so a little personal adjustment can go a long way.
Color changes are another way to elevate a standard Crochet hat with ears – Pattern. You can use a contrasting color for the inner part of the ears to give them more depth and realism. To do this, you would follow the Pattern twice—once in the main color and once in the accent color—and then stitch the two pieces together. This “double-layered” ear technique also makes the ears of your Crochet hat with ears much sturdier, allowing them to stand up without the need for wire or stuffing.
Finally, blocking your finished project is a professional secret that makes any Crochet hat with ears – Pattern look ten times better. Blocking involves lightly steaming or dampening the Crochet hat with ears and shaping it on a mannequin head or a bowl to dry. This process relaxes the fibers, evens out your tension, and makes the ears on your Crochet hat with ears look crisp and intentional. It is the perfect finishing touch to any handmade Pattern and ensures your hard work looks its absolute best.
5. Tips for Customizing the Ears on Your Crochet Hat
The “ears” are the soul of the Crochet hat with ears – Pattern, and they offer the most room for creativity. If you want a “cat” look, the Pattern will usually guide you toward sharp, triangular shapes that sit high on the head. For a “bear” or “mouse” look, you will work in rounded semi-circles. You can even adapt a basic Crochet hat with ears into a fantasy creature like an elf or an alien by simply extending the length of the increases in the ear section of the Pattern.
Adding texture to the ears of your Crochet hat with ears can be achieved by using “fuzzy” or “eyelash” yarn for the inner ear section. This creates a realistic, soft look that is especially popular in baby Crochet hat with ears – Pattern designs. Just be careful when working with fuzzy yarn, as it can be difficult to see your stitches; many find it easier to hold the fuzzy yarn together with a strand of regular smooth yarn to maintain the structure of the Crochet hat with ears.
If you find that the ears on your Crochet hat with ears are drooping forward, you can reinforce the base of the ear where it meets the hat. When following the Pattern for attachment, sew a wider base rather than a thin line. A wide, slightly curved attachment point creates a “tripod” effect that helps the ears of your Crochet hat with ears stay upright during movement. This is a small adjustment to the standard Pattern that makes a huge difference in the final silhouette.
Proportions are everything when customizing a Crochet hat with ears – Pattern. For an “anime” or “kawaii” style, many people choose to make the ears slightly larger than life. If you decide to deviate from the Pattern to make bigger ears, remember that they will be heavier. You may need to use a smaller hook for the ears to create a very dense, stiff fabric that can support its own weight, ensuring your Crochet hat with ears looks exactly as you envisioned.
Embellishments like bows, flowers, or even small piercings can be added to the ears once you finish the Crochet hat with ears – Pattern. A small pink bow at the base of one ear can turn a generic cat hat into a specific character-inspired Crochet hat with ears. These additions don’t usually require a separate Pattern; you can simply use scraps of yarn to create small details that make the hat feel truly “one of a kind” and personalized for the recipient.
Finally, consider the seasonal utility of your Crochet hat with ears – Pattern. For a summer version, you can use the same Pattern but switch to a lightweight cotton yarn and a larger hook to create a “lacy” or “holey” texture. This allows for airflow while still keeping the cute ear details. A “sun hat” version of a Crochet hat with ears is a unique twist on the winter classic and shows just how adaptable a good crochet Pattern can be across different fibers and styles.
FAQ – Frequently Asked Questions
How long does it take to complete a Crochet hat with ears – Pattern?
For an intermediate crocheter, a standard adult-sized Crochet hat with ears usually takes between 3 to 5 hours. If you are using bulky yarn, it might take even less time. Beginners should allow a full weekend to comfortably work through the Pattern, especially when learning how to shape and attach the ears for the first time.
What is the best stitch for a Crochet hat with ears?
The Half Double Crochet (HDC) is widely considered the best stitch for a Crochet hat with ears – Pattern. It is faster than a single crochet but denser than a double crochet, providing the perfect balance of warmth, flexibility, and “solidness” to ensure the ears have a good base to be sewn onto.
Can I make this Crochet hat with ears – Pattern without a magic ring?
Yes! If the magic ring is too difficult, you can “Chain 4,” slip stitch into the first chain to form a ring, and then work your first round of stitches into that center hole. While it leaves a tiny gap, it is a perfectly valid way to start your Crochet hat with ears if the Pattern feels a bit too technical at the start.
How do I make the ears stand up on my Crochet hat with ears?
The secret is tension and placement. Use a slightly smaller hook for the ears to make the fabric stiff. Also, when sewing them onto the Crochet hat with ears, sew in a slight “C” curve rather than a straight line. This curved base acts like a structural support, much like how a piece of paper stands up better when you fold it slightly.
Is this Crochet hat with ears – Pattern suitable for men?
Absolutely! By using neutral colors like charcoal, navy, or olive and choosing “bear” ears instead of cat ears, a Crochet hat with ears becomes a rugged and fun outdoor accessory for men. The Pattern remains the same; only the color palette and the specific ear shape change to suit the wearer’s preference.
How do I wash my handmade Crochet hat with ears?
Hand washing is always the safest bet for any item made from a Crochet hat with ears – Pattern. Submerge it in cool water with a bit of mild detergent, rinse well, and roll it in a towel to remove excess water. Never wring the Crochet hat with ears, as this can stretch the stitches and cause the ears to become misshapen.
Conclusion
In summary, mastering the Crochet hat with ears – Pattern is an incredibly rewarding journey that combines mathematical precision with artistic flair. We have explored how to select the right yarns and hooks, the importance of gauge and stitch markers, and the technical steps of increasing, decreasing, and finishing your work. By following a structured Pattern, you can create a high-quality Crochet hat with ears that provides warmth, comfort, and a touch of whimsy to any outfit. Whether you are making a gift for a loved one or expanding your own collection, the skills learned here will serve you in many future crochet projects.
The beauty of the Crochet hat with ears – Pattern lies in its endless possibilities for customization, from the type of animal ears you choose to the decorative flourishes you add at the end. We hope this guide has inspired you to pick up your hook and start your very own Crochet hat with ears. It is a project that brings joy not just to the maker, but to everyone who sees the finished product in action.