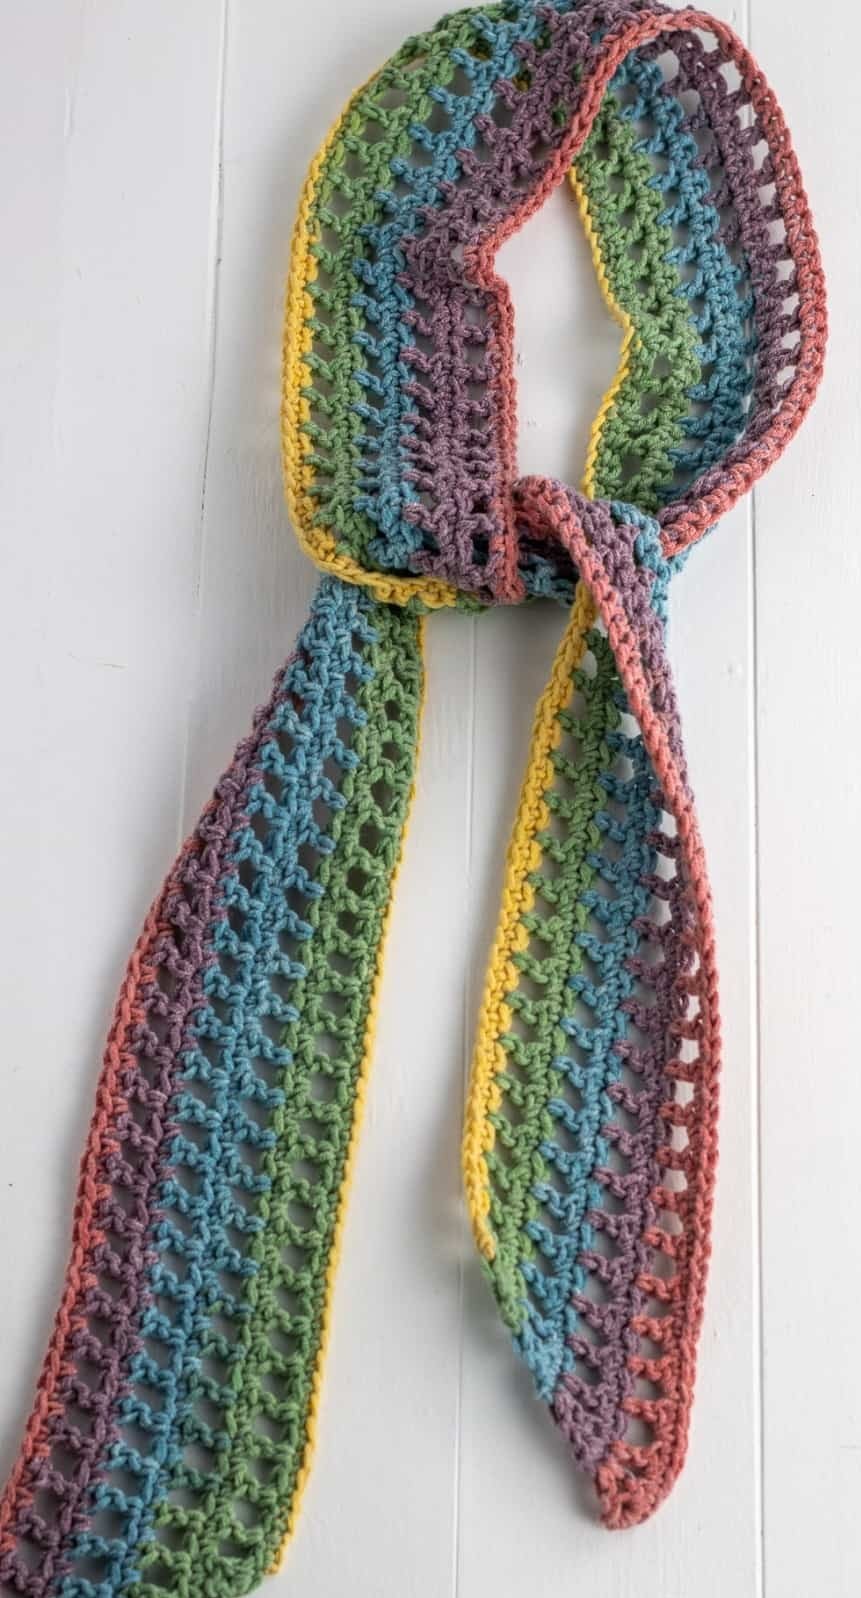
If you’re searching for a stylish and versatile accessory, a Crochet Head Scarf – Pattern is a wonderful project to explore. This timeless piece combines fashion with function, offering a cozy and chic way to keep your hair in place or add a splash of personality to your outfit. Whether you’re new to crocheting or a seasoned crafter, learning how to make a crochet head scarf opens up endless possibilities for customization and creativity.
A crochet head scarf is not only practical but also a beautiful statement piece that can be adapted for every season and occasion. From delicate lace designs perfect for spring to thick, warm scarves that shield you from the winter chill, these scarves fit all styles and preferences. The charm of making your own head scarf is that you control the yarn, colors, and stitches, creating a truly unique item.
This article will guide you step-by-step through the process of creating your own Crochet Head Scarf – Pattern. You’ll learn about the essential materials, foundational stitches, creative variations, and how to wear or gift your scarf. With the right instructions and inspiration, you’ll be crocheting a head scarf you’ll cherish for years.
1. Choosing Materials for Your Crochet Head Scarf – Pattern
The first step in making your Crochet Head Scarf – Pattern is selecting the right materials. Choosing the perfect yarn and tools will make your project easier and the finished scarf more comfortable and durable.
When selecting yarn, consider the season and intended use. For warmer weather, lightweight cotton or bamboo yarns are breathable and soft against the skin. For colder months, acrylic or wool blends provide warmth without irritation. Many crafters prefer cotton blends for their versatility and ease of care.
Your choice of crochet hook should match your yarn weight. Most head scarves use medium-weight yarn, so hooks in the 4.0mm to 5.5mm range are common. Using the right hook size ensures your scarf will have the right drape and texture.
Don’t forget to gather essential tools such as scissors, stitch markers, and a tapestry needle for weaving in ends. Stitch markers are especially helpful when following complex patterns or counting rows.
Color selection is another important aspect. You can go with neutral tones for everyday wear or experiment with bright, bold colors to make your scarf a focal accessory. Ombre or variegated yarns can also add depth and interest without complicated stitch patterns.
Finally, consider your skill level. If you’re a beginner, look for patterns that use simple stitches and straightforward construction. More advanced crocheters might want to try lacy or textured stitches for added sophistication.
2. Basic Stitches and Techniques for a Crochet Head Scarf – Pattern
Understanding the foundational stitches is key to successfully completing your Crochet Head Scarf – Pattern. Most head scarves rely on basic crochet stitches that can be combined in countless ways to create various textures and designs.
The chain stitch (ch) is the starting point for most crochet projects, including head scarves. It creates the foundation row upon which other stitches are built.
Single crochet (sc) and double crochet (dc) are the most commonly used stitches in head scarves. Single crochet creates a tight, dense fabric, while double crochet gives a lighter, more open texture.
For a decorative touch, you might explore shell stitches, grit stitch, or lattice patterns. These add visual interest and a delicate feel to your scarf, making it perfect for spring or summer.
If you want a thicker scarf for winter, try using front post or back post stitches. These stitches add texture and thickness, which helps retain warmth.
Don’t forget to practice your tension and stitch consistency. A consistent stitch size leads to a more professional-looking finished scarf and a comfortable fit.
3. Step-by-Step Guide to Creating Your Crochet Head Scarf – Pattern
With materials and stitches chosen, it’s time to bring your Crochet Head Scarf – Pattern to life. This section breaks down the creation process into manageable steps for beginners and experts alike.
Start by measuring your head circumference and desired scarf length. Most head scarves range from 20 to 30 inches long and 6 to 10 inches wide, but you can adjust based on personal preference.
Create a foundation chain that matches your scarf’s width. Make sure your chain is not too tight, as you want your scarf to have some stretch for comfort.
Begin working your chosen stitch pattern row by row. Keep your tension consistent, and use stitch markers to track rows if needed.
As you progress, try the scarf on to ensure it fits well and has the desired drape. Adjust the length or width as needed by adding or subtracting rows or stitches.
Once you reach the desired size, fasten off your yarn and weave in all loose ends neatly with a tapestry needle.
For a finishing touch, consider adding decorative edges like scallops or picot stitches. You can also sew on beads or buttons to personalize your scarf further.
4. Styling and Gifting Your Crochet Head Scarf
One of the best parts about completing your Crochet Head Scarf – Pattern is styling and sharing it. These scarves are versatile and can elevate almost any outfit.
Wear your scarf as a headband, tying it at the nape of your neck for a bohemian look. Alternatively, wrap it fully around your head for warmth and vintage charm.
Pair your scarf with casual outfits like jeans and sweaters or dress it up with a flowing dress or tailored jacket. The crochet texture adds a handmade touch that enhances your overall style.
Crochet head scarves make heartfelt gifts for friends and family. Personalize your gift by selecting the recipient’s favorite colors and styles. Adding a handwritten note about the time and love spent crafting the scarf makes it even more special.
For holiday gifts, consider pairing your scarf with matching accessories like crochet earrings or a bracelet. This creates a coordinated set sure to impress.
Lastly, don’t hesitate to share your pattern or scarf photos on social media or crochet communities. Inspiring others to create and gifting handmade items helps keep this beautiful craft alive.
FAQ – Crochet Head Scarf – Pattern
Q1: Is this pattern suitable for beginners?
A: Yes, many crochet head scarf patterns use basic stitches like chain, single, and double crochet, making them accessible for beginners.
Q2: What yarn is best for a crochet head scarf?
A: Lightweight cotton or bamboo yarns are ideal for warm weather, while acrylic or wool blends work well for cooler seasons.
Q3: How do I ensure the scarf fits well?
A: Measure your head circumference and desired scarf width and length before starting. Adjust stitch count and rows as necessary.
Q4: Can I customize the pattern?
A: Absolutely! You can change colors, stitch patterns, and add embellishments like beads or buttons.
Q5: How do I care for a crochet head scarf?
A: Follow the yarn manufacturer’s care instructions. Most cotton and acrylic scarves can be machine washed on gentle cycles and air dried.
Q6: Can I sell scarves made from this pattern?
A: Yes, as long as you have the rights to the pattern or it is your own design, you can sell your handmade scarves.
Conclusion
Creating a Crochet Head Scarf – Pattern is a rewarding and enjoyable project that blends creativity with practicality. From selecting the perfect yarn and mastering basic stitches to customizing designs and sharing your finished scarves, this guide has covered all the essentials to help you succeed.
Whether you want a cozy scarf for winter or a lightweight accessory for spring, crocheting your own head scarf allows you to express your personal style and craftsmanship. We encourage you to try different colors, stitches, and finishing touches to make your scarves uniquely yours.
If you’ve enjoyed this article or tried the pattern, please leave a sincere opinion or suggestions below. Your feedback helps create a supportive crochet community and inspires more beautiful projects. Happy crocheting!