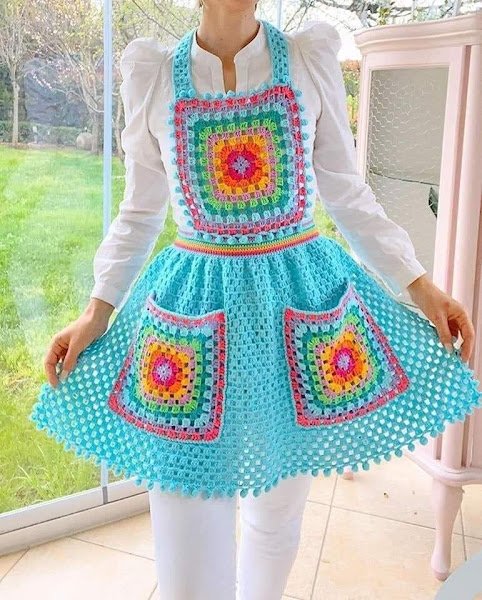
The Crochet kitchen Apron – Pattern is a delightful project that combines the rustic charm of handmade crafts with the practical needs of a busy home cook. Adding a touch of personality to your culinary space has never been easier than with a custom-made garment designed to protect your clothes while showcasing your artistic flair. Whether you are whipping up a family feast or baking a batch of cookies, wearing a piece you created yourself adds a layer of satisfaction to the experience that store-bought accessories simply cannot replicate.
When you start working on a Crochet kitchen Apron – Pattern, you are diving into a world where functionality meets fashion. These aprons are not just decorative; they are durable, washable, and highly customizable to fit any body type or kitchen aesthetic. In this guide, we will explore the best techniques to ensure your project is both beautiful and resilient, focusing on the specific stitches and yarn choices that make for a high-quality finished product that stands the test of time and repeated use in a messy kitchen environment.
This comprehensive tutorial on the Crochet kitchen Apron – Pattern is designed to help both beginners and experienced makers achieve a professional result. We will break down the construction process into manageable steps, ensuring that your tension remains consistent and your edges stay straight. By the end of this article, you will have a deep understanding of how to manipulate crochet textures and structural seams to create a garment that is as sturdy as it is stylish. Let’s gather our hooks and yarn and begin this rewarding journey into functional crochet art.
1. Choosing Durable Materials for Your Crochet kitchen Apron – Pattern
Selecting the right yarn is the foundation of any successful Crochet kitchen Apron – Pattern. Since this item will inevitably face spills, flour dust, and frequent washing, you need a fiber that is “workhorse” grade. 100% Cotton yarn is the gold standard for kitchen accessories because it is highly absorbent, heat-resistant, and can handle heavy-duty laundering without losing its shape or pill-ing like synthetic fibers might.
The weight of the yarn also plays a significant role in the utility of your Crochet kitchen Apron – Pattern. Using a worsted weight (Level 4) yarn provides a thick, protective barrier between the stove and your clothing. It offers enough substance to prevent liquids from soaking through too quickly while remaining flexible enough for comfortable movement. If you prefer a lighter feel, a DK weight can work, but you may need a tighter stitch to maintain protection.
Color choice for a Crochet kitchen Apron – Pattern is more than just an aesthetic decision; it is a practical one. While white or cream looks classic and clean, they show stains easily. Many crafters prefer variegated yarns or darker “tweed” tones that help hide the occasional splash of tomato sauce or coffee. Choosing a colorfast yarn is essential to ensure that your beautiful design doesn’t bleed or fade after the first few cycles in the washing machine.
Your choice of crochet hook should complement your yarn to create a dense fabric. For a Crochet kitchen Apron – Pattern, it is often recommended to use a hook size slightly smaller than what the yarn label suggests. This creates a “tight” weave that prevents gaps between stitches, ensuring that flour or small crumbs don’t pass through the apron and onto your clothes, which is the primary job of any good kitchen protector.
Don’t overlook the importance of notions and hardware when preparing your materials. You might want to incorporate wooden buttons, metal rings, or even leather straps to give your Crochet kitchen Apron – Pattern a modern, high-end look. Having these items ready before you start will help you plan your stitch placement for buttonholes and attachment points, making the final assembly much smoother and more professional.
Lastly, consider the “scrub-ability” of the yarn. Some cotton yarns are mercerized, giving them a slight sheen and making them more resistant to stains. For a Crochet kitchen Apron – Pattern, mercerized cotton is a fantastic choice because it feels smoother against the hands and tends to shed water better than unmercerized options. Investing in quality materials ensures that your hard work results in a long-lasting kitchen heirloom.
2. Essential Stitches and Textures for a Functional Crochet kitchen Apron – Pattern
The most common stitch used in a Crochet kitchen Apron – Pattern is the single crochet (sc). While it may seem basic, the single crochet creates a dense, sturdy fabric that is perfect for protecting clothing. It produces a flat surface that is easy to clean and doesn’t have large holes that can get caught on kitchen cabinet handles or utensils while you are moving around.
To add a bit of visual interest without sacrificing the integrity of the Crochet kitchen Apron – Pattern, you can incorporate the waffle stitch. This texture creates a deep, honeycomb-like grid that is incredibly absorbent and thick. It is an excellent choice for the “chest” portion of the apron or for adding a decorative border along the bottom hem, giving the piece a professional, store-quality appearance.
The moss stitch (also known as the linen stitch) is another favorite for the Crochet kitchen Apron – Pattern. By alternating single crochets and chain spaces, you create a fabric that looks woven rather than crocheted. It has a wonderful drape and is very durable, making it ideal for the main body of the apron where you want a bit of flexibility as you bend and reach during cooking tasks.
When it comes to the straps of your Crochet kitchen Apron – Pattern, you need stitches that do not stretch excessively. The I-cord technique or a very tight thermal stitch works best for neck and waist ties. These methods ensure that the apron stays securely in place even when the pockets are full of heavy tools, preventing the dreaded “sag” that can happen with simple chain-stitch straps.
Pockets are a vital feature of any Crochet kitchen Apron – Pattern, and they offer a chance to play with different patterns. You can use a half-double crochet (hdc) for the pockets to give them a slightly different texture than the main body. Reinforcing the top edge of the pocket with a slip stitch border will prevent it from stretching out over time when you store your phone or recipe cards inside.
Finally, consider the edging and finishing stitches. A crab stitch (reverse single crochet) provides a corded, rounded edge that looks very sophisticated on a Crochet kitchen Apron – Pattern. This finishing touch not only looks great but also reinforces the perimeter of the garment, preventing the edges from curling and helping the apron maintain its rectangular or flared shape through years of use.
3. Construction and Shaping Techniques for the Crochet kitchen Apron – Pattern
Most Crochet kitchen Apron – Pattern designs start from the bottom and work up, or vice versa. The “apron skirt” is usually a simple rectangle or a slightly flared trapezoid. To achieve a flattering flare, you will use increses (two stitches in one) at the beginning and end of rows. This ensures the apron wraps comfortably around your hips, providing maximum coverage against splashes.
The transition from the waist to the bib in a Crochet kitchen Apron – Pattern requires careful decreasing. By gradually reducing the number of stitches, you create a tapered look that leads up to the chest area. It is important to keep these decreases symmetrical so that your bib is perfectly centered. Counting your stitches at the end of every row is the best way to maintain geometric accuracy.
For the bib of the Crochet kitchen Apron – Pattern, you want a height that reaches just below the collarbone. This area is the most likely to get hit by “splatter,” so keeping the stitches tight here is paramount. Some makers prefer a square bib, while others like a slightly rounded “sweetheart” neckline, which can be achieved through clever use of slip stitches and half-double crochets along the top edge.
Straps can be attached in two ways: sewn on afterward or crocheted directly into the corners. For a more “seamless” Crochet kitchen Apron – Pattern, working the straps directly into the body is preferred as it creates a stronger bond. If you choose to sew them, use a tapestry needle and a “reinforcement square” stitch pattern to ensure the weight of the apron doesn’t tear the connection points.
Adjustability is a key factor in a successful Crochet kitchen Apron – Pattern. Consider making the neck strap with a series of buttonholes so that users of different heights can wear it comfortably. Alternatively, a “cross-back” design where the straps go over the shoulders and tie at the waist is often more comfortable for long periods, as it removes the weight from the back of the neck.
The final step in construction is the blocking process. Even though cotton is a sturdy fiber, “wet blocking” your Crochet kitchen Apron – Pattern will help relax the stitches and ensure the corners don’t flip up. Simply soak the finished piece, gently squeeze out the water, and pin it to the desired dimensions on a blocking mat. Once dry, your apron will have a professional, crisp finish ready for the kitchen.
4. Customizing and Monetizing Your Crochet kitchen Apron – Pattern
One of the best things about a Crochet kitchen Apron – Pattern is how easy it is to personalize. You can add surface crochet embroidery to include initials, or use intarsia crochet to work a fruit or vegetable motif directly into the center of the bib. These small details transform a functional item into a personalized gift that friends and family will cherish for years to come.
If you are a content creator, documenting your Crochet kitchen Apron – Pattern is a great way to build an audience. High-quality photos of the apron in a real kitchen setting, perhaps paired with a tray of muffins, help readers visualize the product in their own homes. Using natural lighting and clear close-ups of the stitch work will make your tutorial more engaging and shareable on social media platforms.
From a business perspective, the Crochet kitchen Apron – Pattern is a high-demand niche. People are always looking for unique, “farmhouse style” decor for their homes. You can sell the digital PDF pattern on platforms like Etsy or Ravelry, or sell the physical finished aprons at local craft fairs. Because they are functional items, they often command a higher price point than purely decorative pieces.
To optimize your Crochet kitchen Apron – Pattern blog post for search engines, make sure to include “alt-text” for all your images. Describe the stitches and colors used in the photos so that Google can index them properly. This helps hobbyists who are searching for “textured crochet apron” or “cotton kitchen pattern” find your specific content among the thousands of other craft blogs.
Encouraging user-generated content is another great way to boost the visibility of your Crochet kitchen Apron – Pattern. Ask your readers to tag you on Instagram or Pinterest when they finish their projects. This creates a “social proof” loop where potential new followers see that your patterns are easy to follow and produce beautiful results, driving more traffic back to your AdSense-monetized website.
Finally, always keep the user experience in mind. Provide a “print-friendly” version of your Crochet kitchen Apron – Pattern if possible. Many crafters like to have a physical copy to check off rows as they work. Small touches like this build loyalty with your audience, ensuring they return to your site for their next project and continue to support your journey as a digital fiber artist.
FAQ – Frequently Asked Questions
What is the best yarn for a Crochet kitchen Apron – Pattern?
The absolute best choice is 100% cotton yarn. Cotton is durable, heat-resistant, and becomes softer with every wash. It also absorbs spills better than acrylic, which tends to let liquids bead up and roll off onto your clothes.
Can I use acrylic yarn for a Crochet kitchen Apron – Pattern?
While you can, it is not recommended. Acrylic is a form of plastic and can melt if it comes into contact with high heat or a hot stove burner. Additionally, it is not as absorbent as cotton, which makes it less effective at protecting your clothes from liquid splashes.
How do I make the straps of my apron stronger?
To prevent stretching, use a smaller hook for the straps to create a very tight tension. You can also “line” the straps with a strip of cotton fabric or ribbon, or use the thermal stitch, which creates a double-thick fabric that is virtually stretch-proof.
Is this Crochet kitchen Apron – Pattern suitable for beginners?
Yes! If you stick to a basic rectangular shape with single crochet or half-double crochet stitches, it is a very beginner-friendly project. The most “difficult” part is usually the shaping of the bib, but with a bit of practice on decreases, anyone can master it.
How many hours does it take to finish a Crochet kitchen Apron – Pattern?
Depending on your speed and the complexity of the stitch, a full-sized apron usually takes between 8 to 15 hours. Using a thicker yarn and a larger hook (within reason) can speed up the process significantly if you are in a rush to make a gift.
How do I clean my handmade crochet apron?
If you used 100% cotton, you can machine wash it on a gentle cycle with similar colors. It is best to air dry it flat to maintain the shape, but many cotton yarns can handle a low-heat tumble dry. Always check your yarn label for specific care instructions!
Conclusion
In this article, we have explored the wonderful world of the Crochet kitchen Apron – Pattern, covering everything from the necessity of using durable cotton fibers to the advanced shaping techniques needed for a perfect fit.
We discussed how specific textures like the waffle and moss stitch can add both beauty and functionality to your work, and how small details like reinforced straps and decorative edging elevate the final product. Designing and making your own kitchen gear is a rewarding way to practice your skills while creating something that will be used and loved daily.