Making your own crochet newborn booties – pattern is a beautiful way to welcome a little one into the world.
These tiny, cozy creations are not only practical for keeping baby feet warm, but they also carry a handmade charm that factory-made items simply can’t match.
Whether you’re a beginner in the world of crochet or an experienced crafter looking for a meaningful project, baby booties are both enjoyable and rewarding to make.
The appeal of crocheting booties lies in the quick and satisfying process. They are small, portable projects that you can complete in a single evening, and they make wonderful gifts for baby showers, newborn announcements, or even to donate to hospitals. Best of all, you have full creative control over the colors, yarn type, and design details, allowing you to make each pair of booties truly one-of-a-kind.
In this article, we’ll guide you through everything you need to know about crafting crochet newborn booties – pattern, from the tools and materials you’ll need to detailed steps and customization options. We’ve also included a helpful FAQ section and a conclusion to wrap up your journey with thoughtful insights and encouragement to get started.
1. Gathering Materials and Getting Started
Before you dive into your crochet newborn booties – pattern, it’s important to make sure you have all the right materials on hand. Using the proper tools and choosing the right yarn will ensure your booties are both soft and safe for newborn skin.
Start by selecting yarn. For baby projects, 100% cotton or baby-soft acrylic yarns are ideal. Look for lightweight yarns labeled as DK (double knit) or sport weight, which are perfect for the delicate size of baby booties. These yarns are gentle on skin, breathable, and washable—three important qualities for baby clothing.
You’ll also need a crochet hook that matches your yarn’s recommended size. Typically, a 3.5 mm to 4 mm hook works well for baby booties. If you crochet tightly, go up half a size; if you crochet loosely, go down a size to ensure your stitches stay snug.
Have a yarn needle on hand for weaving in ends, and a pair of sharp scissors. Stitch markers are helpful too, especially if your pattern includes working in rounds. They’ll help you keep track of where each row starts and ends.
Choose your crochet newborn booties – pattern carefully. Look for patterns with clear instructions, photos, or video tutorials if needed. If this is your first time making booties, start with a simple pattern that uses basic stitches like single crochet (sc), half double crochet (hdc), and double crochet (dc).
Make sure to create a swatch if the pattern suggests it. Although it may feel like an extra step, this helps ensure the final size is accurate. Newborn feet are tiny, and even slight differences in gauge can result in booties that don’t fit well.
2. Step-by-Step Guide to Crochet Newborn Booties
Once your materials are ready, it’s time to begin following your crochet newborn booties – pattern. Most bootie patterns consist of three parts: the sole, the upper, and any decorative or fastening elements. Let’s walk through a simple approach.
Begin with the sole. You’ll typically start with a chain and build up a flat oval shape by working single and half double crochet stitches, increasing on the ends to give the sole its shape. Make sure your stitches are tight so the bootie holds its structure.
Once the sole is the right size, you’ll start building the upper part of the bootie. This usually means working in rounds around the sole without increasing. These rows will form the sides of the bootie, and you’ll begin to see the shape take form. Some patterns call for back-loop-only stitches here to create a nice edge between the sole and upper.
As you work upwards, you may start decreasing stitches to taper the bootie toward the ankle. This gives the bootie its snug fit. The decrease rounds may also include chain spaces or holes for laces or straps to be added later.
For fastening, booties often include a simple chain tie, button strap, or elastic band. If you’re adding buttons, make sure they’re securely sewn and large enough not to be a choking hazard. Avoid anything small or detachable for newborn safety.
After finishing the first bootie, be sure to replicate the second bootie with exact stitch counts and tension. This helps ensure both booties match in size and shape, creating a professional, polished look.
Weave in all ends securely with a yarn needle, and block the booties lightly if necessary. This helps shape them neatly and gives them a clean, finished look. Now your pair of crochet newborn booties – pattern is ready to be worn or gifted!
3. Customizing Your Crochet Newborn Booties
Once you’re confident in the basic structure, you can start customizing your crochet newborn booties – pattern to make them even more adorable and personal. This is where your creativity can truly shine.
Color is the easiest way to personalize your booties. You can stick to classic baby blues, pinks, or neutral whites and creams. Or, go bold with bright colors or even multicolored yarn. Try using stripes or color blocks to create more visual interest.
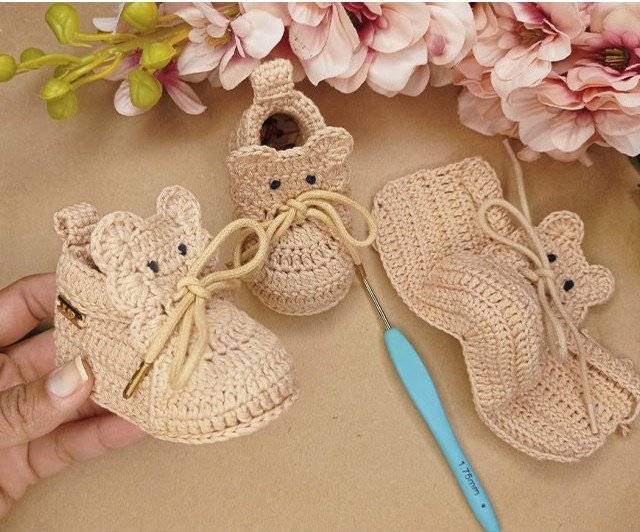
Add decorative elements like small bows, flowers, or animal ears. Tiny crocheted bear ears on the sides or a scalloped edge around the ankle can turn basic booties into playful, themed pieces. Keep these additions secure and soft to maintain baby safety.
Consider matching your booties to other handmade baby items. You can create a full set including a baby hat, mittens, and a matching blanket, using the same yarn and color palette. These sets make thoughtful and cherished gifts.
Adjust sizing if needed. Most crochet newborn booties – pattern designs include instructions for newborns (0–3 months), but you can modify the stitch count slightly to make them fit 3–6 months or even 6–12 months. Always refer to size charts for foot length.
Try textured stitches to enhance both form and function. Ribbed cuffs or puff-stitch uppers add stretch and comfort while also looking stylish. You can even double up on yarn to create warmer booties for winter babies.
Don’t forget about presentation! Packaging your finished booties in a handmade drawstring bag or wrapping them in tissue paper adds a lovely finishing touch. This is especially important if you’re gifting or selling your work.
4. Selling or Gifting Handmade Booties
Crochet newborn booties – pattern projects are not just fun to make—they’re also popular items for gifting or selling. Their universal appeal and handmade charm make them perfect for both personal and commercial use.
For gifting, consider the occasion. Newborn booties are perfect for baby showers, birth announcements, or first holiday gifts. You can make themed booties, such as Christmas, Easter, or Valentine’s styles, which make your handmade present stand out.
If you plan to sell your booties, create a range of color options and styles. Display your booties attractively, whether at local craft markets or online platforms like Etsy. Quality photos are essential—make sure to include close-ups, size details, and images showing how soft and wearable the booties are.
Price your booties carefully. Factor in the cost of materials, your time, and market competition. Generally, handmade baby booties can sell for $10–$25 depending on complexity and design. Be transparent about sizing and materials to help buyers make informed decisions.
Brand your product. A simple tag with care instructions and a label for your shop or name can go a long way in making your creations feel professional and trustworthy. Include washing instructions to help buyers care for their handmade gifts.
Be aware of pattern copyright. Some crochet newborn booties – pattern designers allow items made from their patterns to be sold, while others do not. Always read the licensing terms and give credit if required.
Finally, enjoy the process. Whether you’re gifting to a friend or selling to a new parent, your handmade booties carry a sense of warmth, care, and creativity that no store-bought item can match.
FAQ – Frequently Asked Questions
Q1: What size should newborn booties be?
Most newborn booties measure about 3.5 to 3.75 inches (9 to 9.5 cm) in sole length. It’s best to follow a crochet newborn booties – pattern that specifies exact dimensions to ensure a good fit.
Q2: Is it safe to add buttons or decorations to baby booties?
Yes, but they must be securely attached and large enough to avoid choking hazards. Avoid small beads or detachable parts.
Q3: Can I use any yarn to crochet baby booties?
No. Only use soft, baby-friendly yarn such as 100% cotton or baby acrylic yarns. Avoid wool blends unless they’re labeled as safe for sensitive skin.
Q4: How long does it take to make a pair of baby booties?
Typically, it takes 1–2 hours per pair depending on the pattern complexity and your experience level.
Q5: Are these booties machine washable?
Yes, most yarns used for baby items are machine washable. However, always include care instructions based on the yarn label.
Q6: Can I adjust the pattern for older babies?
Absolutely! Most patterns include sizing instructions, and you can also modify stitch counts or use slightly larger hooks and yarn to increase size.
Conclusion
Creating crochet newborn booties – pattern is a fulfilling and heartwarming experience, whether you’re making them for a baby in your life, as a gift, or to sell. This article guided you through the essential materials, step-by-step instructions, customization ideas, and the business side of crafting baby booties.
We hope you’re inspired to try your own bootie project and discover the joy of handmade baby gifts. If you’ve followed a pattern or created your own, share your results with us! We welcome your honest opinions, tips, and suggestions in the comments. Happy crocheting!