If you’re looking for a fun and creative DIY project, the CROCHET OWL KEYCHAIN – Pattern is a perfect choice. Whether you’re a beginner or an experienced crocheter, this project offers a quick, satisfying way to create a charming, handmade accessory. These tiny owls are not just adorable—they also make great gifts, party favors, or items to sell at craft fairs.
Making your own crochet owl keychain is a delightful way to practice different techniques, including working in the round, color changes, and shaping. With a few basic supplies and a little patience, you can bring a cute and colorful owl to life. Plus, since they’re small, they’re great for using up leftover yarn from other projects.
In this article, we’ll walk you through every step of the process using a clear and simple crochet owl keychain – pattern. From selecting the right materials to finishing your keychain with safety eyes and a keyring, everything is covered to help you succeed. This is more than just a craft—it’s a chance to create something personal and meaningful with your own two hands.
1. Materials and Tools for Your Crochet Owl Keychain
Before you begin, gather all the essential materials you’ll need to complete your crochet owl keychain – pattern. Having the right tools on hand makes the process smoother and more enjoyable.
You’ll want to use cotton or acrylic yarn in multiple colors. Cotton yarn offers good stitch definition, which is ideal for small projects like keychains. Use bold, bright colors to give your owl a playful and eye-catching look.
For the hook, a 2.5 mm or 3.0 mm crochet hook works well with lightweight yarn. Smaller hooks help keep the stitches tight, which is especially important for stuffed projects like this. Loose stitches may cause stuffing to show through.
Other important items include polyfill stuffing, safety eyes (or black yarn if you prefer to embroider eyes), a tapestry needle, and small keychain rings. You may also want a stitch marker to keep track of your rounds.
Make sure your scissors are sharp for clean cuts, especially when changing yarn colors or trimming finishing touches. A pair of embroidery scissors can be helpful for small projects like this one.
Having a quiet, well-lit workspace is also beneficial. Since the pieces are small, you’ll want to see every detail clearly and avoid eye strain. Turn on a desk lamp or work near a window if possible.
2. Creating the Owl Body – Step-by-Step Instructions
The body of your crochet owl keychain – pattern starts with a simple circle that forms the base. This is worked in the round, so you’ll use either the magic ring method or chain two and crochet into the first stitch.
Begin with six single crochets into your magic ring, then increase evenly to create a flat circle. After a few rounds of increasing, you’ll stop expanding and simply crochet evenly to build up the height of the owl’s body.
As the body grows, you can start planning your color changes. Use contrasting yarns for the belly and the back to give the owl a bold, cartoon-like appearance. Switching colors is a great way to add personality and variety.
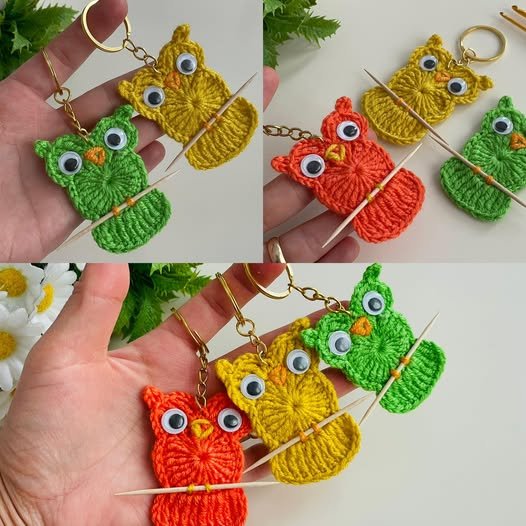
Once the desired height is reached, insert your safety eyes or embroider the eyes just above the centerline. Make sure the eyes are evenly spaced, as this gives your owl a balanced, cute look. Add a tiny triangle-shaped beak using a few stitches of yellow or orange yarn.
After inserting the stuffing, close the top of the owl with a round or flat closure. Be sure to stuff it firmly but not too tightly. The shape should be slightly oval, plump, and soft to the touch.
Before moving on to other parts, fasten off and weave in all your ends neatly using a tapestry needle. Your crochet owl keychain – pattern is already coming to life!
3. Adding Wings, Ears, and Keychain Attachment
To really make your owl stand out, it’s time to add small details like wings, ears, and the keychain loop. These elements give your owl character and complete its look.
Wings are typically made with a few rows of half-circle shapes or small ovals. You can attach them with slip stitches or by sewing them onto the sides of the body using your tapestry needle. Choose a color that contrasts with the body for extra flair.
The ears can be made by adding tiny triangles or even simple knots at the top corners of the owl. These help define the head and give the owl a more recognizable silhouette. You can also brush out the yarn ends for a feathery effect.
Some crocheters like to add tiny feet or tail feathers, although these are optional. If you do, make sure they are secure, especially if the keychain is meant for a child or daily use.
To attach the keychain ring, crochet or sew a small loop at the top of the owl’s head. You can make this loop with a chain of 6–8 stitches, then slip stitch back into the same spot. Reinforce it well so the keychain holds up under use.
Slide the metal keyring through the loop. If you’re using a split ring (like a standard keychain), use pliers if necessary to avoid damaging the yarn. Make sure the owl hangs securely and upright.
Finally, give your keychain a gentle stretch and check for loose threads. Once you’re satisfied, you’ll have a complete, handmade crochet owl keychain that’s ready to charm anyone who sees it!
4. Tips for Personalizing and Gifting Your Owl Keychain
One of the best things about the crochet owl keychain – pattern is how easy it is to personalize. With just a few changes, you can create an owl that’s truly unique and full of personality.
Experiment with different color combinations. Try making a pastel owl, a rainbow owl, or even a Halloween-themed version using orange and black. The possibilities are endless, and each variation adds a new creative spin.
You can also add accessories like mini bows, tiny glasses, or little hats to your owls. These extras can be crocheted or added using other craft supplies. Personalizing each one makes them special and ideal for gifts.
For a more refined finish, add a fabric tag or a tiny label with your name or brand if you plan to sell the keychains. This small touch gives your project a professional feel and helps you stand out at craft markets.
Another idea is to create matching keychains for couples, friends, or family members. Use complementary colors and stitch tiny hearts or initials onto the back of the owl. It’s a thoughtful, handmade present that people really appreciate.
You can also scale your pattern slightly by using thinner yarn and a smaller hook, or make a larger version for a backpack charm. This flexibility is what makes the crochet owl keychain – pattern so versatile.
Finally, remember to photograph your finished owls in good lighting and share your creations online. Many crocheters enjoy showing their work on social media or in crafting groups, where you can get feedback and inspire others.
FAQ – CROCHET OWL KEYCHAIN – Pattern
Q1: Is the crochet owl keychain suitable for beginners?
Yes, it’s a great beginner project! Basic stitches like single crochet, increases, and working in the round are all you need.
Q2: How long does it take to make one owl keychain?
It usually takes between 1 to 2 hours, depending on your skill level and how detailed your design is.
Q3: What size should my owl keychain be?
Most owl keychains measure about 2 to 3 inches tall, but you can adjust the size by using different yarn weights and hook sizes.
Q4: Can I sell keychains made from this pattern?
Absolutely! Handmade crochet keychains are popular items at markets and online. Just be sure to credit the original pattern if you’re using one.
Q5: What type of yarn works best?
Cotton yarn is ideal due to its durability and stitch definition, but acrylic works too if you prefer a softer texture.
Q6: Do I need to use safety eyes?
Safety eyes give a polished look, but you can also embroider the eyes using black yarn, especially if you’re making the toy for small children.
Conclusion
We hope this guide on the CROCHET OWL KEYCHAIN – Pattern has inspired you to grab your hook and create something adorable and useful. From learning the basic stitches to customizing your own designs, this small but rewarding project offers creativity, fun, and practicality in every stitch.
If you’ve enjoyed this article or tried the pattern yourself, please leave your honest opinion in the comments below. We’d love to hear how your owl turned out and what creative twists you added. Also, feel free to suggest topics for future crochet tutorials—we’re always excited to create more content for fellow crafters like you!