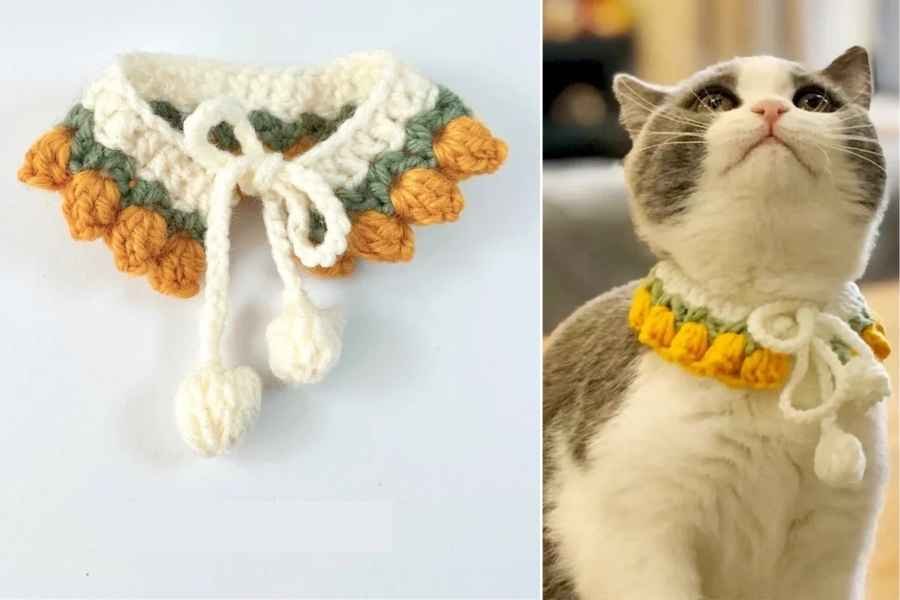
The Crochet Pet Collar – Pattern is one of the most charming and personalized ways to show your furry friends how much you care while expressing your creativity through yarn and hook. Unlike standard store-bought options, a handmade pet collar allows you to choose specific textures and colors that perfectly match your pet’s personality and coat. This versatile pattern is designed to be both stylish and functional, providing a lightweight alternative for pets who might find heavy leather or nylon collars uncomfortable during their afternoon naps or indoor playtime.
Creating a Crochet Pet Collar – Pattern is an ideal project for crafters of all skill levels because it requires minimal yarn and can be completed in a single afternoon. The beauty of this crochet project lies in its adaptability; you can easily scale the dimensions to fit a tiny kitten or a large golden retriever simply by adjusting your stitch count. By focusing on high-quality materials and safe construction methods, you ensure that the final product is not only a fashion statement but also a durable accessory that can withstand the daily adventures of an active pet.
When you dive into this Crochet Pet Collar – Pattern, you are engaging in a mindful activity that results in a unique gift for your dog or cat. This guide will walk you through the essential steps, from selecting the right hypoallergenic yarn to mastering the specific stitches that provide the necessary strength for a collar. We will also explore how to integrate safety features, such as breakaway buckles or adjustable sliders, ensuring your pet remains safe while looking absolutely adorable in their new crochet accessory.
1. Choosing the Right Materials for Your Crochet Pet Collar – Pattern
The success of your Crochet Pet Collar – Pattern begins with the selection of the yarn, as pets have sensitive skin that can be easily irritated by rough fibers. We strongly recommend using 100% mercerized cotton for this project because it is incredibly strong, does not stretch out of shape easily, and has a smooth finish that won’t trap fur.
In addition to the fiber type, you must consider the yarn weight in relation to the size of your pet. For smaller animals like cats or toy dog breeds, a Category 2 (Sport) or Category 3 (DK) yarn is perfect to keep the collar delicate, while larger dogs may benefit from the sturdiness of a Category 4 (Worsted) cotton yarn.
Your choice of crochet hook size will dictate the density of the fabric, which is crucial for a Crochet Pet Collar – Pattern. Using a hook that is slightly smaller than what the yarn label suggests—such as a 3.25mm (D) or 3.5mm (E) hook—will create a tighter, more durable stitch that prevents the collar from sagging over time.
Hardware is the next essential component of your pet pattern. You will need a high-quality side-release buckle, a metal D-ring for attaching identification tags, and perhaps a slider if you want the collar to be adjustable. Always ensure these components are lead-free and specifically designed for pet use to guarantee safety and longevity.
Don’t forget the importance of durability and hygiene when choosing your materials. Since pets love to explore the outdoors, your Crochet Pet Collar – Pattern should be made from a yarn that is fully machine washable. This allows you to keep the accessory fresh and clean without worrying about the colors fading or the stitches unraveling after a wash.
Lastly, consider the aesthetic elements like yarn color and variegated patterns. Choosing a bright, contrasting color can make it easier to spot your pet in the garden, while a reflective yarn thread carried along with your main yarn can add an extra layer of visibility and safety during evening walks.
2. Essential Stitches and Construction Techniques
The foundation of a reliable Crochet Pet Collar – Pattern is usually a series of foundation single crochets (fsc) rather than a standard starting chain. This technique provides a much more elastic and comfortable base that moves with your pet, preventing the “stiff” feeling that often comes with traditional chain starts.
Most crochet collars rely on the single crochet (sc) or half double crochet (hdc) stitch because these provide a dense, solid fabric. These stitches are excellent for ensuring that the collar doesn’t catch on claws or furniture, which is a common concern when making crocheted items for animals that like to scratch or climb.
To add structural integrity to your Crochet Pet Collar – Pattern, you can work in the back loops only (BLO). This creates a ribbed effect that is not only visually appealing but also adds a bit of “spring” to the collar, allowing it to sit snugly against the neck without being restrictive or causing hair breakage.
Integrating the D-ring and buckle into the pattern requires a bit of planning. You will typically crochet directly around the bar of the buckle or the D-ring using tight single crochets, ensuring the metal or plastic components are securely anchored within the yarn work to prevent them from slipping out under pressure.
If you want a more decorative look, you can add a scalloped edge or a picot border to the top and bottom of your Crochet Pet Collar – Pattern. While these details are beautiful, ensure they are kept small so they don’t interfere with the pet’s movement or become a distraction that the pet might try to chew on.
Reinforcing the stress points is a professional secret for a long-lasting pet accessory. Using a tapestry needle and a matching strand of yarn to double-stitch the areas where the buckle and D-ring are attached will provide extra peace of mind, making your handmade collar as strong as any commercial version.
3. Adjusting the Size for a Custom Fit
One of the greatest advantages of using a Crochet Pet Collar – Pattern is the ability to achieve a bespoke fit. Before you start, measure your pet’s neck with a soft measuring tape, ensuring you can fit two fingers between the tape and the neck to allow for comfortable breathing and movement.
For a fixed-size collar, you will simply crochet until your piece matches the measured circumference minus the length of the buckle. If you are following a pattern for a growing puppy or kitten, it is better to create an adjustable strap by using a slider, which allows the collar to expand as the pet matures.
When working on a Crochet Pet Collar – Pattern for a cat, safety is the number one priority. Always use a breakaway buckle (also known as a safety buckle) that is designed to pop open if the collar gets snagged on a fence or a tree branch, preventing the risk of choking during their climbs.
For larger dogs, you might want to increase the width of the collar. You can do this by adding more rows of stitches to your pattern. A wider collar distributes pressure more evenly across the neck, which is especially important for breeds that tend to pull or have longer, more delicate necks like Greyhounds.
Always perform a “tension test” as you work through the Crochet Pet Collar – Pattern. Cotton yarn has very little give, so if your stitches are too loose, the collar will grow significantly over the first few days of wear. Aim for a firm, consistent tension to maintain the original dimensions of your project.
Final measurements should be taken after the blocking process. By pinning your finished crochet collar to a blocking board and lightly steaming it, you relax the fibers and set the final shape. This ensures that the pattern looks professional and reaches the exact length you intended for your pet.
4. Personalizing and Styling Your Finished Piece
Personalization is where your Crochet Pet Collar – Pattern truly comes to life. You can embroider your pet’s name directly onto the crochet fabric using a contrasting thread, or even attach small crochet charms like a bone, a fish, or a flower to give the collar a 3D effect.
For festive occasions, you can easily modify your pattern to include holiday themes. Imagine a vibrant orange and black collar for Halloween, or a sparkly white and silver one for the winter holidays. These themed crochet accessories make for fantastic social media photos and festive family gatherings.
Another popular variation is the bow tie attachment. You can use the same yarn from your Crochet Pet Collar – Pattern to make a simple rectangle, cinch it in the middle, and slide it onto the collar. This “dapper” look is incredibly popular for male dogs and adds a touch of class to any pet.
If your pet has a specific “job,” such as a therapy dog, you can use the collar pattern to indicate their status. Choosing specific colors like bright blue or red can signal to others that your pet is at work, combining the beauty of crochet with a functional, communicative purpose.
Don’t be afraid to experiment with multi-color yarn or stripes. By changing colors every two rows, you can create a vibrant, striped Crochet Pet Collar – Pattern that stands out. This is also an excellent way to use up “scrap yarn” from larger projects, making this an eco-friendly and budget-conscious craft.
Selling your finished items is also a great option. A well-made Crochet Pet Collar – Pattern is a high-demand item at local craft markets or on digital platforms like Etsy. Because they are quick to make and use very little material, they offer a wonderful return on investment for your time and skill as a crocheter.
FAQ: Frequently Asked Questions about the Crochet Pet Collar – Pattern
1. Is a crochet collar strong enough for a dog that pulls on the lead?
While a Crochet Pet Collar – Pattern made with mercerized cotton is very strong, we generally recommend using it as a decorative accessory for holding ID tags. For heavy pullers, it is safer to attach the lead to a specialized harness while wearing the crochet collar for style.
2. How do I clean my handmade pet collar?
Since most Crochet Pet Collar – Patterns use cotton, you can hand wash them in warm soapy water or place them in a mesh laundry bag and run them through a gentle machine cycle. Always air dry the collar to prevent any shrinkage from a high-heat dryer.
3. Will the crochet stitches irritate my pet’s skin?
Not if you choose the right yarn! Soft, natural fibers like cotton or bamboo are much smoother than synthetic nylon. Always check the inside of the collar for any stray knots or sharp hardware edges before placing it on your pet.
4. How long does it take to crochet a pet collar?
A standard Crochet Pet Collar – Pattern usually takes between 45 minutes to 2 hours, depending on your experience level and the complexity of the decorative borders you choose to add.
5. Can I add a bell to the collar for my cat?
Yes, you can easily sew a small bell onto the D-ring of the pattern. This is a great way to help protect local wildlife and keep track of your cat’s movements around the house.
6. What if my pet tries to chew the collar?
If your pet is a known “chewer,” ensure the Crochet Pet Collar – Pattern is fitted snugly (but safely) so they cannot get their jaw under it. If they do manage to chew it, cotton is generally safer than plastic, but you should always replace a damaged collar immediately.
Conclusion
In this comprehensive guide, we have explored the wonderful process of creating a Crochet Pet Collar – Pattern, from the initial selection of durable cotton yarns to the final decorative touches that make the piece unique.
We learned how to prioritize safety by using breakaway buckles for cats and reinforced D-rings for dogs, and we discussed the technical stitches like the foundation single crochet that ensure a comfortable fit. By following these steps, you can create a high-quality, handmade pet accessory that is both beautiful and functional.