Crochet Plant Cover – Pattern is a fantastic project that allows you to blend the organic beauty of indoor gardening with the cozy, handcrafted texture of fiber arts. Whether you are looking to hide a plain plastic nursery pot or simply want to elevate your home decor, a custom-made cover adds a touch of warmth and personality to any room. This guide is designed to help you create a professional-looking piece that looks stunning on a shelf or as a thoughtful gift for a fellow plant lover.
When you start working on a Crochet Plant Cover – Pattern, you realize how versatile and adaptable the design can be for different environments. By selecting specific yarns and textures, you can match your interior design style, ranging from modern minimalist to bohemian chic. Beyond the aesthetics, these covers also provide a small layer of protection for your surfaces, catching minor drips or scratches that a standard ceramic pot might leave behind.
Creating your own Crochet Plant Cover – Pattern is a rewarding experience that also helps you practice essential stitches in a functional way. It is a relatively quick project that doesn’t require a massive investment of materials, making it perfect for using up your yarn stash while producing something high-end in appearance. Throughout this article, we will break down everything you need to know to master this pattern and ensure your digital content or physical projects are top-tier.
1. Choosing Materials for Your Crochet Plant Cover – Pattern
To begin your Crochet Plant Cover – Pattern, the first step is selecting the right yarn. Cotton yarn is generally the best choice because it is sturdy, breathable, and holds its shape well even when it gets slightly damp from plant misting. Unlike acrylic, cotton provides a crisp stitch definition that makes your crochet pattern stand out beautifully.
The hook size you choose will greatly impact the tension of your project. For a Crochet Plant Cover – Pattern, you usually want a tighter tension so the plastic pot underneath doesn’t peek through the stitches. Using a hook slightly smaller than what the yarn label recommends can help achieve this dense fabric look.
Don’t forget about the stitch markers and tapestry needles. Since many plant covers are worked in the round, a marker is essential to keep track of your continuous spirals or joined rounds. This ensures your Crochet Plant Cover – Pattern maintains a perfectly symmetrical shape from bottom to top.
The gauge of your work is particularly important here because pots come in very specific diameters. Before diving deep into the full Crochet Plant Cover – Pattern, take a moment to measure the base of your pot. You want the bottom of your crochet project to match the diameter of the pot’s base exactly.
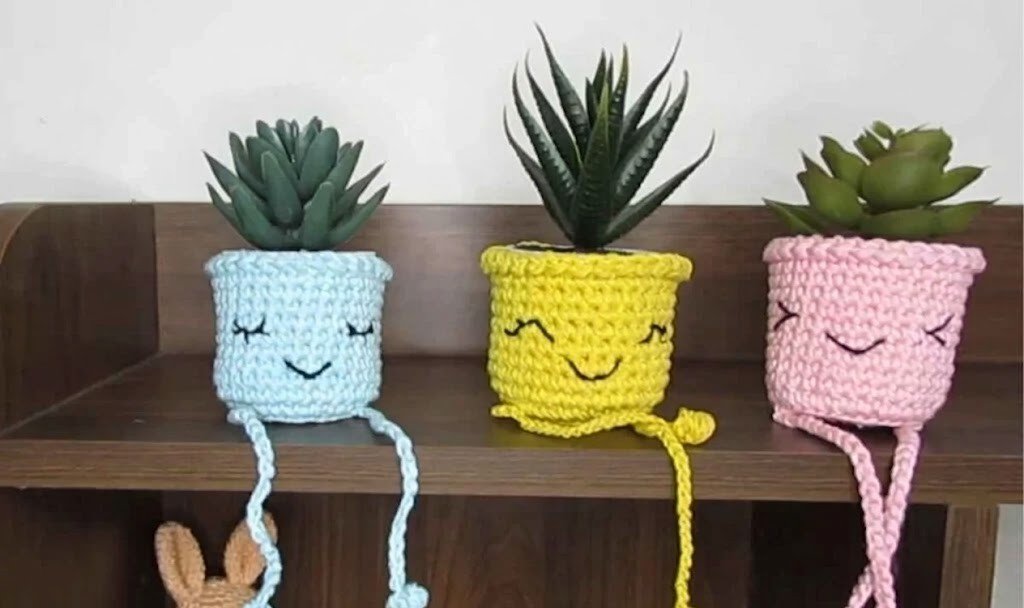
Color choice plays a massive role in how the final Crochet Plant Cover – Pattern looks in a home. Neutral tones like cream, beige, or charcoal are popular for a scandi-style look, while variegated yarns can create a fun, eclectic vibe. Always consider the foliage color of the plant you intend to house inside the cover.
Lastly, consider adding a waterproof liner or a plastic tray inside your finished piece. While the Crochet Plant Cover – Pattern is durable, constant soaking can lead to mildew over time. Incorporating a small barrier between the soil and the yarn ensures your handcrafted cover remains clean and beautiful for years.
2. Understanding the Base of the Crochet Plant Cover – Pattern
The foundation of a successful Crochet Plant Cover – Pattern starts with a flat circle. Most patterns begin with a magic ring (or magic circle), which allows you to pull the center tight and eliminate any gaps at the bottom of the pot. This is a crucial skill for any amigurumi or circular project.
Once the ring is established, you will follow a standard increase formula to expand the circle. In a typical Crochet Plant Cover – Pattern, you increase by a set number of stitches—usually 6 for single crochet or 12 for double crochet—in each round. This keeps the base lying flat rather than curling into a bowl too early.
To transition from the base to the walls of the Crochet Plant Cover – Pattern, many designers use the back loop only (BLO) technique. By working one round into the back loops, you create a sharp “ledge” or crease. This structural detail helps the cover sit flat on a table and gives it a professional, tailored appearance.
The height of your Crochet Plant Cover – Pattern is entirely customizable. After the base is complete, you simply stop increasing and work even rounds of basic stitches. This is the part of the project where you can relax and enjoy the rhythmic nature of handmade crochet, watching the walls grow taller with every row.
If you want to add texture to your Crochet Plant Cover – Pattern, this is the stage to do it. You can incorporate waistline stitches, bobbles, or v-stitches to create visual interest. Each variation in the stitch pattern will affect how the light hits the cover and how much of the inner pot is hidden.
Ensure you are measuring against the actual pot as you go. A common mistake in a Crochet Plant Cover – Pattern is making the walls too tight, making it difficult to slide the pot inside. Aim for a “snug but comfortable” fit, allowing for the slight natural stretch of the yarn over time.
3. Advanced Techniques for a Custom Crochet Plant Cover – Pattern
For those who want to take their Crochet Plant Cover – Pattern to the next level, consider adding handles. Crocheted handles can be worked directly into the top rounds using a series of chain stitches. This gives the cover a “basket” look, which is very trendy in modern farmhouse decor.
Another way to enhance the Crochet Plant Cover – Pattern is by using the tapestry crochet technique. This allows you to “paint” with yarn, creating geometric shapes or even letters on the side of the cover. It requires carrying two colors of yarn at once, resulting in a thicker, more durable fabric.
You can also experiment with ribbing at the top edge of your Crochet Plant Cover – Pattern. Using front post and back post double crochets creates a stretchy, textured rim that mimics a knitted look. This adds a sophisticated finish that elevates the project from a simple “sleeve” to a high-quality home accessory.
If you prefer a more rustic aesthetic, try using jute or twine instead of traditional yarn for your Crochet Plant Cover – Pattern. Working with natural fibers can be tougher on the hands, but the resulting textured basket is incredibly sturdy and looks amazing with succulents or cacti.
For a bohemian flair, you can add fringe or tassels to the bottom or the rim of your Crochet Plant Cover – Pattern. These small embellishments can be easily attached after the main body is finished. It’s a simple way to customize a basic pattern and make it truly unique to your personal style.
Blocking your finished Crochet Plant Cover – Pattern is a step you shouldn’t skip if you want a professional result. By wetting the cover and shaping it over a form (like the pot itself), you can even out the stitches and ensure the cylindrical shape is perfect. This final touch makes a world of difference in the SEO-worthy photos you might take.
4. Maintenance and Care for Your Crochet Plant Cover – Pattern
Because your Crochet Plant Cover – Pattern will be living near soil and water, knowing how to clean it is essential. If you used 100% cotton, most covers are machine washable on a gentle cycle. However, air drying is highly recommended to prevent the fibers from shrinking and losing their fit on the pot.
Over time, the weight of the plant or the stretching of the yarn might cause the Crochet Plant Cover – Pattern to sag. To fix this, you can “re-stiffen” the project using a bit of fabric stiffener or even a light starch spray. This helps the walls stay upright and maintains the crisp lines of the original design.
If you notice your Crochet Plant Cover – Pattern is getting dirty frequently, consider using a darker yarn color or a mottled tweed yarn. These colors are much more forgiving when it comes to small water spots or dust. It ensures your hand-stitched decor looks fresh between washes.
For those using the Crochet Plant Cover – Pattern for hanging plants, checking the structural integrity of the yarn is vital. Gravity will pull on the stitches, so using a non-stretch cord like macramé rope or nylon mixed with yarn can help the cover hold its shape while suspended in the air.
Sunlight exposure is another factor to consider for your Crochet Plant Cover – Pattern. If your plant sits in a very sunny window, certain dyed yarns may fade over time. Choosing UV-resistant yarns or high-quality mercerized cotton can help preserve the vibrant colors of your artisan plant cozy.
Finally, always keep a few extra yards of the yarn used for your Crochet Plant Cover – Pattern. If a thread snags or a hole develops, having the matching dye lot makes it easy to perform a quick “invisible” repair. This ensures your hard work remains a staple of your indoor garden for a long time.
FAQ – Frequently Asked Questions
What is the best yarn for a Crochet Plant Cover – Pattern?
The most recommended material is cotton yarn due to its durability and ability to handle moisture. T-shirt yarn is also a popular choice for larger pots because it works up quickly and creates very thick, sturdy walls.
Can I make a Crochet Plant Cover – Pattern for any pot size?
Yes! The beauty of a crochet pattern is that it is easily scalable. By simply adding more increase rounds to the base, you can accommodate everything from tiny 2-inch succulents to large 10-inch floor plants.
How do I prevent the crochet cover from getting moldy?
The best way to protect your Crochet Plant Cover – Pattern is to use a saucer inside the cover to catch excess water. Ensure the plant is not sitting in standing water, and allow the crochet fabric to dry completely if it accidentally gets wet.
Is this project suitable for beginners?
Absolutely. A basic Crochet Plant Cover – Pattern uses fundamental stitches like the chain, single crochet, and slip stitch. It is an excellent project for learning how to work in the round and manage increases.
How long does it take to finish one cover?
Depending on the size of the pot and your speed, a standard Crochet Plant Cover – Pattern for a 4-inch pot can usually be completed in about 1 to 2 hours, making it a perfect weekend or evening craft.
Conclusion
In this article, we have explored the essential steps to creating a beautiful and functional Crochet Plant Cover – Pattern. From selecting the most durable cotton yarns and matching your hook size, to mastering the flat circle base and adding decorative textures like ribbing or tassels, you now have the knowledge to transform any plain flower pot into a work of art.
We also discussed the importance of maintenance and care, ensuring your handcrafted items stay clean and structural in your home.