The Crochet Plant Hanger – Pattern is a fantastic way to combine your love for greenery with the therapeutic art of crochet, creating a vertical garden that breathes life into any room. Whether you are living in a cozy apartment with limited shelf space or simply want to add a bohemian touch to your home decor, mastering a Crochet Plant Hanger – Pattern allows you to showcase your favorite succulents and trailing vines in a unique, handmade way. The beauty of this specific project lies in its structural simplicity, making it an ideal choice for both beginners and experienced crafters looking for a quick and functional weekend task.
When you begin working on a Crochet Plant Hanger – Pattern, you are engaging in a project that emphasizes durability and weight-bearing construction. Unlike a scarf or a blanket, a plant hanger must be sturdy enough to support a pot and the damp soil within, which means your choice of stitch tension and material is paramount. For many, this crochet project serves as a gateway into the world of functional home accessories, proving that yarn and a hook can do much more than just provide warmth; they can become structural elements of interior design.
In this comprehensive guide, we will explore the essential components that make a Crochet Plant Hanger – Pattern successful, from selecting the right macramé-style cords to understanding the technical increases required for the base. We will focus on creating a piece that is not only visually appealing with its intricate lace-like windows but also safe for your terracotta or ceramic pots. By the end of this article, you will have the confidence to follow any hanging plant pattern, adjust the size for various pot diameters, and add your own decorative flair to the final tassels. Let’s get our supplies ready and dive into the world of vertical crochet gardening.
1. Selecting Durable Materials for Your Crochet Plant Hanger – Pattern
The most important factor in a successful Crochet Plant Hanger – Pattern is the durability of your yarn, as it must resist stretching under the constant weight of a plant. 100% cotton yarn or mercerized cotton is highly recommended because of its low elasticity and high strength. Unlike acrylic, which can sag significantly over time, cotton maintains its structural integrity, ensuring that your Crochet Plant Hanger – Pattern keeps your plant at the exact height you intended without drooping toward the floor.
If you are looking for a more rugged or rustic aesthetic, you might consider using t-shirt yarn or recycled cord for your Crochet Plant Hanger – Pattern. These thicker materials work up very quickly and provide a chunky, modern look that fits perfectly in contemporary homes. When using thicker cords, ensure you are using a large crochet hook, such as a 6.0mm (J) or 8.0mm (L), to keep the stitches manageable and the overall design feeling airy rather than dense and heavy.
The Crochet Hook Size you choose should actually be slightly smaller than what the yarn label recommends for a typical garment. In a Crochet Plant Hanger – Pattern, you want your stitches to be tight and secure, particularly at the base and the attachment points. A tighter gauge prevents the pot from slipping through the gaps of the mesh and provides a more professional, “finished” look to your handmade plant holder, which is a staple of high-quality fiber art.
Another essential component is the Top Ring, which serves as the primary hanging point for your Crochet Plant Hanger – Pattern. While you can crochet a simple loop of yarn, using a wooden or metal ring provides a much more stable foundation. Crocheting over the ring using single crochet stitches not only secures the yarn but also adds a decorative, finished edge that prevents the fiber from fraying against the hook or nail on your wall or ceiling.
For outdoor use, the choice of material for your Crochet Plant Hanger – Pattern becomes even more critical due to sun and rain exposure. Look for nylon cords or polypropylene twine, which are resistant to mold, mildew, and UV fading. While these materials can be a bit tougher on the hands during the crochet process, the resulting plant hanger will be weather-proof and durable enough to last several seasons on a porch or balcony, keeping your outdoor space looking vibrant.
Finally, consider the Pot Weight before you finalize your material list. A large ceramic pot filled with wet soil can be surprisingly heavy, so your Crochet Plant Hanger – Pattern might require a bulky weight yarn or even multiple strands held together. Understanding the physics of your project ensures that your DIY plant hanger is a safe environment for your plants, preventing any accidental falls and allowing your greenery to thrive in its new elevated home.
2. Mastering the Base and Mesh Construction
Most Crochet Plant Hanger – Pattern designs begin at the bottom with a circular base that expands to cradle the pot. A Magic Ring (or Magic Circle) is the best way to start, as it allows you to pull the center tight so there is no hole at the bottom of the pot. From there, you will use increase rounds to create a flat disk that matches the diameter of the bottom of your pot, ensuring a stable and centered fit for your crochet project.
Once the base reaches the correct size, the Crochet Plant Hanger – Pattern transitions into the “mesh” or “netting” phase. This is usually achieved through a series of Chain Spaces and Slip Stitches or Single Crochets. By creating large loops of chains, you allow the fabric to stretch and conform to the unique shape of the pot, whether it is a traditional tapered cylinder or a modern geometric bowl. This “openwork” is what gives the plant hanger its characteristic light and airy appearance.
The term V-Stitch or Fillet Crochet is often used in more decorative versions of the Crochet Plant Hanger – Pattern. These techniques create a more structured grid that looks elegant and sophisticated. When working the sides of the hanger, it is important to count your chains carefully to ensure the symmetry of the design. An uneven number of chains can cause the pot to tilt to one side, which could lead to water spilling or the plant falling out of its handmade holder.
As you move up the sides of the Crochet Plant Hanger – Pattern, you may encounter the term Working in the Round. Unlike flat projects that you turn at the end of each row, a plant hanger is typically worked in a continuous spiral or joined rounds. This eliminates the need for a seam and results in a much stronger structure. Using a Stitch Marker is vital here to keep track of your rounds and ensure that the “arms” of the hanger are all started at the same height.
The Arm Length is a customizable part of the Crochet Plant Hanger – Pattern. Some people prefer a short hanger that sits close to the ceiling, while others want a long, dramatic drop. When calculating the length, remember that the weight of the pot will cause some natural stretching. It is often a good idea to crochet the arms about 10% shorter than your desired final length to account for the “settling” of the yarn once the plant is placed inside your crochet creation.
Finally, the Joining Technique at the top of the arms is what secures the entire project. In a professional Crochet Plant Hanger – Pattern, you will gather the arms together and join them to the top ring using a series of tight slip stitches or a “gathering knot” made with a separate piece of yarn. This point of the project bears the most stress, so double-checking the security of your knots and stitches here is the secret to a long-lasting and reliable hanging plant holder.
3. Technical Stitches for Support and Decoration
While the mesh provides the structure, specific technical stitches can add both beauty and strength to your Crochet Plant Hanger – Pattern. The Single Crochet (sc) is the workhorse of this project, used primarily for the base and the attachment points where maximum density is required. For the arms, a Double Crochet (dc) or Half Double Crochet (hdc) can provide a bit more decorative “braided” look while still remaining strong enough to hold a medium-sized pot in your handmade hanger.
The Picot Stitch is a wonderful way to add a bit of “boho-chic” flair to the edges of your Crochet Plant Hanger – Pattern. By adding these small decorative points around the rim of the pot holder, you create a more intricate and expensive-looking accessory. These small details are what separate a simple utility item from a piece of boutique-style home decor, making your crochet craft a true conversation piece in your living room or kitchen.
For those who want a truly unique Crochet Plant Hanger – Pattern, incorporating Beads into the stitches is a fantastic option. You can slide wooden or glass beads onto your yarn before you start crocheting and then secure them into the “arms” of the hanger. This adds a weight and a shimmering quality to the design, mimicking the look of traditional macramé plant hangers but with the soft, textured feel that only crochet can provide.
Surface Crochet is another advanced technique that can be applied to the base of your Crochet Plant Hanger – Pattern. Once the hanger is finished, you can use a contrasting color to slip stitch a decorative spiral or a flower onto the bottom of the base. Since this part of the hanger is often visible from below, adding a “hidden” design is a delightful touch that shows a high level of craftsmanship and attention to detail.
The term Post Stitches (Front Post or Back Post) can be used to create ridges and “ribbing” on the arms of the Crochet Plant Hanger – Pattern. This technique adds a 3D texture that makes the hanger look more like a woven rope. Not only does this look great, but it also adds a bit of thickness to the arms, which can make the crochet hanger feel more secure and durable when holding larger, heavier terracotta pots.
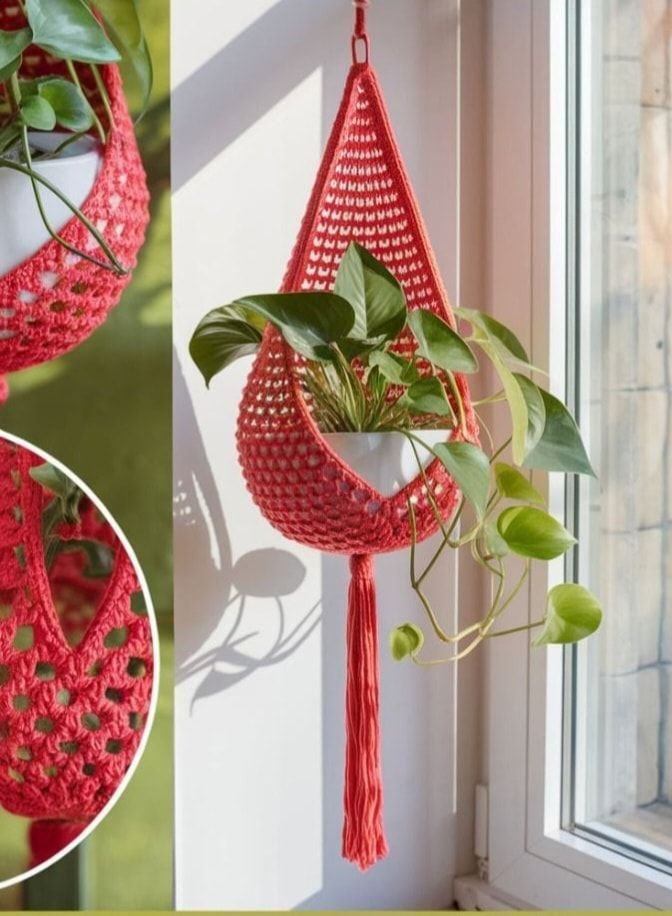
Lastly, let’s talk about the Tassel. Most Crochet Plant Hanger – Pattern designs end with a decorative tassel hanging from the bottom of the base. You can make this by wrapping yarn around a piece of cardboard, cutting the ends, and tying it securely to the center of the magic ring. A long, lush tassel adds a sense of movement and “finish” to the project, completing the aesthetic of your bohemian crochet plant holder.
4. Customization, Sizing, and Care Tips
The versatility of the Crochet Plant Hanger – Pattern means you can adapt it for any size pot, from a tiny 2-inch succulent starter to a massive 10-inch hanging basket. The key is to measure the circumference and height of your pot before you start. If you are gifting a hanger, it is best to use a flexible mesh pattern that can stretch to accommodate various shapes, ensuring that your handcrafted gift is as practical as it is beautiful.
Color Blocking is a trendy way to modernize your Crochet Plant Hanger – Pattern. By using a different color for the base, the mesh, and the arms, you can create a high-contrast look that pops against your walls. Imagine a neon pink base with a charcoal grey mesh; this combination turns a traditional craft into a modern home accent that fits perfectly with contemporary or industrial interior design styles.
When it comes to Plant Compatibility, consider the “trailers.” A Crochet Plant Hanger – Pattern is particularly well-suited for plants like the Pothos, String of Pearls, or Spider Plant. These plants will grow through the mesh of the hanger, eventually partially hiding the yarn and creating a “floating” jungle effect. Designing your hanger with large mesh holes allows the vines to weave through the structure naturally over time.
Care and Maintenance are important for any textile item in a home with plants. Because you will be watering the plants while they are in the Crochet Plant Hanger – Pattern, the yarn may occasionally get damp. Using cotton yarn allows the hanger to be machine-washed on a gentle cycle if it gets soiled. Always air-dry your plant hangers to prevent shrinkage, ensuring that your crochet accessory stays the perfect size for your pots for years to come.
For those who want to sell their work, adding a Personalized Tag to the Crochet Plant Hanger – Pattern is a great branding step. A small leather or wooden tag with your logo can be sewn onto the top of the hanger. This identifies the piece as a locally made, artisanal product, which is highly valued in the handmade market. It adds a final layer of professionalism to your crochet business or hobby.
Finally, think about Creative Placement. Your Crochet Plant Hanger – Pattern doesn’t just have to hang from the ceiling. You can hang them from a wall-mounted bracket, a curtain rod, or even a sturdy tree branch in a sheltered garden area. The portability of the crochet plant holder allows you to move your plants around to follow the sun, ensuring they stay healthy and happy while looking stylish in their custom-made crochet home.
FAQ: Frequently Asked Questions about the Crochet Plant Hanger – Pattern
1. Is a Crochet Plant Hanger – Pattern suitable for total beginners?
Yes! Because it primarily uses basic stitches like the chain and single crochet, it is a very beginner-friendly project. It is also a great way to learn how to work in the round without the pressure of making a garment that has to fit a human body perfectly.
2. How do I prevent the hanger from stretching too much?
The best way is to use 100% cotton yarn and a hook that is one size smaller than recommended. You can also “pre-stretch” your hanger by putting a heavy pot in it for 24 hours before you hang it in its final location. This allows the stitches to settle before you find the perfect hanging height.
3. Can I use acrylic yarn for my Crochet Plant Hanger – Pattern?
While you can, it is not recommended for long-term use. Acrylic has a lot of “memory,” meaning it likes to stretch and stay stretched. If you use it for a Crochet Plant Hanger – Pattern, you may find that your plant is several inches lower after a month than it was on day one.
4. How do I clean my crochet plant hanger if soil gets on it?
Most cotton hangers can be hand-washed or machine-washed in a mesh laundry bag. Use cool water and a mild detergent. After washing, reshape the hanger by placing a pot inside it while it is damp and then removing the pot to let the yarn air dry completely.
5. What is the best pot shape for a Crochet Plant Hanger – Pattern?
Standard tapered terracotta pots are the easiest to fit because the “lip” at the top prevents the pot from sliding through the mesh. However, with a tightly crocheted base, you can safely hold bowl-shaped pots or even flat-bottomed wooden containers in your crochet hanger.
6. How much yarn do I need for one hanger?
For a standard medium-sized pot (6 inches), you will usually need less than 100 yards of yarn. This makes the Crochet Plant Hanger – Pattern an excellent “stash-buster” project for using up leftover cotton from previous summer projects or market bag builds.
Conclusion
In this guide, we have explored the functional and artistic world of the Crochet Plant Hanger – Pattern. We discussed the importance of choosing non-stretch cotton yarn and the technical steps of creating a solid Magic Ring base and a flexible mesh body.
We also looked at how to add personality through beads, tassels, and post stitches, as well as how to care for your finished work to ensure it lasts for years. A plant hanger is a perfect project that bridges the gap between traditional craft and modern lifestyle, offering a sustainable way to beautify your home.