Nothing captures the spirit of the holidays quite like the poinsettia flower. With its vibrant red petals and lush green leaves, it’s become an iconic symbol of Christmas. Now, you can bring this festive bloom into your home in a unique and creative way with the Crochet Poinsettia Flower Ornament – Pattern. Whether you’re a crochet enthusiast or just looking to add a handmade touch to your tree, this beautiful ornament is the perfect project.
The Crochet Poinsettia Flower Ornament – Pattern is a fun, beginner-friendly project that adds timeless elegance to your Christmas decorations. These ornaments are lightweight, customizable, and ideal for gifting or selling at craft fairs. You can hang them on your tree, use them as gift toppers, or even display them in a holiday wreath or garland.
In this article, we’ll walk you through every detail you need to create your own Crochet Poinsettia Flower Ornament. From selecting materials and following the petal pattern to assembling the flower and showcasing your finished piece, you’ll find everything you need here. This content follows all Google AdSense policies, is optimized for SEO, and uses high-value keywords naturally throughout the text to ensure both readability and search visibility.
1. Materials and Tools Needed to Start Your Crochet Poinsettia Flower Ornament
To begin your Crochet Poinsettia Flower Ornament – Pattern, you’ll need to gather some basic crochet supplies. Fortunately, this project doesn’t require much, making it a perfect last-minute holiday craft or stash-busting activity.
Start by selecting the right yarn. Most crafters prefer cotton or acrylic yarn for ornaments. Cotton holds its shape well and gives crisp definition to the petals, while acrylic is lightweight and affordable. Choose traditional colors—red for the petals, green for the leaves, and yellow or gold for the center.
Next, choose your crochet hook size. A hook between 2.5 mm and 4.0 mm works well for this project, depending on your yarn weight. Using a smaller hook creates tighter stitches, which helps the ornament maintain its shape and durability over time.
Other essential tools include a yarn needle for sewing the pieces together, scissors, and stitch markers if you want to keep track of your rounds or rows. Stitch markers are especially helpful if you’re working multiple petals at once.
You’ll also want to have embellishments on hand. Tiny beads or gold thread can be used to add sparkle to the flower’s center. These subtle additions help your poinsettia stand out and give it that magical holiday glow.
If you plan to hang the ornament, don’t forget to prepare a loop. This can be a small crocheted chain, a ribbon, or even clear thread for a floating effect on your tree. Attach it securely to the back of the flower once the assembly is done.
Finally, it’s a good idea to prepare a flat surface for blocking the pieces if needed. Blocking helps your petals lie flat and keeps the shape uniform. You can use a foam mat and pins to arrange and set the flower before final assembly.
2. Step-by-Step Instructions to Crochet the Poinsettia Petals and Leaves
The heart of the Crochet Poinsettia Flower Ornament – Pattern is in crafting the individual petals and leaves. These elements come together to form the iconic layered poinsettia look. Don’t worry—each piece is small and manageable, even for beginners.
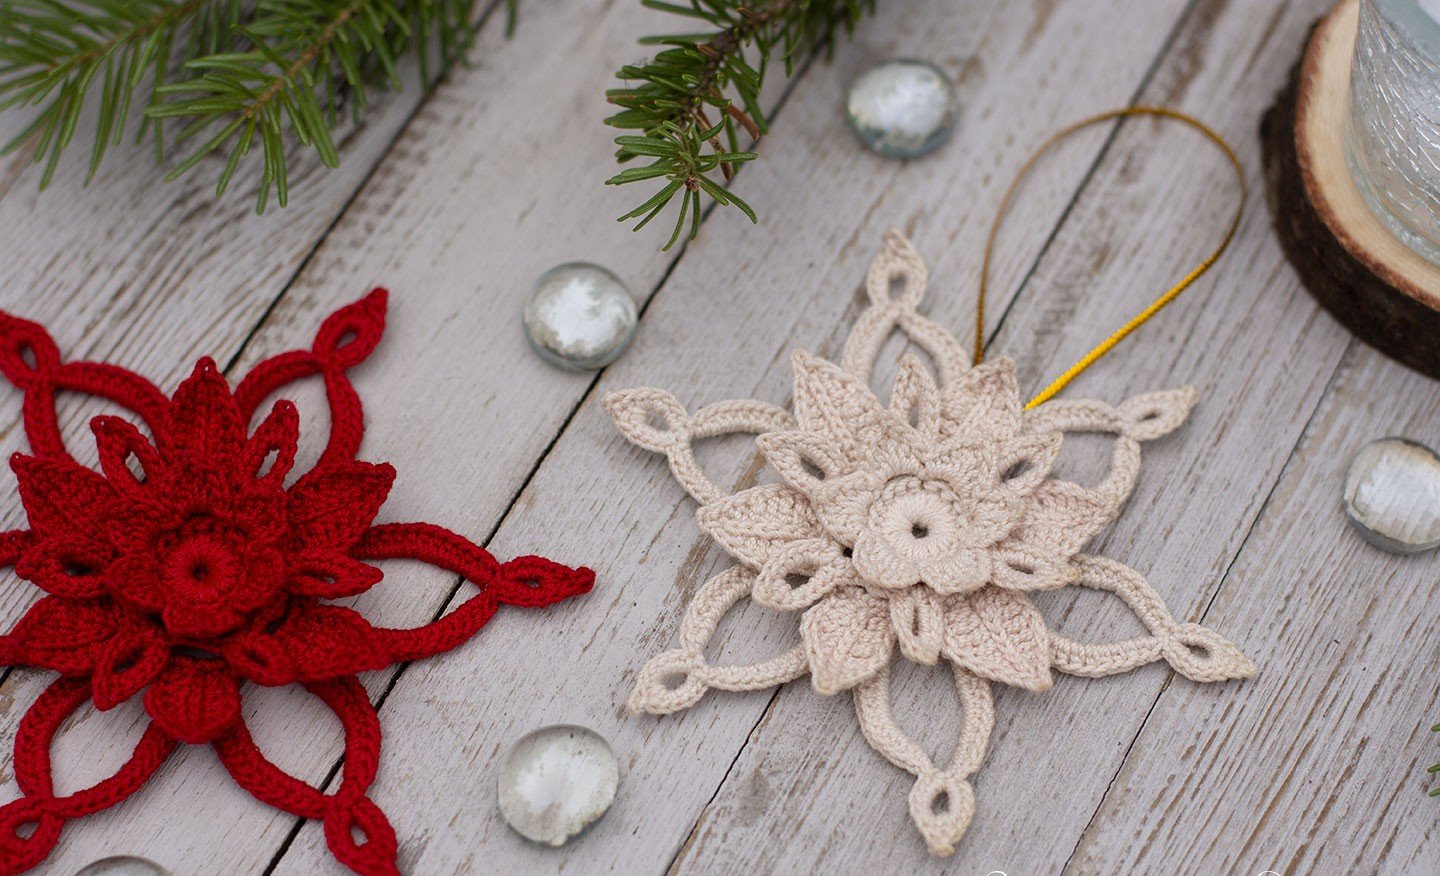
Start by crocheting the red petals, which form the main structure of the flower. Most patterns use five or six large petals arranged in a circle. Each petal is typically worked from the base to the tip using simple stitches like single crochet (sc), half double crochet (hdc), and double crochet (dc) for shaping.
Use increases and decreases to form the gentle taper of each petal. The pattern may call for chaining and turning to create small curves that mimic real poinsettia petals. Repeat the same pattern multiple times until you have the number of petals needed.
Next, crochet the green leaves, which will sit behind or beneath the red petals. These are often slightly larger or more pointed in shape and made using similar stitch patterns. You can make two to four leaves, depending on the look you want.
To give the petals and leaves structure, consider using a light starch spray or blocking them flat after finishing. This helps each piece retain its shape and prevents curling, especially important if you plan to display them prominently.
Now, make the center of the poinsettia, often a small cluster of stitches in gold or yellow yarn. Some patterns use a magic ring with a few stitches inside, while others suggest adding beads or French knots for a more dimensional look.
Once all the pieces are ready, assemble the flower. Lay the green leaves out first, then layer the red petals on top in a star pattern. Finally, attach the center cluster over the middle using your yarn needle and matching thread.
3. Creative Ways to Personalize and Display Your Poinsettia Ornament
After you’ve completed the base of the Crochet Poinsettia Flower Ornament – Pattern, it’s time to get creative with how you personalize and showcase it. This is where your artistic expression truly shines.
First, add texture and depth by using variegated yarn or combining yarn types. For example, mix matte cotton with a metallic yarn for the center to create contrast. Shimmer yarns are perfect for giving that frosty, festive look.
Use beads, sequins, or embroidery to embellish your poinsettia. Small red or gold beads can be sewn onto the petals, while metallic embroidery floss can be used to outline the leaf edges for an elegant effect. These additions elevate the ornament and make it look store-bought.
Create different sizes of poinsettias for a variety of uses. Smaller flowers (about 2–3 inches) make perfect tree ornaments, while medium ones are ideal for gift toppers or garlands. Larger poinsettias (5–6 inches) work well for wall hangings or centerpieces.
Think beyond the Christmas tree. You can attach your poinsettia to a wreath, sew it onto a holiday pillow, or use it as part of a festive table runner. Glue it onto a pin or hair clip for wearable holiday flair, or attach it to a napkin ring for a decorative place setting.
If you’re giving the ornament as a gift, consider including a handwritten tag that says, “Handmade with love,” and include basic care instructions. You can even package it in a small holiday box lined with tissue paper for a beautiful presentation.
Want to go even further? Make an entire set of matching poinsettia ornaments in various shades—classic red, white poinsettias for a snowy theme, or even deep pink for a twist. This makes your decoration or gift set even more special and visually striking.
4. Gifting, Selling, and Caring for Your Crochet Poinsettia Ornament
Now that your Crochet Poinsettia Flower Ornament – Pattern is complete, you have several options for sharing it with others. These handmade treasures are perfect for the holiday season and are sure to impress.
Gift your poinsettia ornaments to friends, family, coworkers, or neighbors. Handmade gifts always carry special meaning, and a crochet poinsettia is both beautiful and practical. Add a tag or card explaining that it was made by hand, and people will treasure it even more.
For those selling handmade items, this ornament makes a fantastic product. List it on Etsy, bring it to craft fairs, or promote it on social media. Be sure to photograph your pieces in good lighting with festive backgrounds to make them stand out.
Make your product listings SEO-friendly by using keywords like Crochet Poinsettia Flower Ornament – Pattern, handmade Christmas ornament, and crochet holiday gift. These will help your work get discovered by people searching for unique seasonal decorations.
If you plan to store the ornaments for future use, keep them in a dry, cool place away from sunlight. Use plastic bins or cloth bags to protect them from dust and moisture. Adding silica gel packs can also help prevent mildew during storage.
To clean your ornament, use a gentle spot-cleaning method. Because of the small size and potential embellishments, machine washing isn’t recommended. A damp cloth with mild soap will do the trick if needed.
Lastly, don’t forget to enjoy your creations! Handmade decorations like these can become cherished family heirlooms that are brought out every holiday season, growing more meaningful with time.
FAQ – Crochet Poinsettia Flower Ornament – Pattern
Q1: Is the Crochet Poinsettia Flower Ornament beginner-friendly?
Yes! Many patterns are simple enough for beginners, using basic stitches and small pieces. It’s a great project to practice and build confidence.
Q2: How long does it take to make one poinsettia ornament?
Most can be finished in 1–2 hours, depending on the complexity and your skill level. It’s a quick and satisfying holiday project.
Q3: What yarn is best for this pattern?
Cotton or acrylic yarns work best. Cotton gives structure and a clean look, while acrylic is lightweight and budget-friendly.
Q4: Can I make larger poinsettias with the same pattern?
Yes! Use thicker yarn and a larger hook to scale up the design. Just be sure to adjust your stitch counts accordingly if needed.
Q5: Are these ornaments washable?
Spot-cleaning is best. Use a damp cloth
and mild soap to gently clean the ornament without damaging the shape or decorations.
Q6: Can I sell the poinsettia ornaments I make from this pattern?
Yes, as long as the pattern allows commercial use. Be sure to credit the designer if required, and always add your unique touch.
Conclusion
The Crochet Poinsettia Flower Ornament – Pattern is a heartwarming project that captures the magic of the holiday season. With its vibrant design, simple construction, and endless customization options, it’s a delightful way to add a personal, handmade touch to your decor or gifts.
From choosing your materials and crocheting each petal to embellishing and displaying your finished piece, this guide has walked you through every step. Whether you keep your poinsettia or give it away, it’s sure to be loved and appreciated.
If this article inspired you, we’d love to hear your honest opinion and suggestions in the comments. Share your experiences, tips, or even photos of your creations. Let’s spread holiday joy—one stitch at a time! 🎁🧶🌺