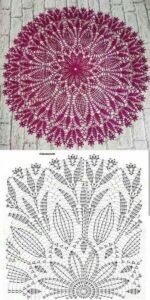
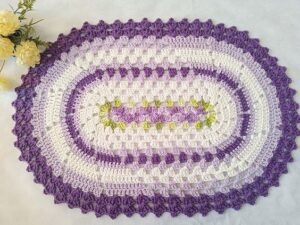
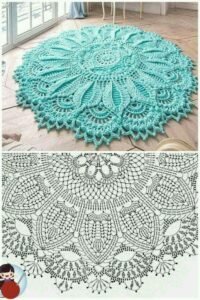
Crochet rugs are a wonderful way to bring warmth, color, and texture into any room. By combining the art of crochet with design elements inspired by quilt patterns, you can create a stunning rug that not only looks beautiful but also feels luxurious underfoot.
In this tutorial, we’ll guide you through the process of making your own crochet rug, from selecting materials to completing the final stitch.
Whether you’re a crochet beginner or an experienced crafter, this step-by-step guide will help you create a cozy and stylish crochet rug.

Selecting Materials for Your Crochet Rug
Choosing the right materials is the first step in creating a successful crochet rug. For this project, you’ll need a durable, thick yarn that can withstand foot traffic while still being soft enough to create a comfortable rug.
Cotton yarn is an excellent choice because it’s strong, easy to care for, and comes in a wide variety of colors. You might also consider using a blend of cotton and synthetic fibers for added durability.
When selecting yarn colors, consider the design and color scheme you want to achieve. Since we’re incorporating quilt patterns into the crochet rug, think about using contrasting colors to highlight the different sections of the pattern. For a more subtle look, you can choose shades from the same color family.
Keep in mind that lighter colors can show dirt more easily, so if the rug will be placed in a high-traffic area, darker or more muted colors might be a better option.
In addition to yarn, you’ll need a crochet hook that matches the weight of your yarn, as well as a pair of scissors and a yarn needle for weaving in ends. It’s also helpful to have a tape measure on hand to ensure your rug reaches the desired dimensions. Gathering all your materials before starting will make the process smoother and more enjoyable.
Planning Your Rug Design
Before you begin crocheting, it’s essential to plan out the design of your rug. Since this project is inspired by quilt patterns, consider which quilt design elements you want to incorporate.
Popular quilt patterns like the granny square, log cabin, or hexagon can all be adapted into a crochet rug. These patterns can be worked up in sections and then joined together to create a cohesive design.
Start by sketching out your rug design on paper, noting the size and shape you want your finished rug to be. Decide whether you want to create a large, single-piece rug or a patchwork of smaller sections that can be sewn or crocheted together.
If you’re new to crochet, starting with a simple pattern like a basic square or circle is a good idea. As you gain confidence, you can experiment with more intricate designs.

Once you’ve chosen your design, calculate how much yarn you’ll need. This will depend on the size of your rug and the thickness of the yarn you’re using. It’s always a good idea to purchase a little more yarn than you think you’ll need to account for any mistakes or adjustments you might make along the way. Having a clear plan in place before you start crocheting will help ensure that your rug turns out exactly as you envision.
Crocheting the Rug
With your materials and design ready, it’s time to start crocheting your rug. Begin by creating a foundation chain, which will determine the width of your rug. For a rectangular or square rug, this chain will be the longest edge of your rug. If you’re making a circular or oval rug, start with a smaller chain and work in rounds, increasing stitches as you go to create the desired shape.
For a quilt-inspired rug, you can crochet individual squares or other shapes, using different colors and patterns for each piece. These pieces can then be joined together to form the final rug.
For example, if you’re using a granny square pattern, create multiple squares in your chosen colors, then sew or crochet them together in a grid pattern. This method allows you to mix and match different designs and colors, creating a unique, patchwork-style rug.
As you crochet, keep your tension consistent to ensure that each piece is the same size and shape. If you find that your stitches are too tight or too loose, adjust your crochet hook size or your tension to achieve the desired look. Remember to check your work regularly to ensure that the pieces are aligning correctly and that the overall shape of the rug is staying true to your original design.

Joining the Sections
Once you’ve crocheted all the individual sections of your rug, it’s time to join them together. There are several methods you can use to join crochet pieces, depending on the look you want to achieve. A simple whip stitch using a yarn needle can create a nearly invisible seam, while a single crochet join can add texture and contrast between the pieces.
To join the sections, lay them out in the desired arrangement on a flat surface. If you’re using a patchwork design, make sure the pieces are aligned correctly and that the colors and patterns are balanced. Starting at one edge, begin joining the pieces together using your chosen method. Work carefully to ensure that the seams are even and that the sections lie flat.
After joining the pieces, you may want to add a border around the entire rug to give it a finished look. This can be done by crocheting a simple single crochet or double crochet border around the edge of the rug. A border can help unify the design and add stability to the edges, preventing them from curling or fraying over time.

Finishing Touches and Care
With your rug complete, it’s time to add the finishing touches. Weave in any loose ends using a yarn needle, and trim any excess yarn. If your rug is slightly misshapen after joining the sections, you can block it to help it lie flat. To block your rug, lightly mist it with water, then pin it to a flat surface and allow it to dry completely. This will help set the stitches and give your rug a professional finish.
To care for your crochet rug, it’s important to follow the care instructions for the yarn you used. Most cotton or cotton-blend rugs can be machine washed on a gentle cycle and laid flat to dry. Avoid using harsh detergents or bleach, as these can damage the fibers and fade the colors. Regular vacuuming or shaking out the rug will help keep it clean and free of dust and dirt.

If your rug will be placed in a high-traffic area, consider adding a non-slip backing to prevent it from sliding on smooth floors. You can purchase non-slip rug pads or apply a layer of rug gripper adhesive to the back of the rug. This will help keep your rug in place and prevent accidents.
Creating a crochet rug is a rewarding project that allows you to combine your love of crochet with the timeless appeal of quilt patterns.
By carefully selecting your materials, planning your design, and following the steps outlined in this tutorial, you can create a beautiful and functional piece that will add warmth and style to your home.

Whether you’re making a rug for yourself or as a gift, the finished product will be a testament to your creativity and craftsmanship.
Crochet rugs are versatile, durable, and endlessly customizable. As you continue to explore the world of crochet and quilt patterns, you’ll discover new ways to combine colors, shapes, and textures to create unique and personalized designs.
With each stitch, you’ll be creating not just a rug, but a piece of art that reflects your style and skill.

