Crafting unique, handcrafted footwear is a delightful journey that combines creativity, comfort, and the charming aesthetics of crochet. The art of creating your own shoes through a meticulously designed crochet shoe pattern opens up a world of possibilities for expressing personal style, whether you’re making adorable baby booties or stylish summer sandals. This detailed guide will delve into the essentials of working with a crochet shoe pattern, offering insights into materials, techniques, and practical tips to ensure your handmade creations are as beautiful as they are functional. As we explore this engaging craft, you will learn how to approach each project with confidence, turning a simple skein of yarn into something truly extraordinary and wearable.
Embarking on a crochet shoe project might seem intimidating at first, but with the right guidance and resources, it becomes an accessible and rewarding endeavor for crafters of all skill levels. The initial step involves understanding the structure of a good crochet shoe pattern, which acts as a roadmap, guiding you through each stage from the sole to the upper. The versatility of this craft means you can experiment with various yarn types, colors, and stitch patterns, allowing for endless customization. Whether you are looking to make practical slippers for cold nights, elegant moccasins for indoor comfort, or lightweight shoes for warm weather, a well-written pattern is the foundation upon which your crafting success is built.
In the upcoming sections, we will break down the crucial components of working with a crochet shoe pattern. From meticulously selecting your materials to deciphering complex instructions, our aim is to equip you with the knowledge needed to achieve professional-looking results. Furthermore, we will focus on enhancing the comfort and durability of your completed crochet shoes—factors often overlooked in simple guides. We will provide practical advice on adding sturdy soles, customizing fit, and mastering the essential techniques that make your projects stand out. This comprehensive exploration of the crochet shoe pattern process is designed to inspire your creativity and enhance your crafting skills.
1. Choosing the Right Yarn for a Crochet Shoe Pattern
Selecting the appropriate yarn is perhaps the most critical decision when starting your crochet shoe pattern project. The fiber content and yarn weight significantly influence the finished shoe’s structure, breathability, and lifespan. For items like baby booties or soft indoor slippers, comfort and warmth might take precedence, leading you toward materials like soft wool, acrylic blends, or even organic cotton. These fibers offer the softness required against sensitive skin while providing a cozy feel perfect for lounging or keeping little feet warm.
Conversely, for sturdier adult shoes designed for more active wear, durability becomes paramount. Yarn with high cotton or bamboo content is often preferred because it’s breathable, slightly elastic, and creates a firm, well-defined stitch. This structure helps the shoe maintain its shape over time. Adding synthetic blends, like those containing nylon, can also enhance the overall durability. Consider the intended use before deciding, as a pair of house moccasins will have different requirements than summer sandals.
The yarn weight specified in your crochet shoe pattern is also crucial. Most patterns recommend using worsted weight (medium) or light-worsted yarns for adult sizes to balance stitch definition and structure. Heavier weights can result in a clunky, thick fabric, while extremely fine weights might lack the substance to support the foot. Adhering to the recommended gauge and weight ensures your project aligns with the pattern’s intended measurements and design.
Furthermore, color choice plays a significant role in the overall aesthetic. While solid colors effectively showcase intricate stitchwork, variegated or self-striping yarns can create dynamic patterns without the hassle of color changes. If your pattern features a decorative stitch, opting for a lighter color might highlight the detail better than darker shades. Your personal taste and the desired look will ultimately guide this decision, but the core focus must remain on the fiber’s property and function.
Finally, washability is a practical consideration for anything wearable, especially footwear. Many crafters prefer machine-washable yarns to simplify cleaning, though natural fibers may require gentler care. When in doubt, always read the care instructions on the yarn label. This step ensures that the effort you invest in following your crochet shoe pattern isn’t compromised by improper maintenance, allowing you to enjoy your beautiful, handmade shoes for a long time.
2. Deciphering Crochet Shoe Pattern Soles
A shoe is only as good as its foundation, and in a crochet shoe pattern, this means the sole. Many patterns offer two distinct approaches: a crocheted sole or attaching a premade or upcycled sole. For beginners, starting with a 100% crocheted sole is often easier. This usually involves working in continuous rounds with tight, dense stitches (like single crochet) to create a firm base. For added durability, some patterns suggest using two strands of yarn held together.
Understanding the construction of a crocheted sole is key to success. Most designs require precise counting of stitches in each round, with specific increases at the toe and heel to achieve the anatomical shape of a foot. Following the crochet shoe pattern diligently during this phase is essential for the fit of the finished product. Marking the beginning of each round with a stitch marker can help prevent confusing mistakes.
While comfortable for light indoor wear, crocheted soles can wear out quickly on abrasive surfaces. This brings us to the second approach: using a more robust material for the sole. You can attach your crocheted creation to a flip-flop base, cut leather, or specialized rubber soles available for crafters. This method greatly increases the versatility and practicality of your crochet shoes, transforming them from simple slippers into sturdy outdoor-wear options.
Integrating a pre-made sole into your crochet shoe pattern requires a unique set of skills. You often need to punch evenly spaced holes into the sole material before you can begin crocheting directly onto it or sewing your crocheted pieces to it. Specialized tools, like an awl or leather punch, can make this task easier. Some clever designs utilize the inner foam portion of a flip-flop and cover it with fabric before adding the crocheted upper.
The choice of sole depends entirely on the purpose of your shoes and the style you want to achieve. If you are aiming for true outdoor wear, a durable rubber or specialized shoe sole is indispensable for traction and protection. For cozy booties or house moccasins, a dense crocheted sole or one enhanced with non-slip patches might suffice. Your pattern should provide guidance on how to execute either method effectively.
Customizing the size and shape of the sole is also important for achieving a proper fit. Even if your crochet shoe pattern provides multiple sizes, slight adjustments might be needed based on the recipient’s unique foot measurements. Taking accurate measurements and crocheting a gauge swatch is crucial for ensuring the finished item fits comfortably and securely.
3. Customizing Your Crochet Shoe Pattern Upper
Once the sole is complete, the creative fun really begins with the upper section of the shoe. This part of the crochet shoe pattern dictates the style, whether you’re crafting high-top boots, delicate ballet flats, or airy sandals. The upper can feature a multitude of intricate stitch patterns, including cables, puff stitches, or delicate lace. Choosing the right stitch pattern can add texture, character, and individual flair to your design.
For closed shoes like moccasins or sneakers, the upper is typically worked directly onto the sole, either by picking up stitches or joining a separate crocheted piece. Ensuring a snug fit across the bridge of the foot is crucial here. Careful tension control and understanding how different stitches create varying degrees of elasticity can help you achieve a stable yet flexible structure, balancing both comfort and support.
Adjusting the height of the ankle cuff is another excellent way to customize your project. A crochet shoe pattern might provide a standard ankle height, but you can easily modify it to create taller boots by adding extra rows or rounds. Adding buttons, ties, or decorative cuffs can further enhance the design. Remember that any decorative elements must be securely attached for safety and durability.
For sandals or open shoes, the upper structure is often lighter, composed of simple straps and decorative buckles. Following the placement specified in your crochet shoe pattern is important to ensure the straps are well-balanced and hold the shoe securely to the foot. The choice between creating intricate lace-up designs or simple slip-on styles provides another avenue for self-expression and practical application.
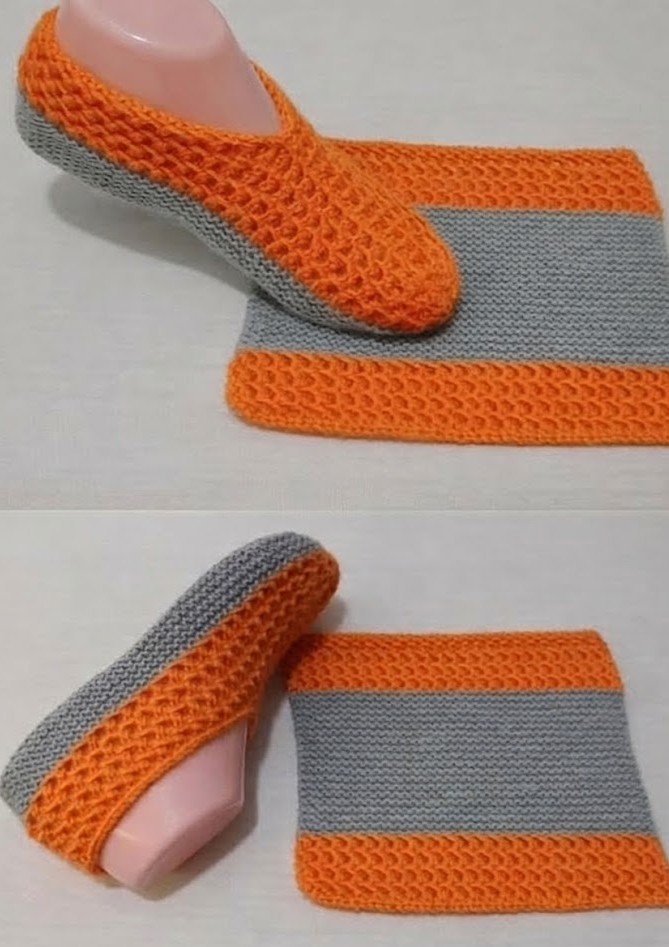
Don’t be afraid to experiment with color. Stripes, color blocks, or intricate embroidery can totally transform the look of your crochet shoes. Your crochet shoe pattern might suggest one color scheme, but you can always select colors that match your wardrobe, personal style, or even your mood. The ability to customize color allows you to create truly one-of-a-kind footwear that stands out.
Lastly, consider the closure mechanism. Many patterns use simple ties, while others incorporate buttons, snaps, or even zippers. The key is ensuring functionality and comfort; the closure must be secure without causing discomfort or irritation to the foot. Understanding how to integrate these elements neatly into the upper of your shoe is crucial for a polished, professional-looking finished product.
4. Achieving the Perfect Fit for Your Crochet Shoes
The most critical aspect of any footwear is a comfortable fit, and achieving this with a crochet shoe pattern can sometimes feel like a puzzle. One of the first steps toward ensuring success is checking your gauge. This crucial preliminary step measures the number of stitches and rows per inch. Working too tightly can make your shoe small and stiff, while working too loosely can lead to a floppy, unsupportive shoe.
Taking accurate measurements of the recipient’s feet is equally important. Your crochet shoe pattern likely offers multiple sizes, often with a measurement chart. Pay close attention to this chart. When choosing a size, measure both the length and width of the foot and select the size that most closely aligns. When in doubt, many crafters recommend making a small gauge swatch to ensure your tension matches the pattern’s.
The elasticity of your chosen yarn also significantly impacts the fit. Cotton, while breathable, has minimal stretch compared to acrylic or wool blends. This property must be taken into account, especially for closed-back shoes. A design created for stretchy yarn might feel restrictive in cotton. If your finished shoes are slightly too snug, blocking might help gently stretch them into the desired shape.
Another way to adjust fit is by modifying the number of rounds or stitches. For instance, if you’re making a bootie that feels a bit short, you can add an extra row before completing the toe section. However, proceed with caution and only make subtle adjustments, as minor changes can substantially affect the overall shape of the finished footwear. It’s always best to make modifications in pairs for consistency.
Finally, consider the addition of an inner lining. While not always necessary, especially for sandals, adding a soft liner (like felt or flannel) can improve comfort, especially for sensitive feet. Furthermore, non-slip patches or fabric paint dots on the bottom of crocheted soles can prevent slips on slick floors, making them safer for everyday use within your home.
Remember that crochet shoes, particularly those with crocheted soles, may slightly stretch with wear. Starting with a slightly snug fit might be beneficial. Achieving the perfect fit may require patience and experimentation, but the final result of wearing personalized, handmade footwear is well worth the extra effort. By understanding these key concepts, you can ensure that your projects are not only beautiful but also enjoyable to wear.
Frequently Asked Questions (FAQ) About Crochet Shoes
Is it difficult to crochet shoes for beginners?
While some patterns require advanced skills, many patterns are designed specifically for beginners. Start with a simple project like baby booties or basic house slippers. These typically use basic stitches and have straightforward constructions, allowing you to build confidence before moving on to more intricate designs.
What kind of yarn should I use?
The best yarn choice depends on the project’s purpose. For sturdiness, cotton and sturdy blends are excellent choices, offering durability and stitch definition. For comfort and softness, wool or soft acrylic blends are ideal. Always consult your crochet shoe pattern for specific recommendations.
How do I make the sole non-slip?
There are several methods for adding traction. You can apply non-slip fabric paint, attach adhesive silicone dots, or even sew on a piece of rugged fabric or specialized non-slip material designed for footwear. These simple solutions make crocheted soles practical for indoor wear.
Can I wear crochet shoes outside?
Yes, you can, but success relies heavily on the type of sole you use. Attaching your crocheted upper to a sturdy, durable sole (like rubber or flip-flop bases) is necessary for outdoor wear. 100% crocheted soles are generally better suited for indoor use only.
What tools do I need besides my crochet hook?
Along with standard supplies like a hook and yarn, you will need sharp scissors, a tapestry needle for sewing, and stitch markers. Depending on your project, specialized tools like an awl, leather punch, measuring tape, and specific sole materials or closures might be required.
How do I clean my crochet shoes?
Cleaning methods depend heavily on the materials. If they are made from machine-washable yarn and have durable soles, gentle machine washing may be appropriate. Hand washing and air drying are usually safer methods, particularly for delicate fibers.
Conclusion
In this comprehensive guide, we’ve explored the fascinating process of working with a crochet shoe pattern. From meticulously selecting the appropriate yarn and understanding diverse sole constructions to customizing intricate upper designs and mastering techniques for the perfect fit, we’ve covered the essentials needed to create beautiful and practical handcrafted footwear. We’ve discussed key considerations like durability, breathability, and non-slip solutions, empowering you to transform simple patterns into personalized wearable art.
This craft offers an incredible avenue for expressing creativity while producing unique, durable items you can take pride in wearing or gifting. We hope this guide has inspired you to grab your yarn and hook and embark on your own crochet shoe journey. We value your feedback and would love to hear your sincere opinions and suggestions. Are you ready to try making your own crochet shoes? Let us know what designs you are excited to try or what challenges you anticipate!