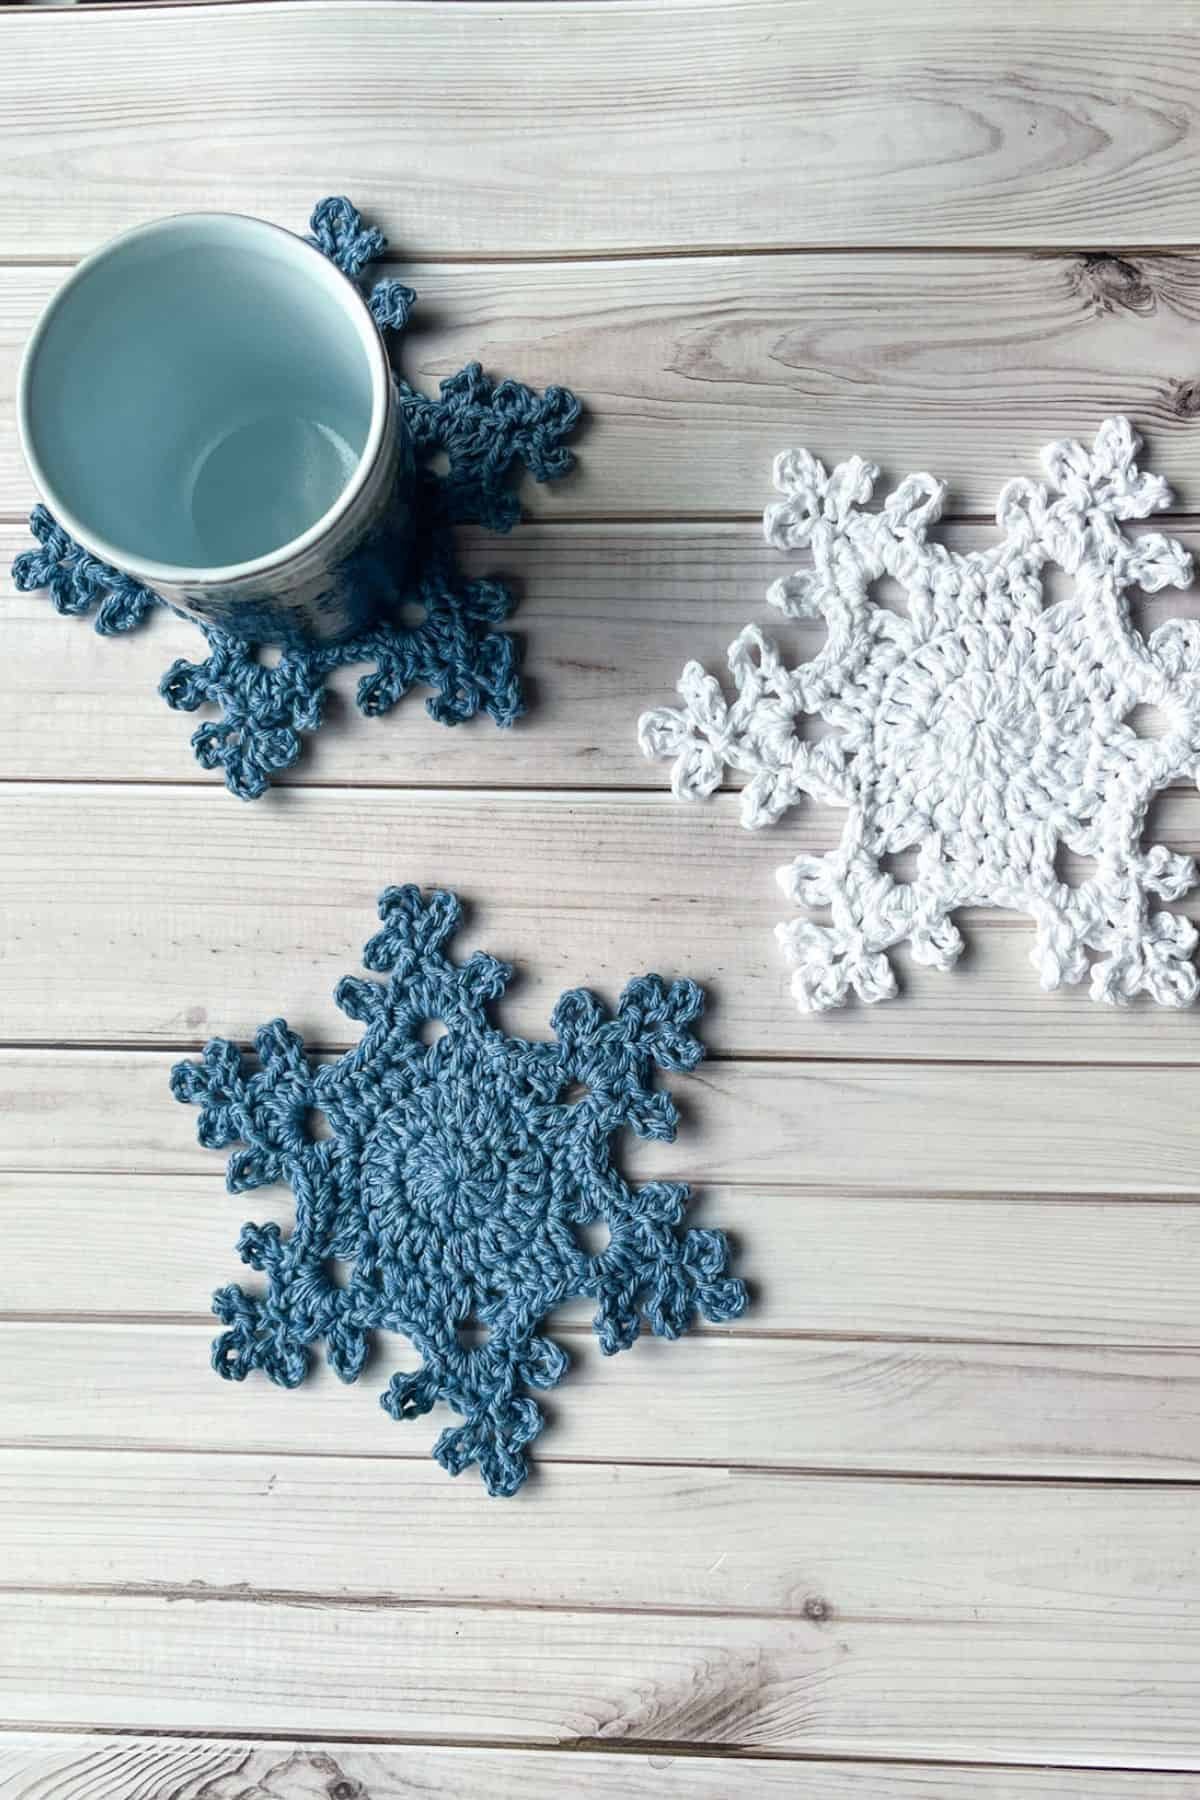
As the colder months approach, many crafters look for cozy, decorative projects to warm up their homes. One charming idea that combines functionality and seasonal beauty is the Crochet Snowflake Coaster – Pattern. These delicate yet durable coasters are perfect for winter décor, holiday gifts, or even adding a handmade touch to your coffee table.
The Crochet Snowflake Coaster – Pattern is not only fun to make, but it’s also an excellent opportunity to practice various crochet techniques. Whether you’re a beginner eager to improve your skills or an experienced crocheter seeking a quick, festive project, snowflake coasters are a satisfying and rewarding choice.
In this article, we’ll walk you through the entire process of making your own crochet snowflake coasters—from materials to step-by-step instructions, creative variations, and gift ideas. We’ll also include a helpful FAQ section to answer your most common questions and ensure your project turns out beautifully.
1. Materials and Tools Needed for the Crochet Snowflake Coaster – Pattern
Before diving into the stitches, you’ll need to gather a few essential supplies. The beauty of the Crochet Snowflake Coaster – Pattern is that it requires minimal materials and can be completed with items many crocheters already have at home.
Start with cotton yarn, which is highly recommended for coasters. Cotton is absorbent, heat-resistant, and provides a clean stitch definition—perfect for showcasing the intricate snowflake design. Choose classic winter colors like white, silver, icy blue, or even metallic thread for a more festive look.
Select the correct crochet hook size based on your yarn. For most cotton yarns, a 3.5mm (E) to 4.0mm (G) hook works well. Tighter stitches are ideal for coasters, as they help maintain shape and stability when in use.
A tapestry needle is also necessary for weaving in your yarn ends and joining parts of the pattern, especially if your snowflake has multiple layers or details that need to be attached after crocheting.
You’ll also need scissors for cutting yarn and possibly a blocking mat and pins. Blocking your finished coasters helps define the snowflake’s shape and ensures it lies flat—important for both aesthetics and functionality.
Optional supplies include starch spray or a homemade stiffener (like sugar water or glue diluted in water) if you want a firmer, more decorative coaster that holds its shape over time, especially for display purposes.
Finally, prepare a clean, well-lit workspace. Working with lighter-colored yarn or finer details means you’ll want excellent visibility to catch every stitch and ensure the snowflake pattern is symmetrical and clean.
2. Step-by-Step Guide to Crochet the Snowflake Coaster Pattern
Now that you’ve prepared your tools, let’s start creating your own Crochet Snowflake Coaster – Pattern. Snowflakes are traditionally circular with repeating arms or points, and this pattern reflects that natural beauty.
Begin with a magic ring, a common technique in circular crochet. This allows you to tighten the center of your coaster for a clean finish. Chain 3 (counts as your first double crochet), then work several double crochets into the ring depending on your chosen pattern—usually 12 for a standard snowflake base.
Close the ring and join with a slip stitch. From here, you’ll build outward by creating spoke-like designs using combinations of chains, picots, and double/triple crochet stitches. Each point of the snowflake should mirror the others, so count stitches carefully to maintain symmetry.
The next rounds will involve chaining and skipping stitches to create open spaces and delicate points. These steps form the recognizable snowflake “arms” and often involve clusters or shells to add detail. Work slowly and adjust your tension as needed.
If your pattern includes picot stitches (tiny decorative loops), make sure to keep them even. These give the snowflake a lacy, icy look that’s perfect for the winter season. Picots are easy once you practice a few times.
After completing the final round, finish off your work and weave in all ends with a tapestry needle. If your snowflake is curling or uneven, don’t worry—it’s normal at this stage.
The final step is blocking. Lightly dampen your coaster, shape it into a perfect snowflake, and pin it onto a foam mat or towel. Let it dry flat for several hours, or use starch spray for extra stiffness. Blocking truly brings your snowflake to life.
3. Design Variations and Personal Touches
One of the best things about the Crochet Snowflake Coaster – Pattern is its versatility. You can follow a standard pattern or modify it slightly to create your own unique snowflake each time, just like in nature.
Try changing yarn colors for different effects. White is traditional, but silver, blue, gold, or even red snowflakes can add a pop of personality to your table. Multicolored yarns can also give a fun, frosted look without switching colors.
You can also experiment with different yarn weights. Thicker yarn and larger hooks will make a larger, more rustic-looking coaster. Finer thread and smaller hooks will create a dainty, lacy design suitable for delicate décor or framed art.
Add embellishments like sequins or beads to give your coasters a festive sparkle. Sew them into the center or along the points of the snowflake after blocking. Just ensure they’re securely fastened if the coaster will be used frequently.
For a 3D effect, consider layering two snowflakes and sewing them together at the center. You can also leave one layer slightly smaller and fluff the edges to create depth and texture.
If you love gifting, create sets of snowflake coasters in matching or contrasting colors. Tie them with a ribbon and include a handwritten tag for a personal, handmade holiday gift.
You might also adapt the pattern into hanging ornaments, bunting, or festive garlands by adding loops to the top of each snowflake. The same design can serve multiple functions depending on how you finish it.
4. Creative Uses and Gifting Ideas for Your Crochet Snowflake Coaster
While the primary purpose of your Crochet Snowflake Coaster – Pattern is functional, these charming pieces can be used in many other ways beyond just protecting your table from hot mugs.
Place them under candles or vases for a holiday-themed centerpiece. The delicate snowflake design adds a cozy, wintry aesthetic to any surface in your home.
Use them as holiday decorations on windows or walls. Simply attach a piece of clear thread or ribbon and hang them for an elegant and minimalist winter touch.
Make them part of a gift wrap presentation. Tie a snowflake coaster to the outside of a wrapped present. It doubles as both decoration and a reusable gift that the recipient can enjoy all season.
Create a coaster set for hostess gifts. Package 4 to 6 coasters in a small box or fabric pouch. These handmade sets are thoughtful, eco-friendly, and always appreciated during holiday parties and gatherings.
Include them in Christmas cards or holiday mail. Since they are flat and lightweight, snowflake coasters can fit inside a card or envelope, turning your message into a mini gift.
Finally, turn them into table place settings by adding name tags or embroidery. Lay a coaster at each seat, write the guest’s name on a card, and place it on top—practical and beautiful for holiday dinners.
FAQ: Crochet Snowflake Coaster – Pattern
Q1: Is the Crochet Snowflake Coaster – Pattern suitable for beginners?
Yes, many snowflake coaster patterns are beginner-friendly, especially if they use basic stitches like single crochet and double crochet.
Q2: What type of yarn is best for snowflake coasters?
Cotton yarn is best due to its durability, absorbency, and ability to hold its shape. It’s also easy to block and style.
Q3: Do I need to block my snowflake coaster?
Blocking is highly recommended. It helps the snowflake hold its shape and ensures that it lays flat, which is important for coaster use.
Q4: Can I wash crochet snowflake coasters?
Yes, if made from washable yarn like cotton. Hand washing and laying flat to dry is the safest way to preserve shape and detail.
Q5: How long does it take to crochet one snowflake coaster?
Most snowflake coasters can be completed in 30 to 60 minutes, depending on your experience and the complexity of the pattern.
Q6: Can I use the pattern to make ornaments instead of coasters?
Absolutely! With a loop or string attached, your coaster becomes a beautiful snowflake ornament or wall decoration.
Conclusion
Creating your own Crochet Snowflake Coaster – Pattern is more than just a fun winter craft—it’s a way to bring warmth, creativity, and a handmade touch to your holiday season. With just a little yarn and time, you can make beautiful pieces that serve as both practical items and festive décor.
We hope this guide helped you feel confident andinspired to start your project. Whether you’re crocheting for your home or as a gift, these coasters are sure to be admired. If you enjoyed this tutorial or have suggestions for improvement, please leave a sincere opinion or idea below. We’d love to hear what you’re creating this season!