If you’re looking to combine your love of crocheting with a creative project that’s both fun and functional, then the crochet spider pattern – perfect for décor and gifting – pattern is a must-try.
Whether you’re decorating for Halloween, surprising a spider-loving friend, or crafting something quirky for your shelf, this pattern is full of charm and creativity.Crocheted spiders are incredibly versatile. You can make them spooky or cute, realistic or cartoonish, tiny or oversized.
With just a few basic crochet skills and some yarn, you can create a charming arachnid that suits your style. Plus, it’s a great stash-busting project that doesn’t require a lot of materials.
In this guide, you’ll learn how to choose your yarn and tools, follow a step-by-step construction, customize your spider for décor or gifts, and care for it once finished. The crochet spider pattern – perfect for décor and gifting – pattern is ideal for crocheters of all levels and offers endless options for personalization.
1. Materials and Tools You’ll Need
The first step to bringing your crochet spider pattern – perfect for décor and gifting – pattern to life is gathering the right materials. While spiders in nature may not be cuddly, your handmade version will be adorable and made from soft, colorful yarn.
To start, you’ll need worsted weight or DK yarn. Acrylic yarn works well, especially if you’re making multiple spiders in different colors. Black, brown, and grey are common choices for realistic looks, while purple, orange, and neon shades are fun for Halloween-themed spiders.
A standard 3.5 mm to 4 mm crochet hook is ideal for making tight stitches, which helps keep the stuffing from showing through. Use a smaller hook than usual for your yarn weight to ensure firmness in the stitches.
Stuffing is essential for shaping your spider’s body. Use polyester fiberfill or scrap yarn to give it a soft but structured feel. A small amount goes a long way since the spider isn’t a large project.
You’ll also need safety eyes or small black buttons to add personality to your spider’s face. For a safer option (especially for kids), you can embroider the eyes using yarn or embroidery thread.
Pipe cleaners or wire are great for shaping the legs and making them posable. Just be sure to wrap them with yarn or crochet over them to prevent sharp ends. Alternatively, you can crochet flexible legs without wire if safety is a concern.
Lastly, a yarn needle, scissors, and stitch marker will make your process smoother. Have all your materials ready before you begin to avoid interruptions during crafting.
2. Step-by-Step Guide to Crochet Your Spider
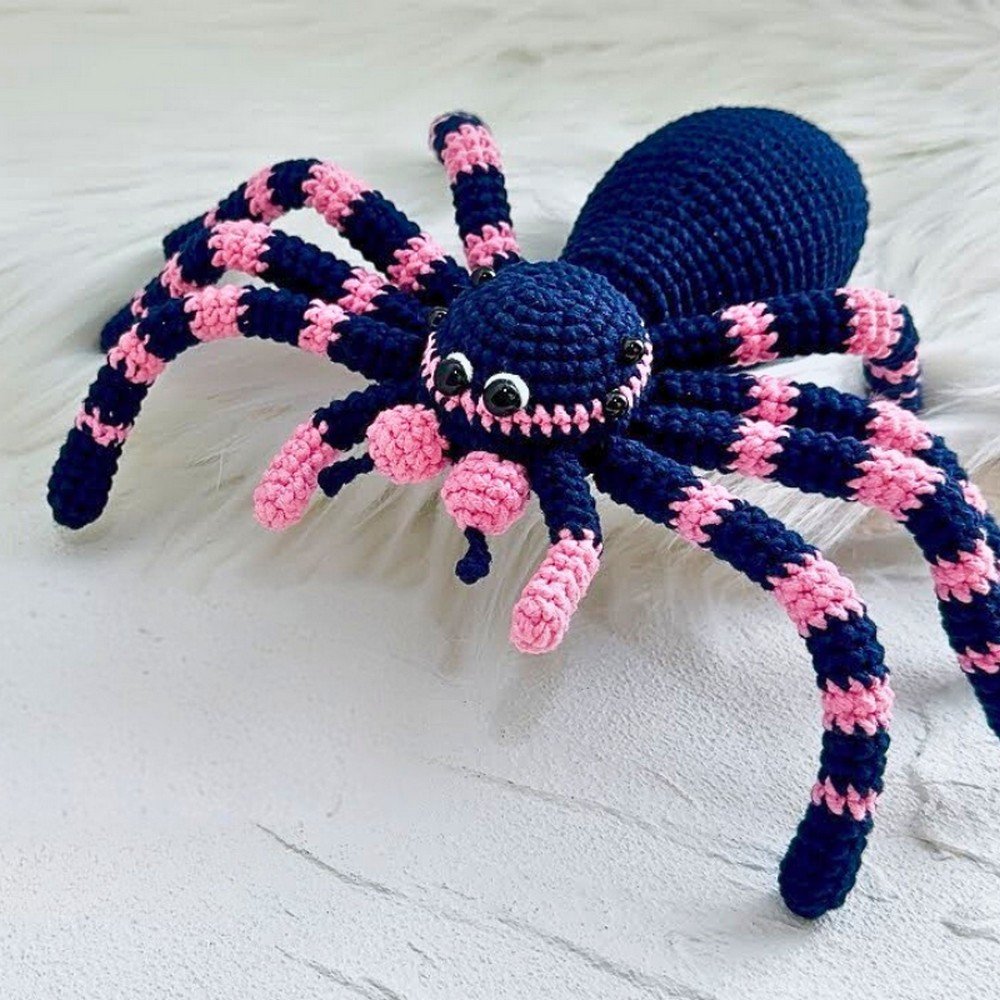
Now that you’ve gathered your supplies, it’s time to create your crochet spider pattern – perfect for décor and gifting – pattern. The process usually involves making two main spheres—one for the head and one for the body—and then adding the legs.
Start by crocheting the head using a basic amigurumi method: a magic ring followed by rounds of single crochet increases. Once you reach the desired size, work even rounds, then decrease to close the head. Stuff firmly before sealing.
Next, make the body in the same way but slightly larger. This gives your spider a more realistic silhouette. As with the head, work in spirals using a stitch marker to track your rounds, and stuff well before finishing off.
Once the head and body are complete, sew them together using a yarn needle. Try to align the two spheres so the spider sits flat when placed on a surface. This creates a stable base, especially if it will be used for décor.
Now, crochet the legs. You can make them as simple chains with single crochets, or you can insert pipe cleaners inside to give them flexibility. Attach four legs on each side, spacing them evenly for balance and symmetry.
Add facial features next. Sew or glue on safety eyes, embroider a smile or fangs if you like, and consider adding tiny eyebrows or eyelashes to give your spider a unique personality.
Lastly, weave in all your loose ends, and double-check that all parts are securely attached. Your spider is now complete and ready to spook—or delight—anyone who sees it!
3. Creative Ways to Use and Gift Your Crochet Spider
What makes the crochet spider pattern – perfect for décor and gifting – pattern so appealing is how many ways you can use the finished piece. From seasonal decorations to year-round collectibles, this little spider fits in everywhere.
For Halloween, place your spider in a decorative web on your porch or hang it from the ceiling. Combine several in different sizes and colors to create a festive garland or creepy table centerpiece.
If you’re decorating a child’s room or nursery, a brightly colored spider with friendly features can be a cute and whimsical touch. Use pastel yarns or fun stripes to make it kid-friendly and soft to the touch.
Gifting a crocheted spider is a thoughtful and creative gesture. Package it in a clear box with a small tag that says, “Handmade with love” or “Caught just for you.” It’s a fun idea for birthdays, spooky-themed parties, or “just because” surprises.
You can even make tiny spiders as keychains or backpack charms. Simply reduce the size of your pattern, use thread-weight yarn and a tiny hook, and add a metal clasp or key ring to the top of the head.
Looking to teach kids about insects or encourage them to embrace creepy crawlies? A plush spider can be a playful educational tool. Add a small booklet or fun facts to turn your gift into a learning experience.
Crafters can also sell finished spiders at craft fairs or online shops. Personalizing colors, adding unique details, and offering sets (like spider families or Halloween bundles) can help attract more customers and show off your crochet talent.
4. Tips for Maintenance and Display
Taking care of your crochet spider pattern – perfect for décor and gifting – pattern ensures it looks great over time, especially if it’s being gifted or used as seasonal décor. A little maintenance goes a long way in keeping your creation clean and intact.
If your spider collects dust or lint, a lint roller or gentle shake usually does the trick. For deeper cleaning, hand wash it in cold water using a mild detergent, then reshape and air dry on a towel.
Avoid machine washing if your spider contains wire or safety eyes, as these components can damage both the item and your washer. Spot cleaning is often enough for decorative spiders that aren’t handled frequently.
When storing your spiders between holidays, keep them in a dry, sealed container. Add a sachet of lavender or cedar to prevent mildew or pests. If the spider is stuffed, make sure it’s not compressed to avoid flattening its shape.
Display your crochet spiders creatively. Use clear acrylic stands, hang them with fishing line, or place them on bookshelves and mantels. Combine with themed props like pumpkins, candles, or spider webs for extra charm.
If gifting to children, consider using embroidered eyes and soft materials only. Always test for loose parts and ensure the spider is safe for young hands and playful squeezes.
For those who sell spiders, include a simple care card. This helps customers keep their purchase looking fresh and gives a professional touch to your packaging. A little extra effort can enhance customer satisfaction and encourage repeat business.
FAQ – Crochet Spider Pattern – Perfect for Décor and Gifting – Pattern
Q1: Is the crochet spider beginner-friendly?
Yes! The crochet spider pattern – perfect for décor and gifting – pattern is simple enough for beginners, especially if you’re familiar with single crochet and magic rings. The legs and assembly are easy to follow.
Q2: What’s the best yarn to use for this project?
Worsted weight acrylic yarn works great. It holds shape well and comes in many colors, making it ideal for themed or personalized spiders.
Q3: How do I make the spider legs poseable?
You can use pipe cleaners or craft wire inside the crocheted legs. This allows them to bend and hold position. Always secure the ends to avoid poking through.
Q4: Can I make this spider safe for babies or toddlers?
Absolutely. Use soft yarn, embroidered eyes, and skip any hard components like safety eyes or wire. Always double-stitch parts to avoid choking hazards.
Q5: How long does it take to complete one spider?
Most crocheters can finish one spider in 1–3 hours, depending on size and detail. It’s a quick and satisfying project for weekend crafting or gifts.
Q6: Can I sell spiders made from this pattern?
Yes, as long as the pattern designer permits it. Most free or commercial patterns allow you to sell finished items, but always give proper credit if required.
Conclusion
The crochet spider pattern – perfect for décor and gifting – pattern is a fantastic way to combine crafting with creativity. Whether you’re making one for fun, for a holiday display, or as a thoughtful gift, each spider you create is full of personality and handmade charm.
You’ve learned how to gather materials, crochet the spider step-by-step, personalize it for different occasions, and maintain its quality over time. With just a few hours and some yarn, you can bring a unique spider to life that’s sure to make someone smile.
Have you tried making your own crochet spider? We’d love to hear how it turned out! Please leave a sincere opinion or suggestions
in the comments below—your insights help the crafting community grow and inspire new ideas. Happy crocheting!