This Crochet Square – Tutorial is designed to take you on a creative journey, transforming a simple ball of yarn into a versatile masterpiece that serves as the building block for countless projects. Whether you are a complete novice holding a hook for the first time or a seasoned artisan looking to refine your technique, mastering the basic crochet square is an essential milestone in your crafting career. The beauty of this specific design lies in its rhythmic simplicity and the way it allows for endless customization through color and texture.
In this comprehensive Crochet Square – Tutorial, we will explore the fundamental mechanics of building stitches in a geometric fashion, ensuring that your corners stay sharp and your sides remain perfectly straight. Many crafters find that the granny square style is the most relaxing form of “meditative crochet,” as it allows the mind to rest while the hands follow a predictable and satisfying pattern. By focusing on stitch consistency and tension control, you will learn how to create squares that are uniform in size, making the eventual assembly of blankets or garments much easier.
As you progress through this Crochet Square – Tutorial, keep in mind that every stitch is an opportunity to express your personal style. We will dive into the specific materials that make a difference in your final result, from the fiber content of your yarn to the ergonomic design of your crochet hook. By the end of this guide, you will not only have a finished square but also the confidence to tackle larger, more complex crochet motifs and geometric patterns that will impress your friends and family.
1. Selecting the Perfect Materials for Your Crochet Square
The first step in any successful Crochet Square – Tutorial is choosing a yarn that complements the design and intended use of your project. For beginners, a medium-weight (worsted) acrylic yarn is often the best choice because it is durable, inexpensive, and has great elasticity. This type of yarn allows you to see your stitch definition clearly, which is vital when you are learning where to insert your hook for the next round.
To match your yarn, you will need an appropriately sized crochet hook, typically a 5.0mm (H/8) for worsted weight. Choosing an ergonomic hook with a comfortable grip can prevent hand fatigue during long sessions of working through this Crochet Square – Tutorial. The hook material—whether aluminum, plastic, or wood—can also affect how the yarn slides, so choose one that feels smooth and doesn’t snag the fibers.
In addition to the basics, you should have a few essential tools nearby, such as a pair of sharp embroidery scissors and a blunt-tipped yarn needle. These tools are necessary for finishing your square professionally by cutting the yarn cleanly and weaving in the loose ends so they don’t unravel. Many crafters also find that a soft measuring tape is helpful for checking the gauge of their square as they work.
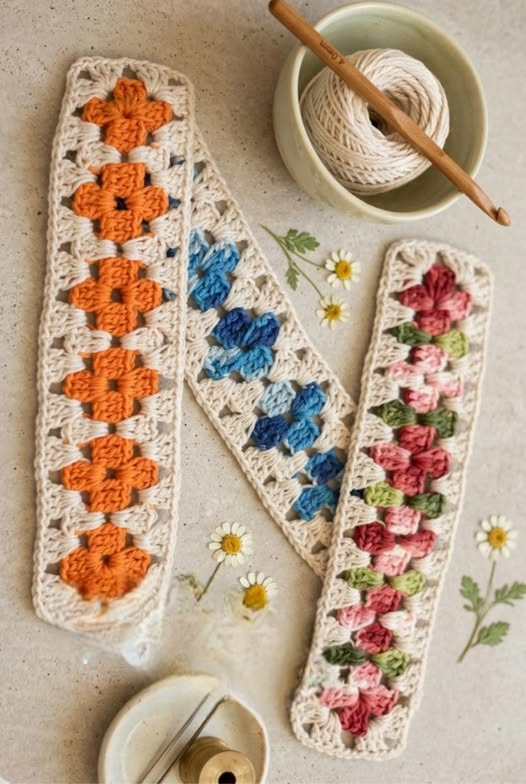
Color selection is perhaps the most exciting part of starting this Crochet Square – Tutorial. You can choose a solid color for a classic, minimalist look, or use a self-striping yarn to create an effortless gradient effect without needing to change yarns manually. If you are feeling adventurous, choosing three or four contrasting colors can make the geometric nature of the square really stand out and “pop.”
Before you begin, it is a good idea to create a small tension swatch to ensure your stitches aren’t too tight or too loose. If your square starts to “bowl” or curl at the edges, it usually means your tension is too high, and you might need to switch to a larger hook size. Conversely, if the square feels floppy and lacks structure, a smaller hook will help tighten the gaps between your stitches.
Lastly, consider the care instructions for your chosen yarn, especially if you plan to make a large blanket. Some fibers are machine washable, while others require delicate hand-washing to avoid shrinking or felting. Knowing this beforehand ensures that the hard work you put into following this Crochet Square – Tutorial results in a beautiful heirloom that remains in perfect condition for years to come.
2. Starting the Center and Initial Rounds
Every Crochet Square – Tutorial begins at the very center, usually starting with either a chain loop or a magic ring. The magic ring is a popular choice among modern crafters because it allows you to pull the center hole completely shut, creating a seamless and professional look. Within this initial loop, you will work your first set of double crochet clusters, which will form the heart of your square.
Once the center is established, the goal is to expand outward in a balanced way using chain spaces to create the corners. In a standard granny square, you typically group three double crochets together, followed by two chains to turn the corner. This mathematical approach is what transforms a circular start into a four-sided shape, a key concept in any Crochet Square – Tutorial.
As you move into the second round, you will notice that you are now working into the spaces created by the previous round’s chains. This “space-work” is much faster than working into individual stitches and is what gives the crochet square its iconic, airy appearance. It is important to maintain a consistent count; missing a cluster in one corner will result in a lopsided square that won’t lay flat.
The rhythm of the Crochet Square – Tutorial becomes more intuitive by the third round. You will simply repeat the process of placing clusters in the side spaces and “cluster-chain-cluster” in the corner spaces. This exponential growth means each round will have four more clusters than the previous one, allowing the square to grow larger while maintaining its perfect 90-degree angles.
If you decide to change colors between rounds, the best technique is to finish the last stitch of the round with the new color. This creates a clean transition and prevents the previous color from “bleeding” into the next row. For those following this Crochet Square – Tutorial to make a colorful scrap-blanket, this is the perfect time to use up small bits of leftover yarn from other projects.
Don’t be discouraged if your first few rounds look a bit wavy; often, the weight of the outer rounds will pull the center into its proper shape. However, if the center is extremely distorted, take a moment to count your corner chains. Keeping the corners identical is the secret to a high-quality handmade crochet square that looks like it was made by a professional.
3. Mastering Advanced Transitions and Edges
As your project grows, this Crochet Square – Tutorial introduces the concept of straightening the edges. While the classic granny style is beautiful, some crafters prefer a solid crochet square for a denser fabric. To achieve this, instead of working into spaces, you work one double crochet into every stitch of the previous row, still maintaining the corner increases to keep the shape.
The transition between rounds can be hidden using a slip stitch join, which is a nearly invisible way to move your yarn to the starting point of the next round. If you are aiming for a flawless finish in your Crochet Square – Tutorial, try the “invisible join” method for your final round. This involves using a needle to mimic the top of a stitch, making it impossible to see where the square began or ended.
Adding a decorative border is a fantastic way to elevate a simple square into something special. You might choose a scalloped edge, a picot stitch, or a simple single crochet border to give the piece a sturdy frame. A well-chosen border not only adds aesthetic value but also provides a clean edge for joining multiple squares together later in your project.
During this stage of the Crochet Square – Tutorial, you should also pay attention to how your yarn behaves at the corners. If the corners are starting to round off, try adding an extra chain in the corner loop. This provides just enough “slack” for the square to keep its sharp points, which is especially important if you plan to block your work later for a crisp, professional look.
For those who want to add texture, you can incorporate front post double crochets or popcorn stitches into the outer rounds. These advanced techniques add a 3D effect to the crochet pattern, making the center of the square look like it is radiating outward. This is a great way to customize the Crochet Square – Tutorial to fit a more modern or “boho” home decor style.
Finally, ensure you are leaving a long enough “tail” when you finish your square. A 6-inch yarn tail is usually sufficient to weave back and forth through the stitches securely. Cutting the yarn too short is a common mistake that can lead to the square unraveling after the first wash, so always err on the side of caution when finalizing your handmade project.
4. Blocking and Joining Your Finished Squares
The final and often overlooked part of a Crochet Square – Tutorial is the process of blocking. Blocking involves pinning your damp crochet square to a foam board in the exact shape you want and letting it dry. This “sets” the fibers and ensures that every square is the exact same size, which is critical for a smooth assembly process when making blankets or sweaters.
There are several methods for joining crochet squares, and the one you choose can completely change the look of your project. The whip stitch is a quick and easy sewing method, while the slip stitch join creates a decorative, raised ridge between squares. For a completely flat and seamless look, the invisible mattress stitch is the gold standard in the Crochet Square – Tutorial world.
If you are making a large-scale project, such as a king-sized afghan, it is often easier to join your squares in rows first and then join the rows together. This prevents the project from becoming too heavy or unwieldy to handle. As you join, keep your joining yarn at a consistent tension so that the blanket doesn’t pucker or pull in certain areas.
Another popular method mentioned in this Crochet Square – Tutorial is the “join-as-you-go” (JAYG) technique. This involves connecting the squares during the final round of crochet, eliminating the need for sewing later. While it requires more focus, many crafters prefer it because the assembly is finished at the same time as the crochet work, providing instant gratification.
After all your squares are joined, you can add a grand border around the entire perimeter of the blanket. This helps to unify the individual pieces and gives the project a cohesive, finished appearance. A simple moss stitch or ribbed border can add a touch of sophistication to a blanket made primarily of simple crochet squares.
Ultimately, the goal of this Crochet Square – Tutorial is to give you a foundation that you can build upon for years to come. Once you understand the geometry of the square, you can experiment with different yarn weights, hook sizes, and stitch combinations. The possibilities are truly infinite, and every square you make is a step forward in your journey as a fiber artist.
FAQ – Frequently Asked Questions
1. Why is my crochet square turning into a circle?
This usually happens if you are forgetting to add corner chains. The chains provide the extra space needed to turn the corner and create a 90-degree angle. Without them, the stitches will naturally pull together into a rounded shape. Always double-check that you have your corner increases in every round of this Crochet Square – Tutorial.
2. How do I prevent my square from leaning or slanting?
A slight slant is common in crochet because stitches aren’t perfectly vertical. To fix this, try turning your work after every round. Instead of always crocheting with the “right side” facing you, flip the square and work the next round in the opposite direction. This balances the natural lean of the stitches and keeps the square perfectly straight.
3. Can I use different types of yarn for the same blanket?
It is generally best to stick to the same yarn weight and fiber content for all squares in a single project. Mixing cotton with acrylic, for example, can cause issues because they shrink at different rates when washed. If you do mix brands, try to ensure the gauge (stitches per inch) remains the same so your squares fit together perfectly.
4. What is the best way to weave in ends so they don’t pop out?
The “rule of three” is a great tip: weave your yarn needle in one direction, then back the other way, and then a third time in the original direction. This creates a secure “anchor” within the fibers. For extra security, you can weave through the actual piles of the yarn rather than just under the stitches.
5. How many squares do I need for a baby blanket?
For a standard baby blanket (approx. 30×30 inches), you would need about 25 squares if each square is 6 inches wide. This is a perfect manageable size for practicing the techniques learned in this Crochet Square – Tutorial without feeling overwhelmed by a massive project.
6. Does blocking really make a difference?
Yes! Blocking is the secret to a high-end look. It evens out your tension, opens up the lacework, and ensures all your squares are identical in size. Even if your squares look good now, blocking will make the joining process much faster and result in a much flatter, more professional-looking finished piece.
Conclusion
In this Crochet Square – Tutorial, we have walked through the entire process of creating a beautiful and functional crochet piece, starting from the selection of materials all the way to the final blocking and joining.
We learned that the secret to a perfect square lies in consistent counting, maintaining even tension, and mastering the corner increases that define the shape. Whether you chose to make a classic granny square or a more modern solid version, the skills you have practiced here are the building blocks for almost any crochet project you can imagine.