CROCHET STAR – Pattern projects have grown incredibly popular among crafters of all skill levels, and it’s easy to understand why. Starting with the primary keyword helps build strong SEO, and throughout this article, you will find CROCHET STAR – Pattern incorporated naturally and effectively. These charming little stars are versatile, quick to create, and perfect for holiday décor, home decorations, or even as thoughtful handmade gifts.
One of the most appealing aspects of this pattern is how simple yet elegant the final result can be. Whether you are a beginner testing new techniques or an advanced crocheter looking for a relaxing project, the CROCHET STAR – Pattern provides a delightful crafting experience. The structure of a star may appear complex at first glance, but with the right instructions, anyone can create a crisp, symmetrical piece.
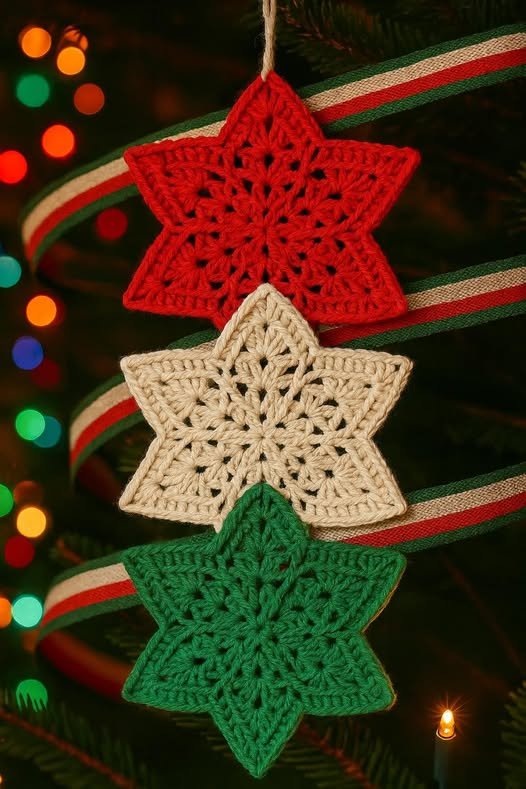
Another wonderful feature of these stars is their adaptability. You can make them tiny for garlands, slightly larger for ornaments, or oversized for wall hangings. The CROCHET STAR – Pattern allows endless color combinations, textures, and creative decorations, making each star uniquely personal. Before we explore detailed techniques, it’s essential to understand how this small but beautiful project is put together.
1. Understanding the Structure of the Crochet Star
The classic CROCHET STAR – Pattern begins with a center ring. This central part provides the foundation for the five points, which give the star its iconic shape. Though stars may vary slightly in construction, most follow a pattern of building outward from the center.
Each point of the star typically involves chains, increases, and decreases to form sharp edges. These stitches help achieve a crisp, clean structure. Beginners often find this pattern useful to practice tension control and stitch consistency, as the points require neat and even stitching.
The symmetry of the star is essential. To maintain the shape, each point must have equal stitch counts. This consistency ensures that the CROCHET STAR – Pattern results in a balanced and visually pleasing design.
The overall shape can be made flat or slightly stuffed. A flat star works beautifully for garlands and appliqués. A lightly stuffed star adds dimension and softness. Crafters often choose depending on what they plan to use the star for.
Many patterns also include decorative edges, such as picot trims or scalloped borders, enhancing the star’s appearance. These extra details make the CROCHET STAR – Pattern perfect for festive decorations.
Finally, choosing yarn weight will influence the size and firmness of the star. Thicker yarn makes bigger, chunkier stars, while thinner yarn produces delicate, elegant pieces suitable for intricate décor.
2. Materials and Tools You Will Need
To make a CROCHET STAR – Pattern, you only need a few simple materials. Most crafters prefer small amounts of yarn, making this an excellent scrap-busting project. Soft cotton yarn is especially popular because it holds shape well while remaining lightweight.
You will also need a crochet hook appropriate for your yarn weight. If you want tight, defined edges, consider using a hook slightly smaller than usual. This gives the star a more polished, structured look. Tighter tension prevents the star from appearing floppy.
A yarn needle is essential for weaving in ends and securing the final shape. Because stars often require multiple color changes or edging work, clean finishing helps achieve a tidy, professional result.
Scissors, of course, are necessary, though small crafting scissors are ideal for trimming ends neatly. A stitch marker may also help beginners keep track of rounds, especially when working in continuous spirals.
If you want a stuffed star, a small amount of fiberfill will give volume without adding weight. Stuffing should remain light to prevent distorting the points of the CROCHET STAR – Pattern.
Optional embellishments such as beads, sequins, ribbons, or embroidery thread can personalize your star. These additions turn a simple crocheted piece into a sparkling or thematic decoration, perfect for holidays or special occasions.
3. Step-by-Step Overview of Crafting a Crochet Star
The first step in making the CROCHET STAR – Pattern is to form the center ring. This can be done with a magic ring or by chaining and joining. The magic ring gives a smooth, adjustable center, making it a popular choice among experienced crocheters.
Once the center is created, you will work a round of stitches that sets up the base for the star points. This round may include single crochet, half-double crochet, or double crochet stitches depending on the design. The number of stitches determines the spacing between the star points.
Next, you will form each point individually. This part includes chains to extend outward, followed by decreases to bring the point to a sharp tip. Returning down the side of the point completes the section, bringing it back to the center ring.
You repeat this process around the circle, one point at a time. Consistency is key. Maintaining uniform tension ensures that all points of the CROCHET STAR – Pattern look symmetrical and clean. This step is both meditative and rewarding as the star begins to take shape.
After all five points are completed, you may add an edging round. This smooths the star, adds detail, and reinforces the shape. Many crocheters love adding picot stitches at the tips for decorative flair.
Finally, weave in all ends securely. If you choose to lightly stuff the star, add a small amount of fiberfill before closing the final stitches. At this stage, your star is ready for display, gifting, or further embellishment.
4. Creative Uses and Customization Ideas for Crochet Stars
The beauty of the CROCHET STAR – Pattern lies in how endlessly customizable it is. You can create stars for holidays, birthdays, nurseries, or home décor, making them a truly versatile crafting project.
One popular use is turning crochet stars into tree ornaments. Adding a small ribbon loop transforms them into festive, lightweight decorations. Bright colors or metallic threads make them shine beautifully under lights.
Another idea is crafting a star garland. By creating multiple stars in coordinating colors, you can string them together for a stunning wall or mantelpiece decoration. This is perfect for parties, Christmas celebrations, or children’s rooms.
Crochet stars also make excellent appliqués. You can sew them onto blankets, bags, hats, or scarves for a fun, decorative touch. This personalization makes handmade gifts even more meaningful.
A unique twist is to create two stars, stitch them together, and stuff them lightly for a plush star ornament. These soft stars make adorable nursery decorations or gentle baby mobile pieces.
You can also experiment with textures. Use velvet yarn for luxurious stars, cotton for clean and crisp shapes, or glitter yarn for sparkling versions. Each material gives the CROCHET STAR – Pattern a fresh character.
Finally, crochet stars can be used as gift toppers. Tie them onto wrapped presents for a handmade touch that adds warmth and charm. This little detail often becomes a keepsake for the recipient.
FAQ – CROCHET STAR Pattern
1. Is the CROCHET STAR – Pattern suitable for beginners?
Yes, it is beginner-friendly and helps build skills like increases, decreases, and tension control.
2. How long does one crochet star take to complete?
Most stars take between 10 and 25 minutes depending on size and experience.
3. What type of yarn works best?
Cotton yarn works best, but any yarn can be used depending on your desired texture and size.
4. Can I make the stars larger?
Yes, increase stitch heights or add additional rounds to expand the design.
5. Can crocheted stars be washed?
Yes, if the yarn is washable. However, embellished stars should be hand-washed carefully.
6. How do I make stars stiff enough to hold shape?
Tight tension, smaller hooks, or optional fabric stiffener can keep stars crisp.
Conclusion
This guide explored everything you need to know about creating a beautiful CROCHET STAR – Pattern, from structure and materials to step-by-step techniques and creative uses.
With endless customization options and beginner-friendly construction, crochet stars are a delightful addition to any crafting project.