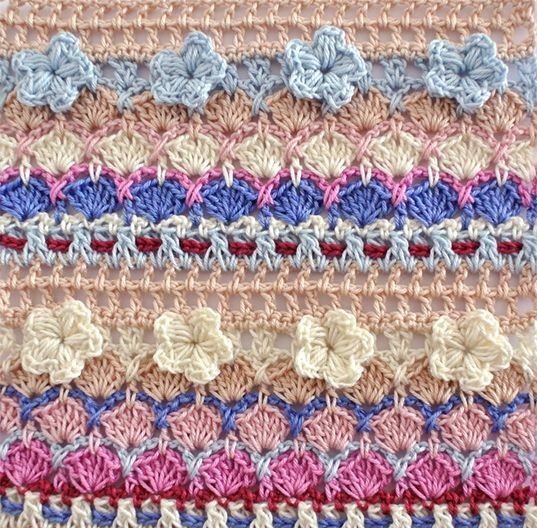
The Crochet stitch flowers- Pattern is one of the most versatile and joyful projects a crafter can explore, offering a way to bring the everlasting beauty of nature into the world of fiber arts. Whether you are looking to embellish a simple beanie, create a stunning bouquet that never wilts, or design a complex floral blanket, mastering the art of crocheted blossoms is a fundamental skill. This specific type of project allows you to practice a wide variety of stitches in a small, manageable format, making it an ideal choice for both beginners who are just finding their rhythm and advanced artists looking for a quick, satisfying creative outlet.
When you dive into a Crochet stitch flowers- Pattern, you are opening a door to endless customization and decorative potential. Unlike larger garments that require weeks of dedication, a single flower can often be completed in a matter of minutes, providing instant gratification and a sense of accomplishment. These tiny works of art can serve as brooches, hair accessories, or even as high-end appliqués for home decor items like pillows and curtains. The structural variety is immense, ranging from flat, simple five-petal daisies to complex, multi-layered 3D roses that mimic the intricate geometry found in real botanical specimens.
In this comprehensive guide, we will explore the technical nuances and creative possibilities of the Crochet stitch flowers- Pattern. We will discuss how to choose the right materials to achieve specific floral textures, the essential stitches that form the petals and centers, and how to assemble these pieces into breathtaking arrangements. By understanding the underlying logic of flower construction, you will be able to move beyond basic instructions and start designing your own unique flora. Let’s begin this journey through the garden of crochet, where every loop and pull of the yarn brings a new blossom to life.
1. Essential Materials and Yarn Selection for the Crochet Stitch Flowers- Pattern
Choosing the right yarn for your Crochet stitch flowers- Pattern is the first step in ensuring your petals have the desired drape and definition. For delicate, realistic flowers like lilies or small daisies, a fine lace-weight cotton or a size 10 crochet thread is often the best choice because it holds its shape without looking bulky. Cotton is particularly favored for floral work because it is “inelastic,” meaning the petals won’t sag or stretch over time, maintaining the crisp lines of the handmade floral design.
If you are working on a more rustic or cozy Crochet stitch flowers- Pattern, such as a large sunflower or a poppy for a winter scarf, a worsted-weight acrylic or wool blend can be highly effective. These thicker yarns provide a soft, fuzzy texture that adds warmth and dimension to the finished piece. When using thicker fibers, it is important to match them with a slightly smaller hook than usual to ensure the stitches are tight, preventing the stuffing or the background fabric from showing through the floral motif.
The hook you select is the primary tool for controlling the “tension” of your Crochet stitch flowers- Pattern. For floral work, most patterns recommend a steel hook for thread or a 2.5mm to 3.5mm hook for yarn. A tighter tension is generally preferred in flower making because it allows the petals to stand up on their own without the need for wire or stiffeners. If your stitches are too loose, the flower may appear wilted, which might be an aesthetic choice for some, but usually, a structured crochet bloom is the goal.
Color theory plays a massive role in the success of any Crochet stitch flowers- Pattern. To create depth, many crafters use variegated yarns that change color every few inches, mimicking the natural gradients found in real petals. Alternatively, using a contrasting color for the “stamen” or the center of the flower can make the entire piece pop. Using high-quality mercerized cotton also adds a subtle sheen to the flower, giving it a healthy, vibrant look that catches the light beautifully in a room or on a garment.
Don’t overlook the importance of finishing tools when executing a Crochet stitch flowers- Pattern. A sharp pair of embroidery scissors is necessary for clean cuts, and a set of tapestry needles in various sizes will help you weave in the many ends that come with color changes. If you plan on turning your flowers into a bouquet, you will also need floral wire and green floral tape to create “stems.” These crochet accessories transform a flat appliqué into a three-dimensional sculpture that can be displayed in a vase.
Lastly, consider the use of “blocking” for your Crochet stitch flowers- Pattern. While many small flowers don’t require it, larger floral mandalas or complex petals benefit greatly from being pinned out and lightly steamed. This process “sets” the yarn into the correct shape and ensures that every petal is uniform. Blocking is the secret to taking a “homemade” looking flower and elevating it to a professional-grade crochet project that looks like it belongs in a high-end boutique.
2. Fundamental Stitches and Techniques for Petal Construction
The foundation of nearly every Crochet stitch flowers- Pattern is the “Magic Ring” or “Magic Circle.” This technique allows you to start your work in a tight, adjustable loop, which is essential for the center of a flower where you don’t want a visible hole. By pulling the tail of the yarn, you can close the center completely, creating a solid base from which your petals will grow. Mastering the magic ring is the first hurdle for any aspiring floral crochet artist.
To create the varied shapes of petals in a Crochet stitch flowers- Pattern, you will use a combination of different stitch heights. A common technique is to work a sequence like “single crochet, half-double crochet, double crochet, half-double crochet, single crochet” into a single space. This gradual increase and decrease in height creates a natural, rounded curve that perfectly mimics a petal. Learning to manipulate stitch heights is key to creating everything from pointed lotus leaves to soft, round pansy petals.
The “Popcorn Stitch” and “Puff Stitch” are frequently used in a Crochet stitch flowers- Pattern to create highly textured centers. These stitches involve working multiple loops into the same base and then joining them at the top to create a 3D “bump.” This is the perfect way to represent the seed-filled center of a daisy or the fuzzy middle of a hibiscus. These textured crochet stitches add a tactile element to your work that makes the flowers feel much more substantial and realistic.
Picot stitches are another vital element in the Crochet stitch flowers- Pattern toolkit. A picot is a small loop made of chains that creates a tiny “point” on the edge of a petal. This is especially useful for flowers like carnations or roses that have ruffled or jagged edges. By adding a picot edging, you introduce a level of detail that makes the crochet work look intricate and delicate, despite being made from simple yarn loops.
Working in the “Front Loops Only” (FLO) and “Back Loops Only” (BLO) is a technique that allows for multi-layered flowers within a single Crochet stitch flowers- Pattern. By working one set of petals into the front loops and then going back to work another set into the back loops of the same row, you create a 3D, stacked effect. This is the standard method for creating crochet roses and marigolds, as it allows for row upon row of dense, overlapping petals that give the flower its iconic volume.
Finally, the “Slip Stitch” (sl st) is used extensively for shaping and moving the yarn across the project without adding height. In a Crochet stitch flowers- Pattern, the slip stitch is often used to “tuck” the end of a petal down to the center, creating a defined separation between each blossom segment. It is also the primary way to join new colors for the leaves or stems, ensuring that the transitions in your botanical crochet are seamless and clean.
3. Assembling and Joining Flowers for Larger Projects
Once you have mastered the individual Crochet stitch flowers- Pattern, the next challenge is joining them together. One of the most popular methods for creating floral blankets is the “Join-as-you-go” technique. This involves connecting the flowers during the final round of each motif using slip stitches or chains. This method is highly efficient because it eliminates the need for tedious sewing at the end, resulting in a seamless floral lace that drapes beautifully.
If you prefer a more structured look, you can “square off” your Crochet stitch flowers- Pattern by crocheting a border around each blossom to turn it into a granny square. This makes the assembly much easier for blankets or bags, as you are simply joining straight edges rather than irregular petal shapes. Many designers use a green border to represent leaves, which creates a stunning “garden” effect when all the floral squares are stitched together into a large tapestry.
For 3D arrangements, such as a crochet wedding bouquet, you will need to attach your Crochet stitch flowers- Pattern to wire stems. This is done by threading a piece of florist wire through the center of the flower and securing it with a small bead or a knot of yarn. Wrapping the wire in green yarn or floral tape provides a professional finish. These everlasting crochet bouquets are becoming a massive trend for brides who want a keepsake that will never wilt or lose its color.
Creating wearable art with your Crochet stitch flowers- Pattern often involves sewing the motifs onto existing fabric. Whether you are adding a floral trim to a denim jacket or decorating a baby’s headband, using a “blind stitch” with matching thread is essential. This ensures that the stitches holding the flower in place are invisible from the outside, keeping the focus entirely on the handmade crochet appliqué and the beauty of the design.
Embellishing your flowers with beads and sequins is a wonderful way to add a touch of glamour to your Crochet stitch flowers- Pattern. A single pearl in the center of a white flower can create an elegant, vintage-inspired look, while tiny glass beads on the edges can mimic the appearance of morning dew. These multimedia crochet techniques allow you to bridge the gap between simple yarn crafts and high-end jewelry or accessory design.
Finally, you can use the Crochet stitch flowers- Pattern to create “freeform” crochet art. This involves taking various flowers of different sizes and yarn types and joining them in an organic, non-linear way to create a wall hanging or a wearable wrap. Freeform crochet is a liberating experience because it doesn’t follow a strict grid; instead, it relies on your artistic eye to balance colors and textures, turning your crochet blossoms into a unique piece of abstract art.
4. Care and Preservation of Your Crochet Flowers
Because items made from a Crochet stitch flowers- Pattern are often delicate and filled with intricate details, they require special care to stay looking their best. If your flowers are used as appliqués on clothing, always wash the garment inside out in a mesh laundry bag. This prevents the petals from getting caught on the machine’s agitator or other clothing items. Using a gentle cycle and cold water will help preserve the yarn’s color and elasticity for years to come.
For 3D flowers or bouquets that are used as home decor, dusting is the primary maintenance task. You can use a soft-bristled paintbrush to gently whisk away dust from the crevices of the crochet petals. Avoid using a vacuum cleaner or a damp cloth, as suction can distort the shape of the flower and moisture can cause certain yarns to lose their structure or attract more dirt into the fibers of the handmade blooms.
If your Crochet stitch flowers- Pattern creations ever lose their shape, you can “re-starch” them. Using a commercial fabric stiffener or a simple sugar-water solution, you can reshape the petals and leave them to dry. This is particularly useful for flowers used as ornaments or wall decor, as it ensures they stay crisp and upright. Always test a small area first to ensure the stiffener doesn’t discolor your vibrant yarn.
Stain removal for crochet flowers should be done with extreme caution. If a spill occurs, blot the area immediately with a clean, dry cloth—never rub, as this will fray the yarn and ruin the stitch definition. Use a tiny amount of mild detergent and a Q-tip to spot-clean the affected area. This targeted approach protects the rest of the Crochet stitch flowers- Pattern from unnecessary wear and keeps the colors from bleeding into one another.
Sunlight is a natural enemy of many yarn dyes. To prevent your Crochet stitch flowers- Pattern from fading, try to keep them out of direct, intense sunlight for extended periods. If you have a crochet bouquet displayed near a window, consider rotating it every few weeks so that any fading occurs evenly, or use UV-protective sprays designed for fabrics to keep your hand-knotted garden looking fresh and bright.
Lastly, when storing your floral projects, avoid heavy boxes that might crush the 3D elements. Instead, store them in a sturdy container with acid-free tissue paper tucked between the layers. This prevents the fibers from breaking and ensures that when you take out your Crochet stitch flowers- Pattern pieces next season, they will look just as beautiful as the day you finished the last stitch. Proper storage is the key to creating family heirlooms that can be passed down through generations.
FAQ – Frequently Asked Questions
Is the Crochet stitch flowers- Pattern suitable for beginners?
Yes, flowers are one of the best projects for beginners. They allow you to practice all the basic stitches (single, double, and triple crochet) in a small, low-pressure format. Most floral patterns are quick to complete, which helps build confidence before moving on to larger projects like blankets or sweaters.
What is the best yarn for making realistic flowers?
For a realistic look, 100% mercerized cotton thread is the industry standard. It offers incredible stitch definition, a slight natural sheen, and enough stiffness to hold the shape of thin petals. However, if you want “cozy” or “whimsical” flowers, soft acrylic or wool yarn works beautifully as well.
How do I stop my crochet flowers from curling?
Curling is usually a result of tension that is too tight or a pattern that doesn’t have enough “increase” stitches. To fix this, you can try using a larger hook or blocking the finished flower with steam. For some flowers, a light application of fabric stiffener can also keep the petals lying flat.
Can I use these flowers for outdoor decor?
You can, but you must choose your materials wisely. 100% acrylic yarn is the most weather-resistant option as it won’t rot or mildew like natural fibers might. However, be aware that the sun will eventually fade the colors. For long-term outdoor use, consider yarns specifically treated for UV resistance.
How do I attach a stem to a crochet flower?
The most common way is to use 18-gauge to 22-gauge floral wire. You can create a small hook at the end of the wire, pull it through the center of the flower, and secure it with a dab of hot glue or by crocheting over the wire. Wrapping the wire in green yarn or floral tape completes the look.
How many flowers do I need for a full-sized blanket?
This depends entirely on the size of the flower and the blanket. For a standard throw using 4-inch floral squares, you would need approximately 150 to 200 squares. If you are making a “field of flowers” blanket with small 1-inch blossoms, you might need over 500 individual pieces!
Conclusion
The Crochet stitch flowers- Pattern is a delightful journey into the heart of creativity, offering a way to capture the ephemeral beauty of nature in a permanent, tactile form. In this article, we have explored the essential materials needed to get started, the fundamental stitches that create realistic petals, and the various ways to assemble and care for your floral masterpieces.
Whether you are creating a single rose as a gift or an entire garden of blossoms for a home project, the skills you develop through floral crochet will enhance every other aspect of your crafting life. The beauty of the crochet blossom is that it requires only a hook, some yarn, and a bit of imagination to bloom.