
Crochet Summer Hat Pattern is one of the most enjoyable and practical projects for crocheters who love creating lightweight, stylish, and wearable accessories. Whether you are making a hat for yourself, as a thoughtful handmade gift, or to sell at craft fairs, this beautiful design combines elegance, comfort, and functionality. A well-made Crochet Summer Hat Pattern is perfect for warm weather because it offers breathability while adding a fashionable touch to any outfit.
One of the greatest advantages of making a Crochet Summer Hat Pattern is the opportunity to customize every detail. You can choose your favorite cotton yarn, adjust the crown size, change the brim width, or even add decorative flowers, ribbons, or simple edging. Since this project uses repetitive stitch combinations, it is relaxing to crochet and suitable for both adventurous beginners and experienced crocheters looking for a satisfying weekend project.
This tutorial explains every stage of creating a Crochet Summer Hat Pattern using standard US crochet terminology. Throughout this guide, you will learn how to shape the crown, build the sides, create the openwork texture, and finish the brim so your hat maintains its beautiful shape. By following each step carefully, you will gain confidence while creating a timeless accessory that can be enjoyed throughout the spring and summer seasons.
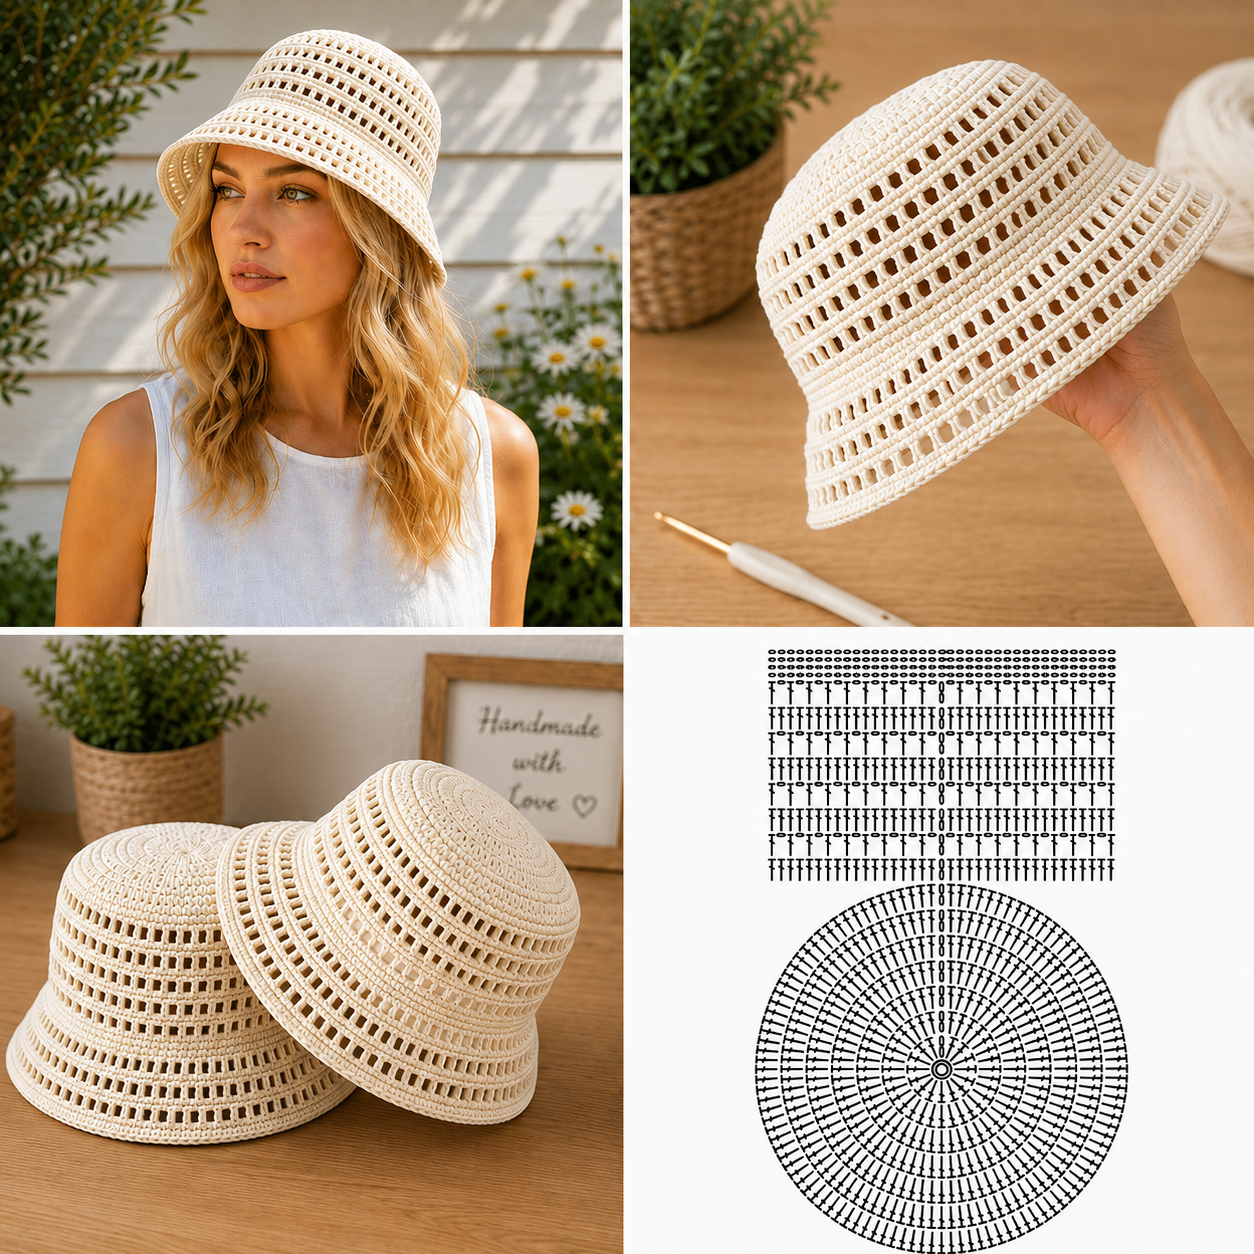
Materials and Crochet Stitches for the Crochet Summer Hat Pattern
A successful Crochet Summer Hat Pattern begins with selecting quality materials. Mercerized cotton yarn is one of the best options because it is lightweight, breathable, and helps the hat hold its structure without becoming too heavy. Cotton also feels comfortable against the skin during warm weather.
Use a crochet hook that matches your yarn weight. A 3.5 mm to 4.0 mm hook works well for most lightweight cotton yarns. Maintaining even tension is important since loose stitches may cause the hat to lose its shape over time.
Additional supplies include stitch markers, scissors, a tapestry needle for weaving in ends, and a measuring tape. These simple tools make the project much easier from beginning to end.
The primary stitches used in this Crochet Summer Hat Pattern include magic ring, chain (ch), slip stitch (sl st), single crochet (sc), half double crochet (hdc), double crochet (dc), and chain spaces. These stitches combine to create the decorative ventilation rows seen throughout the hat.
Before beginning the full project, crochet a small gauge swatch. This helps ensure the finished hat fits comfortably and allows you to adjust hook size if necessary.
Always count your stitches after completing each round. Consistent stitch counts create smooth shaping and help maintain the symmetrical appearance of the finished hat.
Step-by-Step Instructions for the Crochet Summer Hat Pattern
Begin with a magic ring and crochet 12 double crochet (dc) stitches into the center. Join with a slip stitch to complete the first round.
Round 2 increases evenly by placing two double crochet stitches into every stitch around. This creates a perfectly flat circle that becomes the top of the hat.
Continue increasing in each subsequent round by spacing the increases evenly. Every new round adds another regular stitch between increase points, allowing the crown to expand smoothly without ruffling.
Once the crown reaches the desired diameter for the intended head size, stop increasing. From this point forward, crochet one stitch into each stitch around to begin forming the sides of the hat.
Create the decorative mesh pattern by alternating double crochet, chain one, and skipping one stitch. These evenly spaced openings provide excellent airflow while giving the hat its elegant appearance.
Repeat the mesh rounds until the sides measure approximately 4½ to 5½ inches, depending on your preferred hat depth. Try the hat on occasionally to check the fit before moving to the brim.
Creating the Brim of the Crochet Summer Hat Pattern
The brim transforms the project from a simple cap into a fashionable Crochet Summer Hat Pattern suitable for sunny days. Proper shaping keeps the brim attractive and functional.
Begin increasing gradually by adding one increase every 8 to 10 stitches during the first brim round. These gentle increases allow the brim to flare naturally.
Work several rounds of double crochet between decorative mesh rows. This combination produces a balanced texture that remains lightweight while maintaining good structure.
Continue increasing slowly over several rounds until the brim reaches your desired width. A brim measuring approximately 2½ to 3½ inches provides excellent sun protection while remaining stylish.
For additional firmness, crochet the final two rounds entirely in single crochet. This creates a polished edge that helps prevent curling.
Finish with a slip stitch, fasten off securely, and weave in all loose yarn ends using a tapestry needle. Take your time during this final step because neat finishing significantly improves the overall appearance.
Finishing Tips, Customization Ideas, and Care Instructions
Blocking is recommended after completing your Crochet Summer Hat Pattern. Lightly dampen the hat, shape it carefully over a bowl or hat form, and allow it to dry naturally. This helps define the stitch pattern and smooth the brim.
Experiment with different cotton yarn colors to match your wardrobe. Neutral shades create timeless elegance, while vibrant summer colors produce cheerful accessories perfect for vacations and outdoor events.
Decorate the finished hat with a crocheted flower, ribbon, bow, wooden button, or removable fabric band. Keeping decorations removable makes it easy to change the look for different occasions.
If making hats for children, reduce the crown diameter and side height while maintaining the same stitch sequence. Measuring the intended head circumference before beginning always improves the final fit.
Wash the hat gently by hand using mild detergent and cool water. Avoid twisting the fabric. Instead, press out excess moisture with a towel before reshaping and air drying on a flat surface.
After mastering this Crochet Summer Hat Pattern, experiment with different stitch combinations, wider brims, textured rows, or decorative edging to create your own signature design while improving your crochet skills with every project.
Frequently Asked Questions
Is this Crochet Summer Hat Pattern suitable for beginners?
Yes. Beginners who already know the basic crochet stitches such as chain, single crochet, double crochet, and slip stitch can successfully complete this project by following the rounds carefully.
Which yarn works best?
Lightweight cotton yarn is highly recommended because it is breathable, durable, washable, and helps the hat maintain its shape during warm weather.
Which crochet hook should I use?
Most cotton yarns work well with a 3.5 mm to 4.0 mm crochet hook, although checking the yarn label and making a gauge swatch is always recommended.
How can I make the hat larger?
Continue adding increase rounds until the crown reaches the correct diameter before working the sides. This allows the finished hat to fit larger head sizes comfortably.
Can I make the brim wider?
Absolutely. Simply continue working additional increase rounds until the desired brim width is achieved while keeping the increases evenly spaced.
How long does this project usually take?
Depending on your crochet experience, most crocheters can complete this Crochet Summer Hat Pattern in approximately one afternoon or over a relaxing weekend.
Can I sell hats made from this pattern?
Yes. Handmade hats created using your own craftsmanship are commonly sold at local craft fairs, online handmade marketplaces, and gift shops. Always ensure your finished product reflects your own work and creativity.
How do I prevent the brim from curling?
Maintain even tension, increase gradually during the brim rounds, and finish with firm single crochet edging. Blocking also helps the brim hold its intended shape beautifully.
Conclusion
Throughout this article, you learned how to create a beautiful Crochet Summer Hat Pattern from start to finish using standard US crochet terminology. We covered the essential materials, recommended crochet stitches, crown construction, decorative mesh technique, side shaping, brim increases, finishing methods, blocking, customization ideas, and proper care instructions.
By following these step-by-step techniques, you can confidently crochet a lightweight, elegant, and comfortable summer hat that is both fashionable and practical for everyday wear.Thank you for reading this complete guide to the Crochet Summer Hat Pattern. I hope this tutorial inspires you to enjoy every stitch while creating your own handmade hat.