Crocheted Money Pouch – Pattern is a charming and practical project that allows crafters to combine creativity with functionality. From the very first stitch, the Crocheted Money Pouch – Pattern proves to be an ideal accessory for organizing coins, storing small essentials, or gifting something handmade and meaningful. Its compact size, customizable shape, and durable structure make it a favorite among beginners and experienced crocheters alike. Whether your goal is to craft a stylish mini-wallet or create unique pouches for craft fairs, this pattern is versatile, accessible, and enjoyable to make.
The beauty of a crocheted pouch lies in its simplicity. Even with basic stitches, you can achieve a sturdy and elegant finish that keeps your belongings secure. The Crocheted Money Pouch – Pattern works particularly well with cotton yarn or other strong fibers that hold shape firmly. You can also experiment with colors, textures, and closures such as buttons, zippers, or drawstrings to personalize your pouch according to your taste or intended use.
As a portable and quick-to-complete project, this pouch is perfect for using leftover yarn or practicing new techniques. Additionally, handmade pouches make wonderful gifts because they carry personal touches and practical use. Throughout this article, you will discover how to choose the right materials, crochet the base and body of the pouch, customize it to fit your needs, and finish it with professional details. The Crocheted Money Pouch – Pattern offers limitless creative possibilities while remaining easy and enjoyable to craft.
1. Materials Needed for the Crocheted Money Pouch – Pattern
Selecting the appropriate materials is essential to achieving a neat and durable Crocheted Money Pouch – Pattern. The right tools and yarn will greatly impact the structure and longevity of your finished pouch.
When choosing yarn, cotton is the top recommendation because it provides strength and prevents stretching. Cotton also gives the pouch a clean, crisp appearance, making the stitches more defined. You can also choose sturdy acrylic yarn, especially if you want a wider variety of colors or a softer touch.
A smaller crochet hook is typically best for this type of project. Hooks ranging from 2.5 mm to 4 mm help create a tight, dense fabric that prevents small items from slipping through. A smaller hook also improves the overall durability of the pouch, which is important for storing money and other valuables.
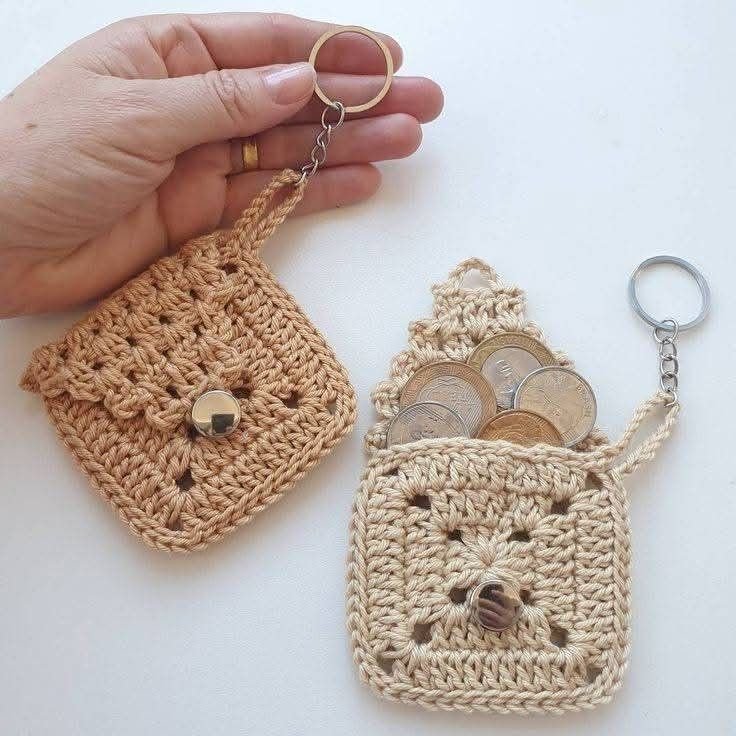
Other essential tools include scissors, stitch markers, a measuring tape, and a yarn needle for sewing pieces together and weaving in ends. You may also need additional hardware depending on your chosen closure, such as a zipper, snap button, wooden button, or drawstring cord.
If you prefer a pouch with lining, you may want to choose a small piece of fabric as well as a sewing needle and thread. Lining isn’t required but can add a polished, professional finish and prevent stretching over time.
Finally, consider your color palette. Choose shades that match your personal style or the purpose of the pouch—neutral colors for everyday use or vibrant tones for a fun, decorative accessory. The Crocheted Money Pouch – Pattern works beautifully with both solid and multicolored yarns.
2. How to Crochet the Crocheted Money Pouch – Pattern
The process of creating the Crocheted Money Pouch – Pattern begins with crafting the base, which can be round, rectangular, or oval depending on your preferred style. Most makers start with a simple rectangle shaped by working rows of single crochet to ensure a tight and structured foundation.
Once the base is complete, you’ll continue working upward to create the body of the pouch. The most common method involves crocheting in continuous rounds to avoid visible seams. This step provides a smooth finish and strengthens the pouch. Single crochet is the stitch most often used because of its density, but you can also incorporate half double crochet or textured stitches for unique designs.
Maintaining consistent tension is crucial. Tight stitches reinforce the fabric, ensuring your pouch keeps its shape even with frequent use. If you notice gaps or uneven rows, adjust your hook size or stitch tightness accordingly.
After shaping the body, you can add decorative elements such as stripes, color blocks, or textured sections. The Crocheted Money Pouch – Pattern adapts easily to various styles, allowing you to personalize the look while maintaining practicality.
Before finishing the top edge, decide what type of closure you’d like. For a zipper closure, leave enough room at the top to sew the zipper in later. If you prefer a button closure, create a small loop using chain stitches and reinforce it securely. For a drawstring pouch, add eyelets by skipping stitches and chaining spaces between them.
Once the pouch reaches your desired height and shape, fasten off your yarn and prepare for finishing touches.
3. Customizing Your Crocheted Money Pouch – Pattern
One of the great advantages of the Crocheted Money Pouch – Pattern is its versatility. You can adjust the size, shape, design, and decorative elements to suit any purpose, style, or recipient.
If you want a larger pouch for storing cards or keys, simply increase the number of stitches in the foundation row or continue crocheting for more rounds. Conversely, for a mini coin purse, start with a small base and keep the height short.
Experimenting with colors is another fun way to customize your project. You can create striped pouches, geometric designs, or even themed pouches for holidays or special events. Self-striping yarns add colorful transitions effortlessly, while solid colors maintain a clean and classic aesthetic.
Another great customization option is adding texture. Incorporate bobble stitches, puff stitches, or front-post stitches to create a decorative surface. These textures add charm and uniqueness, making your Crocheted Money Pouch – Pattern truly one of a kind.
Closure options also offer room for creativity. Wooden buttons give a rustic appeal, while metal snaps add a modern touch. A zipper offers the most security, especially for carrying money, while a drawstring pouch is quick to open and close, making it convenient for daily use.
Small embellishments can enhance the overall design. Consider adding appliqués, mini flowers, embroidered initials, or beadwork. These personal touches make your pouch special and reflect your individual style.
Finally, you can sew in a fabric lining for a professional finish. The lining not only adds elegance but also reinforces the pouch, giving it extra durability and preventing stretching.
4. Finishing and Assembling the Crocheted Money Pouch – Pattern
Once the crocheting portion of your Crocheted Money Pouch – Pattern is complete, it’s time to assemble and finish the pouch with care. These final steps ensure your project looks polished and functions effectively.
Begin by weaving in all loose ends using a yarn needle. This helps secure the stitches and gives your pouch a neat and tidy look. Pay attention to corners and edges to ensure nothing unravels over time.
If you’re adding a zipper, carefully align it along the top edge and sew it using small, even stitches. Make sure it opens and closes smoothly before finishing the seam. For button closures, attach the button securely and test the button loop or flap to ensure a snug fit.
For drawstring pouches, thread the cord through the eyelets evenly and tie secure knots at each end. You can even add small beads to the cord ends for decoration. A drawstring closure adds charm and ease of access.
If you decide to line your pouch, cut the fabric slightly smaller than the pouch itself. Sew the edges of the lining together and attach it to the inside with small, close stitches. This step elevates the appearance and helps your Crocheted Money Pouch – Pattern stand the test of time.
Give your pouch a light steam block to shape it evenly. Do not over-steam, especially if using acrylic yarn, as excessive heat may damage the fibers. Gently shaping the pouch helps smooth uneven areas and enhances its structure.
Once fully assembled, test your pouch by placing a few items inside. Check that the closure holds well, the pouch retains its shape, and the stitches remain intact. Your handcrafted creation is now ready to use or gift!
FAQ About the Crocheted Money Pouch – Pattern
1. Is the Crocheted Money Pouch – Pattern beginner-friendly?
Yes, it is ideal for beginners because it uses simple stitches and basic construction techniques.
2. What type of yarn works best?
Cotton yarn is recommended for its durability and structure, though sturdy acrylic yarn can also be used.
3. Can I adjust the size of the pouch?
Absolutely. You can increase or decrease the foundation stitches or rounds to achieve the desired size.
4. Do I need to add a lining?
A lining is optional but provides added strength and polish, especially for pouches used frequently.
5. What closure works best?
Zippers offer the most security, while buttons and drawstrings are easier to attach and customize.
6. Can I decorate the pouch?
Yes! You can add appliqués, embroidery, beads, or textured stitches for personalization.
Conclusion
Crafting a Crocheted Money Pouch – Pattern is a rewarding and practical project suitable for all skill levels.
You’ve learned how to choose materials, crochet the pouch’s body, customize the design, and finish it with professional details. This small yet meaningful project opens the door to creativity and handmade charm.